
Table of Contents
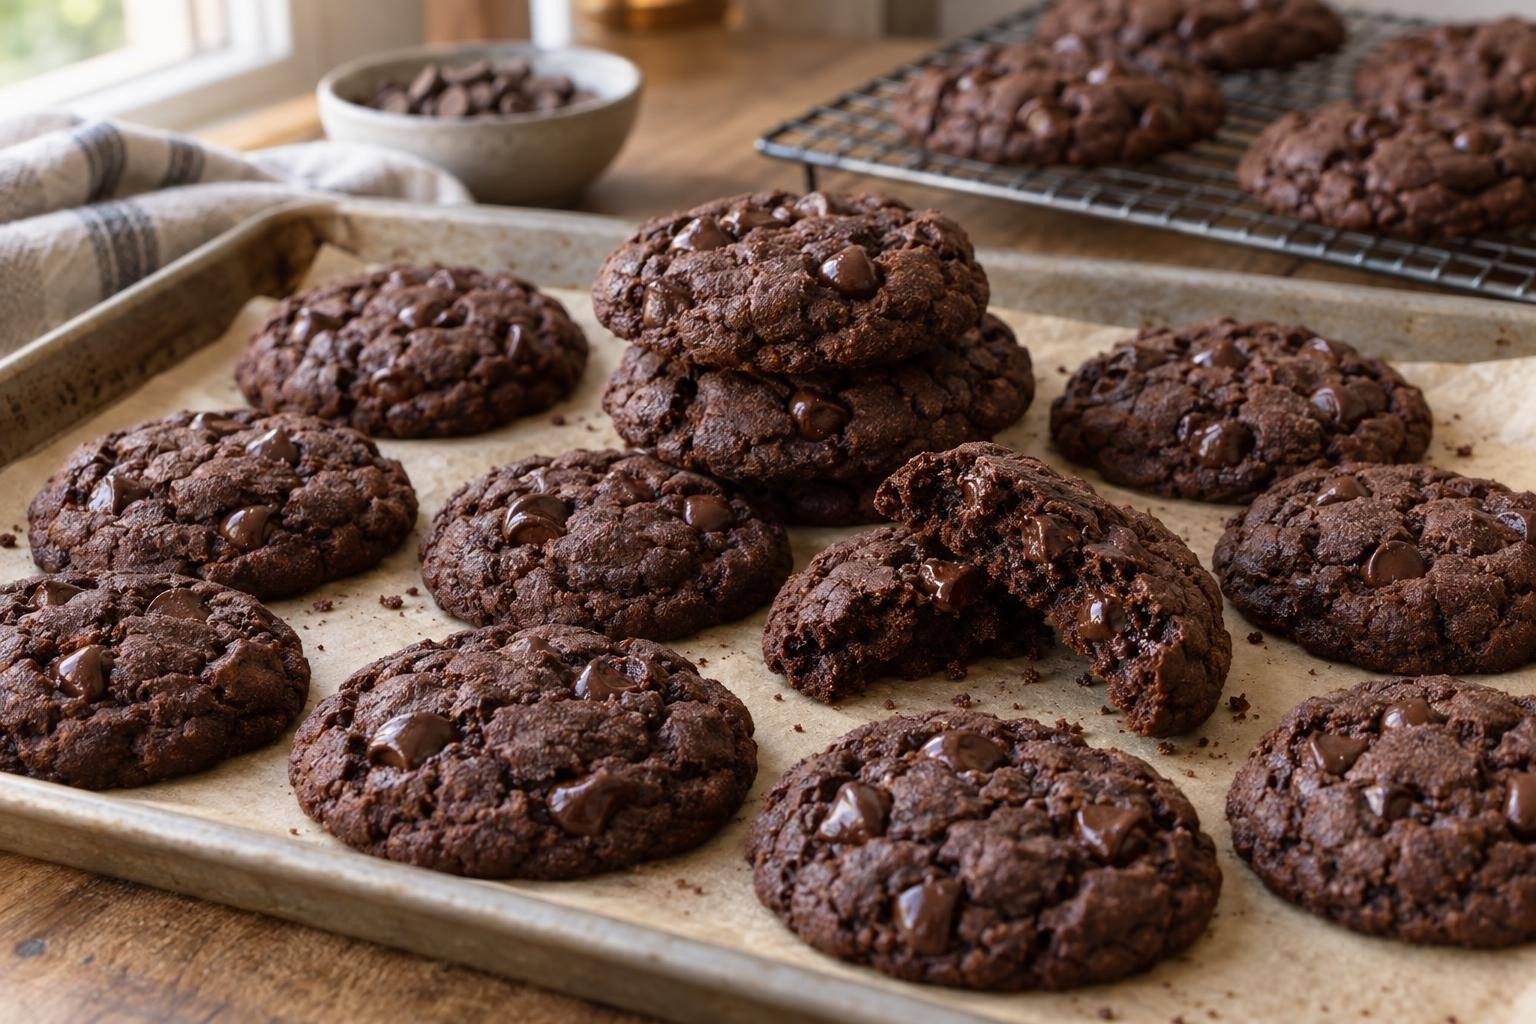
Getting that bakery-style texture in a chocolate cookie is all about the contrast between the edges and the center. These bakery-style double chocolate cookies are big and thick, with lightly crisp edges, soft, chewy middles, and plenty of melted semisweet chocolate throughout. I use natural cocoa powder for a deep chocolate flavor that isn’t overly sweet, and I love how the tops develop those beautiful cracks as the cookies bake. Each cookie weighs a generous 100 grams, so they’re much closer to what you’d find in a bakery than a typical homemade cookie. Chilling the dough helps them spread just enough while keeping their thick centers. They’re especially good when they’ve cooled slightly but the chocolate is still soft, and they’re rich enough that you really don’t need anything else alongside them.
This Is Why You’ll Love these Chocolate Cookies
- Large 100-gram portions create enough distance between the set outer edge and the soft center to produce a true bakery-style texture.
- Natural cocoa supplies concentrated chocolate flavor while contributing starch that absorbs moisture and helps control the dough’s spread.
- More brown sugar than granulated sugar supports a moist, chewy center, while granulated sugar encourages crisp edges and surface cracking.
- Brief creaming incorporates enough air for lift without making the cookies cakey or causing fragile, excessively puffy centers.
- Chilling the portioned dough solidifies the butter and hydrates the flour and cocoa, producing more even spreading and a deeper chocolate flavor.
Ingredient Notes for Bakery-Style Double Chocolate Cookies for Make-Ahead Dough
- Unsalted butter: Use butter softened to a cool 18 to 20°C. It should accept a fingertip impression while retaining its shape. Warm, shiny butter cannot hold air properly and encourages excessive spreading.
- Brown and granulated sugars: Light brown sugar supplies molasses, moisture, and chew, while granulated sugar promotes spreading and crisp edges. Pack the brown sugar only when measuring by volume, although weighing is more reliable.
- Natural cocoa powder: Natural cocoa provides acidity that works with the baking soda and gives the cookies a pronounced cocoa flavor. Sift it if lumpy. Dutch-process cocoa is not a direct replacement because it changes the formula’s acidity.
- All-purpose flour: Flour provides the protein and starch needed to hold these large cookies together. Weigh it whenever possible, since excess flour makes the centers dry and prevents the intended spread.
- Eggs: Two large eggs provide water for hydration, protein for structure, and emulsifiers that keep the butter and sugars combined. Bring them to room temperature so they blend into the creamed mixture without curdling it.
- Semisweet chocolate chips: Semisweet chips balance the sweet dough and retain distinct pockets after baking. An equal weight of chopped semisweet chocolate may be used for irregular pools, but finely chopped chocolate can increase visible spreading.
My Baking Tips
- Weigh each portion rather than estimating with a scoop. Uneven portions finish at different times, leaving small cookies dry before the largest centers have set.
- Use light-colored aluminum pans. Dark pans absorb more radiant heat and can harden or scorch the bottoms before the thick centers finish baking.
- If a chilled portion still feels rock-hard after 15 minutes at room temperature, give it another 3 to 5 minutes. If it becomes shiny or slumps, return it to the refrigerator before baking.
- Bake one pan at a time on the center rack. Two pans interfere with heat circulation and often produce pale tops on one tray and overly dark bottoms on the other.
- Judge doneness by the full set of cues, not color alone. Chocolate dough hides browning, so look for matte cracks, stable edges, a soft dome, and no glossy wet patch in the center.
Ingredients for Bakery-Style Double Chocolate Cookies
- 226 g unsalted butter (softened to a cool 18 to 20°C)
- 190 g light brown sugar (packed only if measuring by volume)
- 130 g granulated sugar
- 2 large eggs (about 100 g without shells, at room temperature)
- 2 tsp pure vanilla extract
- 280 g all-purpose flour
- 60 g natural unsweetened cocoa powder (sifted if lumpy)
- 1 tsp baking soda (leveled)
- 0.75 tsp fine sea salt
- 250 g semisweet chocolate chips (reserve about 40 g for finishing the portions)
How to Make Bakery-Style Double Chocolate Cookies
- STEP 1). Prepare the oven and baking pans Line two light-colored half-sheet pans with parchment paper. Arrange an oven rack in the center and preheat the oven to 175°C or 350°F for at least 30 minutes before baking. A thoroughly heated oven sets the cookie edges before too much butter melts outward. Keep the prepared pans at room temperature for shaping, but do not place dough on a pan that is warm from the oven.
- STEP 2). Cream the butter and sugars briefly Place the 18 to 20°C butter, brown sugar, and granulated sugar in the bowl of a stand mixer fitted with the paddle attachment. Mix on medium speed for 2 minutes, stopping once to scrape the bowl and paddle. The mixture should look creamy and slightly lightened but not fluffy or mousse-like. Restrained aeration helps these large cookies spread evenly instead of rising dramatically and collapsing into fragile centers.
- STEP 3). Incorporate the eggs and vanilla Add the eggs one at a time on medium-low speed, mixing for about 20 seconds after each addition. Scrape the bottom and sides of the bowl, add the vanilla, and mix for another 15 seconds. The mixture should be smooth, thick, and evenly emulsified, although a slightly granular appearance from the sugar is normal. If it looks greasy or separated, continue mixing on low just until it comes together.
- STEP 4). Mix the dry ingredients and chocolate into the dough Whisk the flour, cocoa powder, baking soda, and salt in a medium bowl until the cocoa is evenly distributed. Add the dry mixture to the butter mixture and mix on low for 20 to 30 seconds, stopping while a few flour streaks remain. Fold with a silicone spatula, scraping the bottom of the bowl, then fold in 210 g of the chocolate chips. The finished dough should be thick, cohesive, and slightly tacky rather than loose or glossy.
- STEP 5). Portion and chill the cookie dough Divide the dough into 12 portions weighing 100 to 105 g each. Roll each portion gently into a tall, compact mound rather than a smooth, compressed ball, then press the reserved chocolate chips onto the exposed surfaces. Space six portions on each prepared pan and refrigerate uncovered for 2 hours, or cover after they become firm and chill for up to 48 hours. Properly chilled portions should feel solid through the center and show no greasy surface.
- STEP 6). Temper and bake one pan at a time Remove one pan from the refrigerator and let the portions stand for about 15 minutes while the second pan remains chilled. The dough should reach approximately 16 to 18°C and yield only slightly when pressed. Bake the first pan on the center rack for 12 to 14 minutes. Set out the second pan when the first enters the oven, then bake it the same way. Finished cookies should spread to roughly 9 to 10 cm, with firm edges, matte cracked tops, and softly domed centers that no longer look wet.
- STEP 7). Cool the cookies until their centers set Leave the cookies undisturbed on the hot pan for 15 minutes. Their centers will continue setting as the melted sugar cools, so moving them immediately can cause breakage. The edges should become crisp while the centers remain soft and chewy rather than raw or fluid. Slide a thin spatula beneath each cookie and transfer it to a wire rack. Cool for at least 5 additional minutes before serving, or cool completely before storing.
Storage and Freezing
- Storage: Keep completely cooled cookies in an airtight container at room temperature for up to 4 days. Place parchment between layers and add no moisture source, which would soften the crisp edges.
- Freezing baked cookies: Freeze cooled cookies in a sealed freezer-safe container for up to 2 months. Separate layers with parchment to protect the chocolate-studded tops.
- Freezing dough: Freeze the chilled portions on a lined pan until solid, then transfer them to a freezer-safe bag for up to 2 months. Label the bag with the oven temperature and portion weight.
- Thawing dough: Arrange frozen portions on a lined pan and thaw overnight in the refrigerator. Let them stand at room temperature until slightly pliable and approximately 16 to 18°C before baking as directed.
- Serving: For a softer center, warm a room-temperature cookie in a 150°C or 300°F oven for 4 to 5 minutes, then rest it for 2 minutes before handling.
Frequently Asked Questions
Why do bakery-style double chocolate cookies spread too much?
Excessive spread usually comes from butter that was warmer than 20°C, undermeasured flour, insufficient chilling, or dough placed on a warm pan. The butter should be pliable but matte, and each portion should feel firm after refrigeration.
Also check the oven preheat. An oven that has not stabilized allows the fat to melt before the edges set. Bake on parchment rather than a heavily greased surface, and keep the second pan refrigerated until its tempering period begins.
What size should bakery-style double chocolate cookies be?
Portion each cookie at 100 to 105 g before chilling. That amount produces a substantial cookie measuring roughly 9 to 10 cm across, with enough thickness to maintain a chewy center while the outside becomes crisp.
Smaller portions need a shorter bake and will not have the same pronounced edge-to-center contrast. Keep every mound close to the same weight so one doneness cue and baking time apply consistently across the pan.
How do I know when double chocolate cookies are fully baked?
Look for edges that appear set and feel stable, a matte cracked surface, and a center that remains softly domed without looking glossy, wet, or fluid. Browning is difficult to see against cocoa, so color is not the most reliable cue.
The cookies finish setting on the hot pan for 15 minutes. A soft center at oven removal is desirable, but a visibly liquid depression indicates underbaking. Add 1 to 2 minutes if the centers still ripple when the pan is moved gently.
Can you freeze dough for bakery-style double chocolate cookies?
Portioned and fully chilled dough freezes well for up to 2 months. Freeze the mounds in a single layer until solid, then seal them in a freezer-safe bag so they retain their shape and do not absorb freezer odors.
Thaw the portions overnight in the refrigerator rather than baking them solidly frozen. Before baking, temper them until slightly pliable and about 16 to 18°C. This restores the intended spread and keeps the edges from setting around an underbaked frozen center.
Which ingredient substitutions work in this double chocolate cookie recipe?
An equal weight of chopped semisweet chocolate can replace the semisweet chips. Larger pieces create irregular melted pockets, while very finely chopped chocolate blends into the dough and may make the cookies appear slightly wider.
Keep the natural cocoa, butter, flour, eggs, and sugars as written. Dutch-process cocoa changes the acid balance with the baking soda, while margarine or liquid sweeteners alter fat, water, and spreading behavior too substantially for a direct exchange.
More Ridiculously Delicious Cookies
- Small-Batch Double Chocolate Cookies with Soft, Chewy Centers
- Chocolate Sandwich Cookies with Vanilla Cream with Silky Vanilla Filling
- Thick Brown Butter Chocolate Chunk Cookies with Chewy Centers
- Bakery-Style Chocolate Chip Cookies with Make-Ahead Dough
- Fudgy Chocolate Crinkle Cookies with Crackled Sugar Tops
Bakery-Style Double Chocolate Cookies for Make-Ahead Dough
Ingredients
Equipment
Method
- Line two light-colored half-sheet pans with parchment paper. Arrange an oven rack in the center and preheat the oven to 175°C or 350°F for at least 30 minutes before baking. A thoroughly heated oven sets the cookie edges before too much butter melts outward. Keep the prepared pans at room temperature for shaping, but do not place dough on a pan that is warm from the oven.
- Place the 18 to 20°C butter, brown sugar, and granulated sugar in the bowl of a stand mixer fitted with the paddle attachment. Mix on medium speed for 2 minutes, stopping once to scrape the bowl and paddle. The mixture should look creamy and slightly lightened but not fluffy or mousse-like. Restrained aeration helps these large cookies spread evenly instead of rising dramatically and collapsing into fragile centers.
- Add the eggs one at a time on medium-low speed, mixing for about 20 seconds after each addition. Scrape the bottom and sides of the bowl, add the vanilla, and mix for another 15 seconds. The mixture should be smooth, thick, and evenly emulsified, although a slightly granular appearance from the sugar is normal. If it looks greasy or separated, continue mixing on low just until it comes together.
- Whisk the flour, cocoa powder, baking soda, and salt in a medium bowl until the cocoa is evenly distributed. Add the dry mixture to the butter mixture and mix on low for 20 to 30 seconds, stopping while a few flour streaks remain. Fold with a silicone spatula, scraping the bottom of the bowl, then fold in 210 g of the chocolate chips. The finished dough should be thick, cohesive, and slightly tacky rather than loose or glossy.
- Divide the dough into 12 portions weighing 100 to 105 g each. Roll each portion gently into a tall, compact mound rather than a smooth, compressed ball, then press the reserved chocolate chips onto the exposed surfaces. Space six portions on each prepared pan and refrigerate uncovered for 2 hours, or cover after they become firm and chill for up to 48 hours. Properly chilled portions should feel solid through the center and show no greasy surface.
- Remove one pan from the refrigerator and let the portions stand for about 15 minutes while the second pan remains chilled. The dough should reach approximately 16 to 18°C and yield only slightly when pressed. Bake the first pan on the center rack for 12 to 14 minutes. Set out the second pan when the first enters the oven, then bake it the same way. Finished cookies should spread to roughly 9 to 10 cm, with firm edges, matte cracked tops, and softly domed centers that no longer look wet.
- Leave the cookies undisturbed on the hot pan for 15 minutes. Their centers will continue setting as the melted sugar cools, so moving them immediately can cause breakage. The edges should become crisp while the centers remain soft and chewy rather than raw or fluid. Slide a thin spatula beneath each cookie and transfer it to a wire rack. Cool for at least 5 additional minutes before serving, or cool completely before storing.
Notes
- Weigh each portion rather than estimating with a scoop. Uneven portions finish at different times, leaving small cookies dry before the largest centers have set.
- Use light-colored aluminum pans. Dark pans absorb more radiant heat and can harden or scorch the bottoms before the thick centers finish baking.
- If a chilled portion still feels rock-hard after 15 minutes at room temperature, give it another 3 to 5 minutes. If it becomes shiny or slumps, return it to the refrigerator before baking.
- Bake one pan at a time on the center rack. Two pans interfere with heat circulation and often produce pale tops on one tray and overly dark bottoms on the other.
- Judge doneness by the full set of cues, not color alone. Chocolate dough hides browning, so look for matte cracks, stable edges, a soft dome, and no glossy wet patch in the center.