

Table of Contents
There’s nothing like slicing into a richly chocolatey, peppermint-scented cake to kick off the holiday season. My peppermint chocolate Christmas cake recipe combines tender, deeply flavored cocoa cake with a swirl of cool, creamy peppermint frosting, think the best dark chocolate and a fresh candy cane in every forkful. Each bite is a celebration of texture: a classic delicate crumb, melt-in-your-mouth Swiss meringue buttercream, and (if you go for it) a smooth ganache finish for a bit of shine and drama. I balance the peppermint extract so it lifts the chocolate without overwhelming it, nobody wants a mouthful of toothpaste. A quick gentle tap on the counter helps develop a tight, even crumb, and greasing plus lining the pans never fails to guarantee easy, perfect release. This festive cake doesn’t hold back on chocolate or holiday spirit, and every slice is pure Christmas joy.
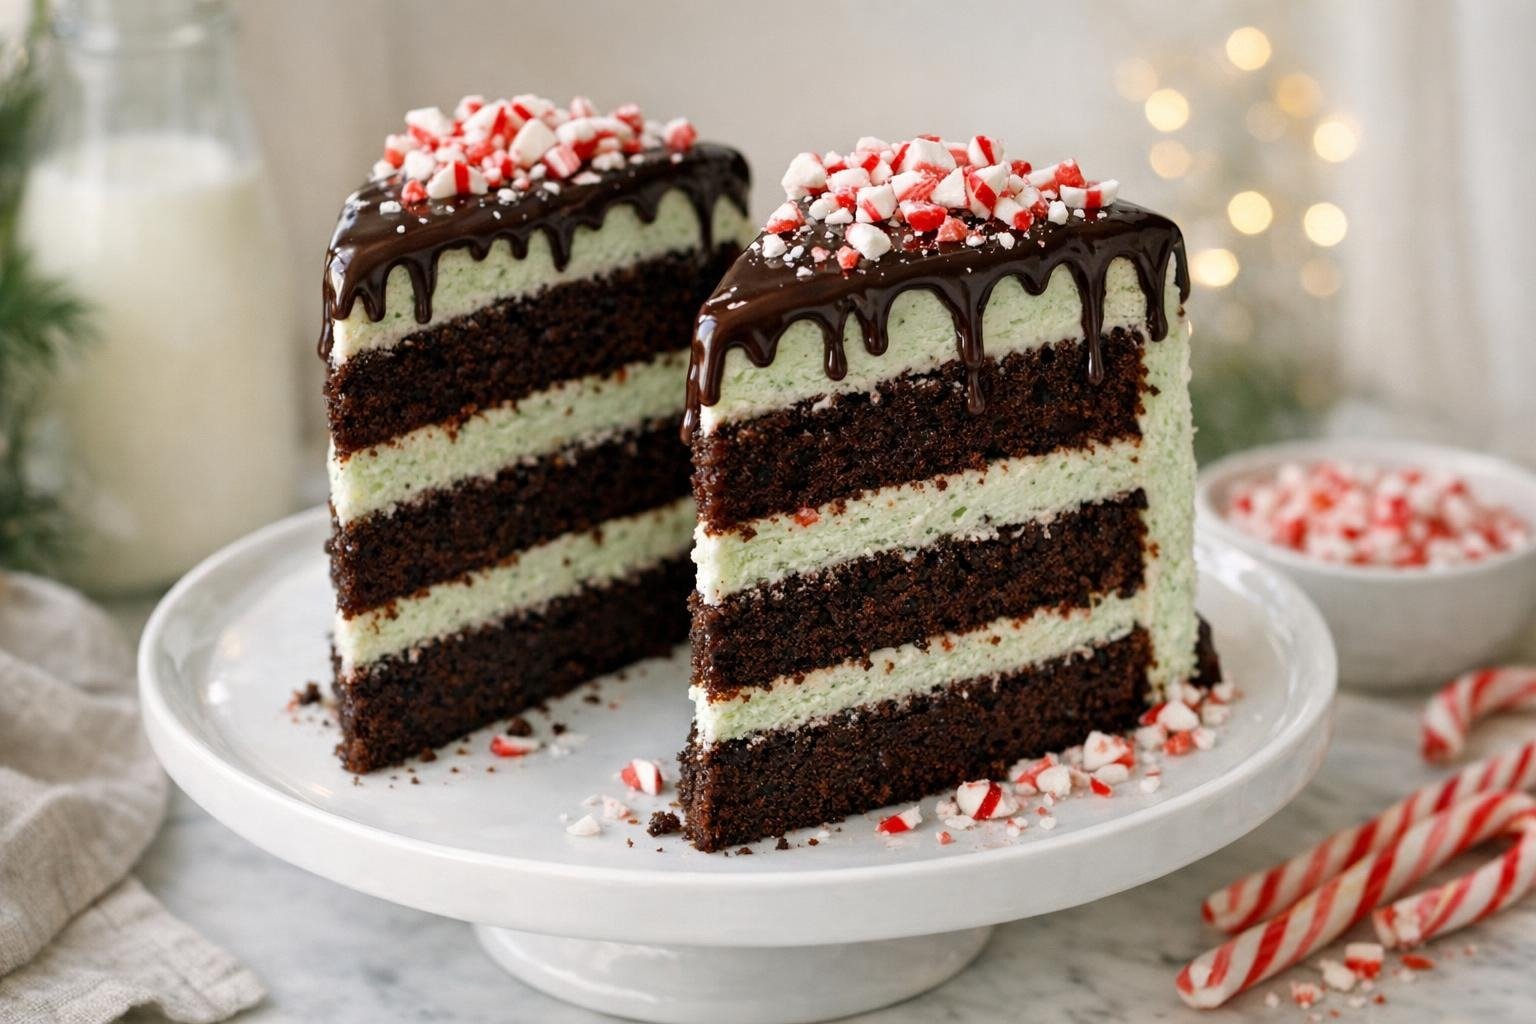
What Makes this Chocolate Cake So Frickin’ Good
- Two kinds of cocoa for layered chocolate flavor: I use both Dutch-process and natural cocoa powders so you get a deep backbone plus that signature classic cocoa bite with complexity.
- Oil and buttermilk for outstanding moisture: Liquid oil and tangy buttermilk give the cake softness, lasting moisture, and a soft crumb that stands up to stacking and slicing.
- Swiss meringue buttercream keeps it light: My Swiss meringue method produces a buttercream that’s creamy yet fluffy, so it chills and slices cleanly without a greasy or hard texture.
- Balanced peppermint that tastes like candy canes, not toothpaste: Precise peppermint extract brings holiday zing while letting rich chocolate shine, you want chocolate with mint, not just mint.
- Ganache drip option for bakery-level drama: A glossy ganache drip is optional, but adds a stunning finish that pairs beautifully with the bright white frosting and a festive sprinkle of crushed candy canes.
Ingredient Notes for Peppermint Chocolate Christmas Cake
- All-purpose flour: Provides structure without becoming dense. Sift for an even crumb and to work air into the batter.
- Dutch-process & natural cocoa powder: The blend creates a deeper, more complex chocolate base. Use reputable cocoa for the best flavor and color.
- Baking powder & baking soda: Both are vital here: the soda neutralizes the buttermilk, while powder adds reliable lift for a tender crumb.
- Buttermilk: Adds moisture and slight acidity for a soft texture and deeper chocolate flavor. Use real buttermilk for best results.
- Vegetable oil: Keeps the cake tender even after chilling and slicing. Butter is richer but won’t deliver the same reliable moisture.
- Eggs: Bind the cake and provide stability for neat layers. Use large eggs at room temperature for easier emulsification.
- Peppermint extract: Pure, not imitation, extract is essential for fresh, clear flavor, a little goes a long way.
- Swiss meringue buttercream (egg whites, sugar, butter): Creamy, silky, and stable even when chilled. Beat until fully cool before adding butter to avoid a soupy mess.
- Bittersweet chocolate and heavy cream: Used for optional ganache drip for a glossy, smooth finish. Chop chocolate fine for even melting.
My Tips for Getting It Just Right
- Don’t skip parchment: Lining pans with parchment ensures the cakes release easily and stay picture-perfect, especially when layering and stacking for a finished look.
- Room temp ingredients, always: Eggs and buttermilk blend smoothly when they’re not cold, you get a finer crumb and an evenly structured cake rather than random sugar pockets or dense layers.
- Patience with meringue: Make sure your Swiss meringue is fully cool before adding butter, or you risk a separated, soupy frosting that’s hard to rescue.
- Thin batter is the secret: The cake batter will look loose before baking, that’s intentional and means a more tender, deeply chocolatey crumb every time.
- Chill before slicing: A cold cake cuts much more cleanly, giving you sharp, bakery-style slices (plus, the peppermint flavor really settles and blooms after a chill).
My Best Tips for Stacking and Decorating a Peppermint Chocolate Christmas Cake
This cake builds beautifully and is ready for an impressive finish. Here’s my pro guide for stacking, filling, and frosting it like a holiday centerpiece.
- Chill cake layers before stacking: Wrap and chill your layers for at least 45 minutes to make them firm, minimizing crumbs and shifting when you assemble.
- Use an offset spatula and turntable: These tools help create even frosting layers and smooth sides, which is essential for a clean finish and even ganache coverage.
- Pipe a frosting dam before filling: For each layer, pipe a ring of buttercream along the edge first, then spread a thinner layer of frosting or filling inside, the dam keeps everything stable when you slice.
- Apply a thin crumb coat and chill: Lightly ice the exterior to lock in stray crumbs, then refrigerate for 15 minutes before your final coat for a pristine surface.
- Warm ganache so it’s pourable, not hot: Let the ganache thicken slightly before pouring; it should gently drip down chilled cake sides for a smooth, controlled bakery-style effect.
Take your time with each stage, and this cake will stack, slice, and photograph like a bakery masterpiece.
Ingredients for Peppermint Chocolate Christmas Cake
- 260 g all-purpose flour (sifted)
- 35 g Dutch-process cocoa powder
- 25 g natural unsweetened cocoa powder
- 2 tsp baking powder
- 1 tsp baking soda
- 1/2 tsp fine sea salt
- 320 g granulated sugar
- 3 large eggs (room temperature)
- 120 ml vegetable oil (neutral, such as canola or sunflower)
- 280 ml buttermilk (at room temperature)
- 2 tsp pure vanilla extract
- 1 tsp peppermint extract (pure, not imitation)
- 180 ml hot water (just off the boil)
- 225 g unsalted butter (softened, for greasing pans and buttercream)
- 200 g egg whites (from about 5-6 large eggs, for buttercream)
- 360 g granulated sugar (for buttercream)
- 385 g unsalted butter (cool but slightly soft, cut into cubes, for buttercream)
- 1/2 tsp peppermint extract (for buttercream)
- 1 tsp pure vanilla extract (for buttercream)
- 120 g bittersweet chocolate, chopped (for optional ganache drip)
- 120 ml heavy cream (for optional ganache drip)
- 3-4 peppermint candy canes, crushed (for optional garnish)
How to Make Peppermint Chocolate Christmas Cake
- STEP 1). Prep cake pans and oven Preheat oven to 350°F (177°C). Grease two 8-inch (20 cm) round cake pans with butter, line their bases with parchment paper, then grease and dust with cocoa powder. This ensures easy release and crisp sides.
- STEP 2). Mix dry ingredients In a large bowl, sift together the flour, Dutch-process cocoa powder, natural cocoa powder, baking powder, baking soda, and salt. Whisk thoroughly, reaching across the bottom and around the sides of the bowl, until the mixture is evenly colored and no cocoa pockets or visible clumps remain.
- STEP 3). Blend eggs, oil, and sugar In a stand mixer bowl, beat eggs with sugar until pale and slightly thickened, about 2-3 minutes at medium speed. Reduce to low, then drizzle in oil and beat until smooth and emulsified.
- STEP 4). Combine wet and dry ingredients Add vanilla and peppermint extract to the mixture. Alternately add dry mix and buttermilk, beginning and ending with dry ingredients. Scrape sides and mix just until the last streak disappears, overmixing toughens crumb.
- STEP 5). Incorporate hot water With the mixer running on low speed, slowly pour the hot water into the batter so it blends in without splashing. Stop once midway to scrape the sides and bottom of the bowl, then continue mixing just until the batter is smooth, fluid, and evenly chocolate-colored. The finished batter will be thin.
- STEP 6). Bake the cakes Divide the batter evenly between the two prepared pans, then smooth the tops and tap the pans gently to release large air bubbles. Bake on the center rack for 26-32 minutes. The layers are ready when the centers look set and a toothpick inserted there comes out with moist crumbs but no wet batter.
- STEP 7). Cool and unmold Let cakes cool in the pans 12 minutes. Run a knife along edges, then invert cakes onto a rack. Peel off parchment and cool completely; this prevents steamy, soggy layers.
- STEP 8). Make Swiss meringue buttercream Combine egg whites and sugar in a heatproof bowl. Set over simmering water; whisk gently and heat to 160°F (71°C), until sugar dissolves. Transfer to a mixer, whip to stiff peaks and cool completely (12-15 min).
- STEP 9). Finish buttercream and flavor Switch to the paddle attachment. On medium-low, add cubed butter a few pieces at a time, beating fully between each. Once thick and creamy, beat in peppermint and vanilla extracts until smooth and fluffy.
- STEP 10). Assemble and frost Level cake layers. Place one layer on a stand, spread about 1 cup frosting evenly, edge to edge. Top with second layer. Apply a thin crumb coat, chill 15 minutes, then cover with remaining buttercream, smoothing tops and sides.
- STEP 11). Optional: Make and add ganache drip For ganache, gently heat cream until steaming, pour over chopped chocolate, and sit 3 minutes. Stir until glossy and smooth. Cool until thick but pourable, then drip over chilled frosted cake with a spoon or piping bag.
- STEP 12). Finish and decorate While the ganache is still tacky, sprinkle the crushed candy canes over the top so they adhere without sinking. Chill the finished cake for 20-30 minutes before slicing. The buttercream and ganache should feel set, and a knife should pass cleanly through the layers for neat, defined servings.
Storage and Freezing
- Wrap cake well and refrigerate up to 4 days. Bring to room temperature before serving for best texture and flavor.
- Freeze unfrosted cake layers up to 2 months: Wrap tightly in two layers of plastic and one of foil.
- Thaw cake layers in the fridge overnight, then frost and decorate.
- Decorated cake slices freeze up to 1 month: Separate with parchment and thaw in the fridge for the best texture.
Frequently Asked Questions
How do I keep peppermint chocolate Christmas cake from getting dry?
Moisture is protected by oil and buttermilk in the batter, these keep the cake tender for days, even after chilling.
Make sure not to overbake: pull the layers when a toothpick comes out with just moist crumbs. Wrapping cooled layers in plastic traps steam for extra softness; always bring cake to room temperature before serving so the texture rebounds and the flavors are at their best.
What’s the best way to get bakery-clean cake layers for decorating?
Chill your cake layers well before stacking, cold cake is less crumbly and much easier to trim, stack, and frost cleanly. Level the tops to eliminate doming, and use an offset spatula and cake turntable for even buttercream layers.
A crumb coat seals loose bits, and another blast in the fridge ensures a smooth, stable surface for the final coat and ganache. Patience pays off with professional-looking results.
How strong is the peppermint flavor in this cake?
You’ll taste peppermint as a refreshing accent rather than a strong medicinal blast, I've balanced it to complement chocolate instead of overpowering it.
Pure peppermint extract is potent, so a measured amount gives a candy cane freshness that pairs beautifully with the rich, sweet cocoa. Adjusting the amount is possible, but remember, too much can dominate or tip the balance toward toothpaste rather than holiday treat.
Do I need to make both chocolate cake and ganache, or is the ganache drip optional?
The ganache drip is completely optional: the cake and buttercream alone deliver plenty of chocolate and peppermint flavor.
Ganache adds a glossy, bakery-finish and another hit of bittersweet richness that makes the cake feel a bit fancier and more festive. Both ways are delicious, so choose based on your decorating ambition or the level of chocolate celebration you’re after.
Can I make this peppermint chocolate Christmas cake ahead for a party?
This cake is very make-ahead friendly: bake cake layers up to two days early, wrap and chill, then frost and decorate the morning of your event.
Completed cakes can rest in the fridge overnight, too. Peppermint and chocolate flavors deepen and meld as the cake sits, so it often tastes even better after a night’s rest, just bring to room temperature before guests arrive for the best flavor and crumb.
What do I do if my Swiss meringue buttercream looks curdled or runny?
A curdled buttercream is usually a temperature issue, too cold and it separates, too warm and it may look soupy. Keep mixing: extra whipping can usually bring it back together as the butter emulsifies.
If it’s too warm, refrigerate the bowl briefly; if too cold, place the bowl over a warm water bath for a few seconds, then beat again. The finished buttercream should be smooth, fluffy, and uniform in color.
More Ridiculously Delicious Cakes
- Chocolate Toffee Crunch Layer Cake Recipe with Moist Layers and Homemade Butter Toffee
- Rich Chocolate Orange Truffle Cake Recipe with Silky Ganache
- Chocolate Hazelnut Praline Cake Recipe
- Chocolate Swiss Roll Cake with a Light Cocoa Sponge
- Two-Tier Chocolate Vanilla Celebration Cake
Peppermint Chocolate Christmas Cake with Mint Frosting
Ingredients
Equipment
Method
- Preheat oven to 350°F (177°C). Grease two 8-inch (20 cm) round cake pans with butter, line their bases with parchment paper, then grease and dust with cocoa powder. This ensures easy release and crisp sides.
- In a large bowl, sift together the flour, Dutch-process cocoa powder, natural cocoa powder, baking powder, baking soda, and salt. Whisk thoroughly, reaching across the bottom and around the sides of the bowl, until the mixture is evenly colored and no cocoa pockets or visible clumps remain.
- In a stand mixer bowl, beat eggs with sugar until pale and slightly thickened, about 2-3 minutes at medium speed. Reduce to low, then drizzle in oil and beat until smooth and emulsified.
- Add vanilla and peppermint extract to the mixture. Alternately add dry mix and buttermilk, beginning and ending with dry ingredients. Scrape sides and mix just until the last streak disappears, overmixing toughens crumb.
- With the mixer running on low speed, slowly pour the hot water into the batter so it blends in without splashing. Stop once midway to scrape the sides and bottom of the bowl, then continue mixing just until the batter is smooth, fluid, and evenly chocolate-colored. The finished batter will be thin.
- Divide the batter evenly between the two prepared pans, then smooth the tops and tap the pans gently to release large air bubbles. Bake on the center rack for 26-32 minutes. The layers are ready when the centers look set and a toothpick inserted there comes out with moist crumbs but no wet batter.
- Let cakes cool in the pans 12 minutes. Run a knife along edges, then invert cakes onto a rack. Peel off parchment and cool completely; this prevents steamy, soggy layers.
- Combine egg whites and sugar in a heatproof bowl. Set over simmering water; whisk gently and heat to 160°F (71°C), until sugar dissolves. Transfer to a mixer, whip to stiff peaks and cool completely (12-15 min).
- Switch to the paddle attachment. On medium-low, add cubed butter a few pieces at a time, beating fully between each. Once thick and creamy, beat in peppermint and vanilla extracts until smooth and fluffy.
- Level cake layers. Place one layer on a stand, spread about 1 cup frosting evenly, edge to edge. Top with second layer. Apply a thin crumb coat, chill 15 minutes, then cover with remaining buttercream, smoothing tops and sides.
- For ganache, gently heat cream until steaming, pour over chopped chocolate, and sit 3 minutes. Stir until glossy and smooth. Cool until thick but pourable, then drip over chilled frosted cake with a spoon or piping bag.
- While the ganache is still tacky, sprinkle the crushed candy canes over the top so they adhere without sinking. Chill the finished cake for 20-30 minutes before slicing. The buttercream and ganache should feel set, and a knife should pass cleanly through the layers for neat, defined servings.
Notes
- Don’t skip parchment: Lining pans with parchment ensures the cakes release easily and stay picture-perfect, especially when layering and stacking for a finished look.
- Room temp ingredients, always: Eggs and buttermilk blend smoothly when they’re not cold, you get a finer crumb and an evenly structured cake rather than random sugar pockets or dense layers.
- Patience with meringue: Make sure your Swiss meringue is fully cool before adding butter, or you risk a separated, soupy frosting that’s hard to rescue.
- Thin batter is the secret: The cake batter will look loose before baking, that’s intentional and means a more tender, deeply chocolatey crumb every time.
- Chill before slicing: A cold cake cuts much more cleanly, giving you sharp, bakery-style slices (plus, the peppermint flavor really settles and blooms after a chill).



