Table of Contents
That moment when your spoon sinks effortlessly into a chilled vanilla bean baked custard and glides through silky, barely set cream, now that's pure dessert pleasure. Each bite blooms with the unmistakable aroma of fresh vanilla bean, carrying a fragrance that store-bought extracts can't come close to matching. Vanilla beans don't just flavor; their tiny seeds add a gorgeous speckled look to the custard, and that subtle floral complexity makes every spoonful just a little more memorable. I use a water bath (bain-marie) to protect the delicate eggs from scrambling, ensuring a perfectly smooth and spoonable custard from edge to center. If you've ever wondered how bakeries get that pristine, quivery set, this time-tested method is the secret. Make it ahead so the flavors mellow and the custard chills right through, then savor the cool, creamy results.

Why You’ll Love this Vanilla Custard
- Water bath means no scrambled eggs: Baking the custard in a hot water bath cushions it from harsh oven heat, so the proteins thicken gently without curdling. This is the foolproof route to creamy, satiny custard.
- Real vanilla bean, real fragrance: Using an actual vanilla bean (not just extract) infuses both flavor and those beautiful speckles. The floral, deep aroma comes through more pure and complex than any shortcut.
- Whole eggs and yolks for perfect set: Combining both whole eggs and yolks means the custard sets softly, never chalky, never runny. There’s enough structure to unmold, but every spoonful stays impossibly smooth.
- Warm milk for better infusion: Scalding the milk with the vanilla extracts more flavor from the bean. Warm milk also incorporates more evenly with the eggs, reducing the chance of gritty texture.
- Cool completely for best texture: Chilling is not just for food safety, it lets the custard finish firming up and the flavors deepen. Patience pays off with a glassy, quivering finish.
Ingredient Notes for Vanilla Bean Baked Custard
- Whole Milk: The primary liquid base for custard, giving a lighter body and classic structure. Low-fat milk will make the custard watery, while all cream results in a heavy, dense set.
- Heavy Cream: Adds richness and a silky texture. The combination of milk and cream strikes a luxurious but not overly dense balance, ideal for scoopable custard.
- Vanilla Bean: Splitting and scraping the pod releases hundreds of aromatic seeds. Use fresh, pliable beans for the best flavor. Don’t substitute with vanilla extract unless noted.
- Eggs and Yolks: Eggs thicken and set the custard. Yolks alone would yield a denser, richer texture, but using some whole eggs keeps the result light and spoonable.
- Granulated Sugar: Sweetens and adds tender body. Even mixing ensures the sugar dissolves fully, avoiding graininess in the final custard.
- Fine Salt: Just enough to enhance vanilla’s sweetness and round out all the flavors. It’s crucial, even if you’re tempted to skip it.
Baking Tips Worth Knowing
- Don’t rush the infusion: Letting the vanilla bean steep fully in the warm milk pushes out all its fragrant oils and makes a world of difference in flavor.
- Watch those edges: Check for the first subtle signs of set at the custard’s edge; the center should still wobble without appearing liquid for a creamy, not rubbery, texture.
- Skim bubbles for a glassy top: Any foam or bubbles on top before baking will dry out or brown. Skim them off gently with a spoon for the smoothest finish.
- Cool before chilling: Transferring hot custard straight to the fridge can cause condensation and texture issues. Let cool at room temperature before chilling completely.
- Line your pan: A kitchen towel under your ramekins keeps them steady and prevents heat shocks, which is crucial for even gentle cooking throughout the batch.
Ingredients for Vanilla Bean Baked Custard
- 1 whole vanilla bean (split and seeds scraped)
- 2 cups whole milk (do not substitute low-fat)
- 1 cup heavy cream
- 4 large egg yolks (at room temperature)
- 2 large whole eggs (at room temperature)
- 2/3 cup granulated sugar
- 1/4 teaspoon fine salt
- 1 teaspoon pure vanilla extract
How to Make Vanilla Bean Baked Custard
- STEP 1). Preheat oven and prepare water bath Preheat your oven to 325°F (163°C). Bring a kettle of water to a boil. Arrange a clean kitchen towel in the bottom of an 8×8 or 9×9-inch baking pan. Set six 6-ounce ramekins or one 1-quart baking dish on top.
- STEP 2). Infuse milk with vanilla bean In a medium saucepan, combine the milk, cream, and the scraped seeds and pod of the vanilla bean. Heat over medium just until the mixture begins to steam and small bubbles appear at the edges; do not simmer. Remove from heat, cover, and let steep 10 minutes to fully infuse.
- STEP 3). Whisk eggs, sugar, and salt In a heatproof bowl or large measuring jug, whisk together the egg yolks, whole eggs, sugar, and salt until thoroughly combined and lighter in color. Do not beat until frothy; you want a silky, even mixture without incorporated air bubbles.
- STEP 4). Temper the eggs Remove the vanilla bean pod from the steeped milk mixture. Slowly pour the warm liquid into the egg mixture, whisking constantly in a slow, steady stream. This gradually raises the temperature, preventing the eggs from scrambling and ensuring a smooth custard base.
- STEP 5). Strain and pour into ramekins Pour the custard mixture through a fine mesh strainer into a clean pitcher or bowl to catch any bits of cooked egg or beanskin. Add the vanilla extract and gently stir. Evenly distribute the custard among ramekins or pour into the baking dish.
- STEP 6). Prepare and bake in a water bath Set the filled ramekins or dish into the prepared baking pan. Carefully pour the hot kettle water around them, filling the outer pan to come halfway up the sides of the ramekins. Bake uncovered for 35-40 minutes (individuals) or 55-65 minutes (large dish), just until the custard is barely set at the edges and the center jiggles like set jelly when tapped.
- STEP 7). Cool, chill, and serve Promptly remove the baked custards from the water bath. Let cool to room temperature, then cover and chill for at least 4 hours or overnight. The custard firms up as it chills, so don't skip this step. Serve cold, optionally garnished with a little extra vanilla sugar or shaved chocolate.
Storage and Freezing
Wrap cooled, baked custards in plastic wrap and chill up to 4 days. For individual portions, cover each ramekin tightly.
Serve straight from the fridge for the best set. Do not freeze, freezing will ruin the delicate custard texture.
Frequently Asked Questions
How do I know when vanilla bean baked custard is set correctly?
The ideal custard should be barely set at the edges, while the center wobbles like jelly when you nudge the dish. It will finish setting as it cools and chills.
Overbaking leads to a rubbery texture and possible separation, so keep an eye on it near the end of baking. For extra confidence, the internal temperature should be about 170-175°F (77-80°C) when tested with an instant-read thermometer for a silky result.
What size pan or ramekins should I use for this vanilla bean baked custard?
You can use a single 1-quart (about 1-liter) ceramic baking dish for a homestyle presentation or six 6-ounce ramekins for individual servings.
Ramekins make for faster, more even setting and easier unmolding. If using a larger or deeper dish, add up to 10 extra minutes, checking for that crucial jiggle in the center before removing from the oven.
How important is the water bath when baking custard?
A water bath is absolutely essential for custards baked in the oven, as it cushions the eggs from direct heat and ensures a gradual, even set.
Skipping the water bath often results in overcooked edges and curdled texture, especially with delicate custards like this. Always pour hot water in after the pan is in the oven for safety and better heat control.
Does chilling really improve the flavor and texture of baked vanilla custard?
Allowing the custard to chill for several hours (or overnight) lets the proteins finish setting and gives the vanilla time to fully infuse the mixture.
The texture becomes silkier, more cohesive, and the flavor sharper and richer. Rushing this process can lead to a soft set, excess moisture, or lacking overall depth.
What’s the best way to garnish or serve vanilla bean baked custard?
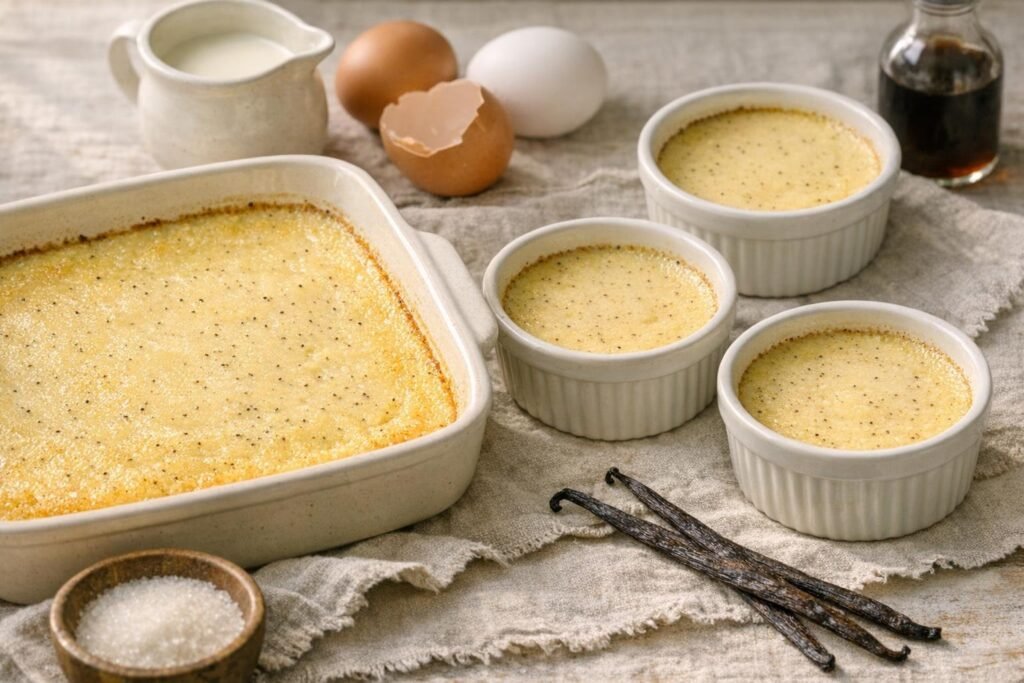
Serve the custard cold, after it has chilled for at least 4 hours or overnight. In individual ramekins, it looks lovely as-is, with the vanilla bean flecks visible across the smooth surface and no garnish needed.
If you baked one large custard, spoon it gently into small serving dishes to preserve its silky texture. For an optional finish, use only a light sprinkle of vanilla sugar or a few shavings of chocolate so the vanilla remains the star.
Your Next Baking Obsession Starts Here
- Vanilla Bean Creme Brulee with Crisp Caramelized Sugar
- Pumpkin Spice Flan with Silky Caramel Custard
- Coconut Flan with Silky Caramel Custard
- Strawberry Flan with Silky Caramel Custard
- Dulce de Leche Flan with Silky Caramel Custard
Vanilla Bean Baked Custard
Ingredients
Equipment
Method
- Preheat your oven to 325°F (163°C). Bring a kettle of water to a boil. Arrange a clean kitchen towel in the bottom of an 8x8 or 9x9-inch baking pan. Set six 6-ounce ramekins or one 1-quart baking dish on top.
- In a medium saucepan, combine the milk, cream, and the scraped seeds and pod of the vanilla bean. Heat over medium just until the mixture begins to steam and small bubbles appear at the edges; do not simmer. Remove from heat, cover, and let steep 10 minutes to fully infuse.
- In a heatproof bowl or large measuring jug, whisk together the egg yolks, whole eggs, sugar, and salt until thoroughly combined and lighter in color. Do not beat until frothy; you want a silky, even mixture without incorporated air bubbles.
- Remove the vanilla bean pod from the steeped milk mixture. Slowly pour the warm liquid into the egg mixture, whisking constantly in a slow, steady stream. This gradually raises the temperature, preventing the eggs from scrambling and ensuring a smooth custard base.
- Pour the custard mixture through a fine mesh strainer into a clean pitcher or bowl to catch any bits of cooked egg or beanskin. Add the vanilla extract and gently stir. Evenly distribute the custard among ramekins or pour into the baking dish.
- Set the filled ramekins or dish into the prepared baking pan. Carefully pour the hot kettle water around them, filling the outer pan to come halfway up the sides of the ramekins. Bake uncovered for 35-40 minutes (individuals) or 55-65 minutes (large dish), just until the custard is barely set at the edges and the center jiggles like set jelly when tapped.
- Promptly remove the baked custards from the water bath. Let cool to room temperature, then cover and chill for at least 4 hours or overnight. The custard firms up as it chills, so don't skip this step. Serve cold, optionally garnished with a little extra vanilla sugar or shaved chocolate.
Notes
- Don’t rush the infusion: Letting the vanilla bean steep fully in the warm milk pushes out all its fragrant oils and makes a world of difference in flavor.
- Watch those edges: Check for the first subtle signs of set at the custard’s edge; the center should still wobble without appearing liquid for a creamy, not rubbery, texture.
- Skim bubbles for a glassy top: Any foam or bubbles on top before baking will dry out or brown. Skim them off gently with a spoon for the smoothest finish.
- Cool before chilling: Transferring hot custard straight to the fridge can cause condensation and texture issues. Let cool at room temperature before chilling completely.
- Line your pan: A kitchen towel under your ramekins keeps them steady and prevents heat shocks, which is crucial for even gentle cooking throughout the batch.