
Table of Contents
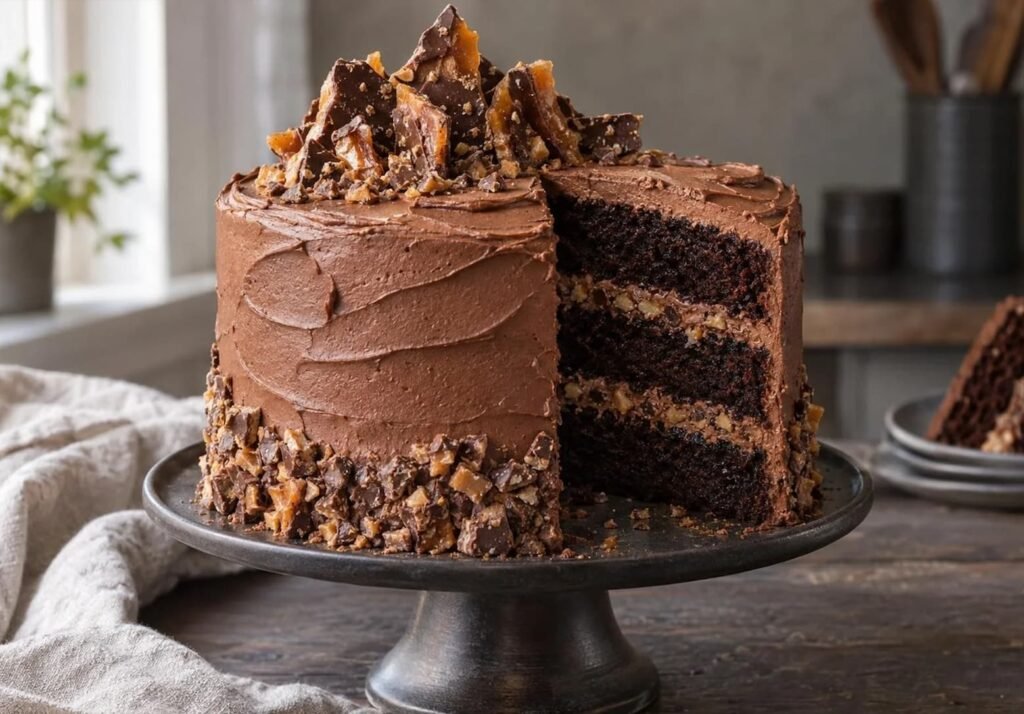
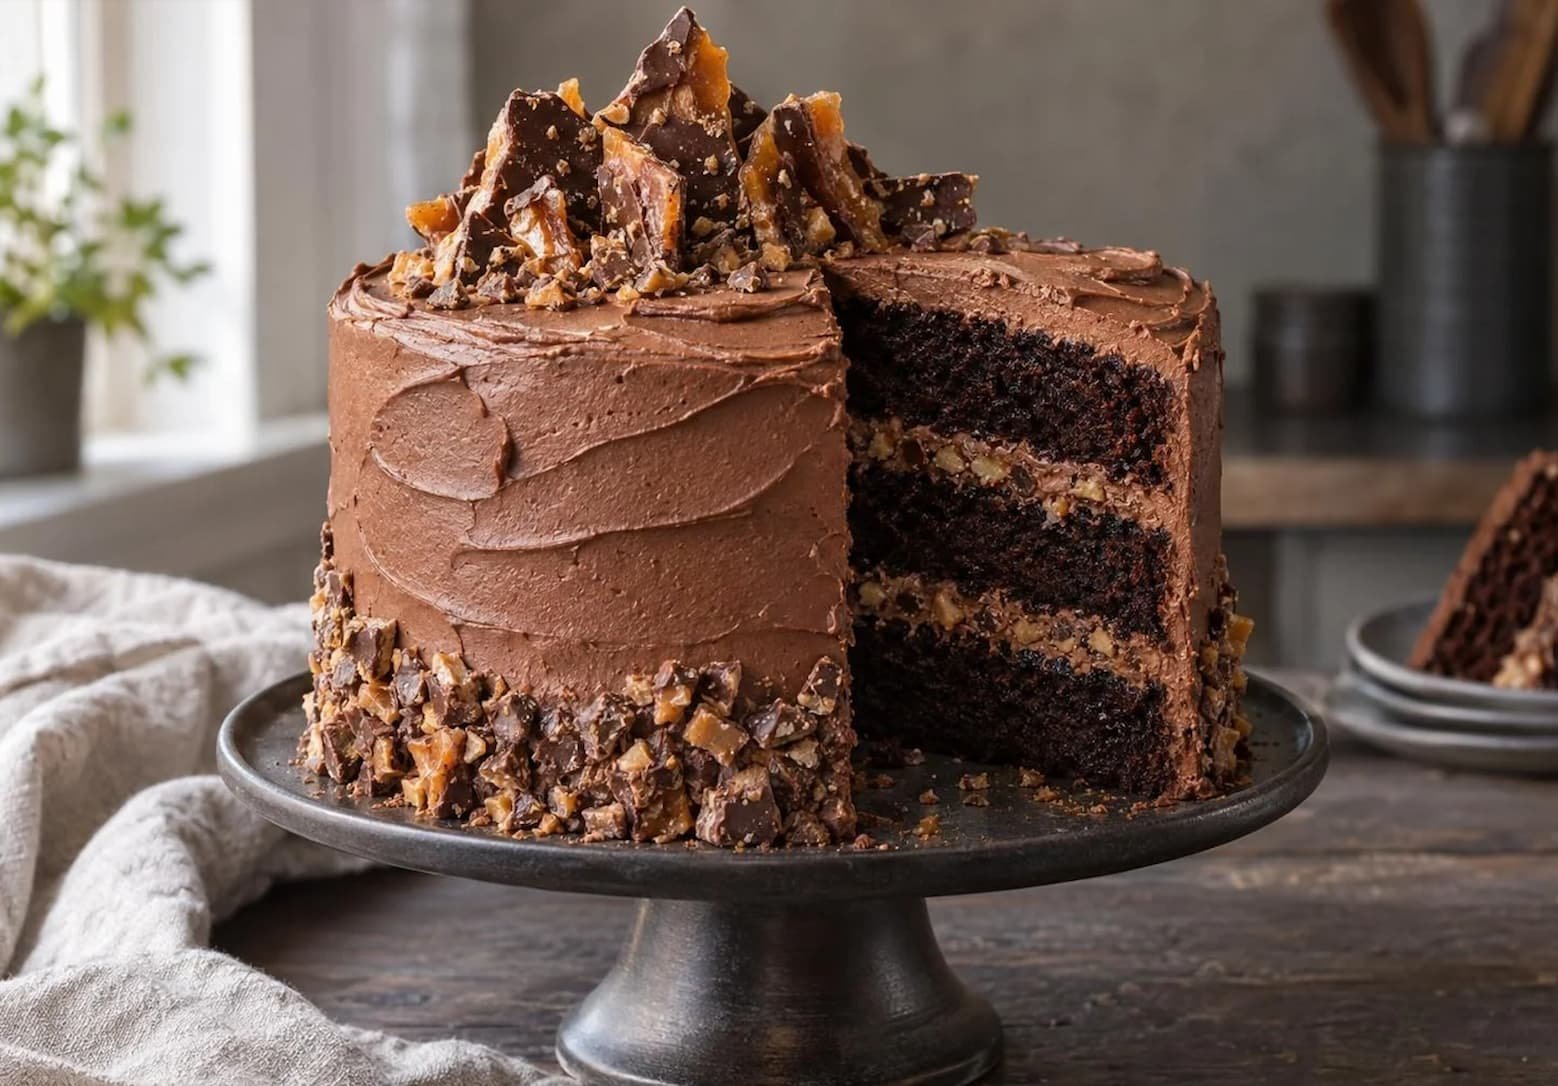
Chocolate cake is already hard to resist, but add homemade butter toffee and suddenly things get a whole lot more interesting! What makes this chocolate toffee crunch layer cake recipe so good is the contrast between the soft, moist chocolate layers, creamy buttercream, and little pieces of crunchy toffee tucked inside. I make the toffee from scratch because that rich, buttery caramel flavor is worth the extra effort, especially when it’s coated in semisweet chocolate. The chocolate also helps protect the crunch once the toffee is mixed into the frosting. I use hot coffee to deepen the cocoa flavor and buttermilk to keep the cake tender without making the layers too delicate to stack. And I have to admit, breaking up the finished toffee might be my favorite part of making this cake, although sneaking a few pieces before decorating comes pretty close!
Why This Recipe Frickin’ Works
- A little coffee makes the chocolate shine: I add hot brewed coffee to the batter because it brings out the deeper flavors in the cocoa without making the cake taste like coffee. You get that rich, chocolatey flavor I want in every bite, with the coffee quietly doing its job in the background.
- Chocolate cake that stays soft, even after chilling: I use neutral oil instead of butter in the cake layers because it remains liquid at refrigerator temperatures. That helps keep the crumb moist and tender, which is especially important for a cake that needs time in the fridge before serving. Nobody wants a beautiful slice of chocolate cake that eats like a dry sponge!
- Buttermilk gives the cake a tender crumb: Buttermilk brings a subtle tang and works with the baking soda to help the cake rise. Its acidity also contributes to a softer texture, giving the layers enough structure for stacking without making them heavy or tough.
- Chocolate-coated toffee keeps its crunch: One of my favorite details is coating the toffee with semisweet chocolate. Once the chocolate sets, it creates a barrier that helps slow down moisture absorption from the frosting. That means more of those satisfying little crunchy pieces instead of toffee that turns sticky and soft too quickly.
- Two sizes of toffee, twice the fun: I use finely crushed toffee between the cake layers because it distributes more evenly through the frosting and gives you a little crunch in every bite. The larger shards go on top, where they add height, texture, and that irresistible homemade candy finish. Just try not to snack on all the toffee before decorating the cake!
Ingredient Notes for Chocolate Toffee Crunch Layer Cake
- Dutch-process cocoa powder: Alkalized cocoa gives the cake and frosting a rounded dark chocolate flavor and deep color. Sift it whenever it looks lumpy because dry cocoa pockets resist mixing once liquid is added.
- All-purpose flour: Its moderate protein level supplies enough structure for three stackable layers without making them tough. Measure by weight and stop mixing as soon as the batter is uniform.
- Buttermilk: Full-fat cultured buttermilk contributes acidity, dairy flavor, and moisture. Bring it to room temperature so the oil and eggs combine into a stable mixture.
- Hot brewed coffee: Coffee heightens the cocoa’s roasted notes and thins this batter to the correct consistency. Use it hot but not vigorously boiling, which makes handling unnecessarily risky.
- Neutral oil: Canola, sunflower, or another mild liquid oil keeps the cake tender when chilled. Strong olive oil would introduce a flavor not balanced by this formula.
- Corn syrup: A small amount discourages sugar crystallization while the toffee cooks. It is functional here and helps produce a clear, brittle candy rather than a grainy one.
- Semisweet chocolate: Chocolate coats the toffee and also gives the buttercream body. Melt it gently, then cool the frosting portion until fluid but no longer warm enough to soften the butter.
- Unsalted butter: Butter carries the caramel flavor in the toffee and forms the frosting’s structure. Use softened butter for the buttercream, but begin the candy with butter cut into pieces so it melts evenly.
- Heavy cream: Cream loosens the buttercream and helps it whip smoothly. Add it gradually because temperature, cocoa absorption, and confectioners’ sugar can change the exact consistency needed.
- Confectioners’ sugar: The very fine particles dissolve into the buttercream without cooking. Sifting removes firm lumps that would otherwise catch on the spatula during final smoothing.
Golden Rules for Baking This Cake Just Right
- Don’t guess when the toffee is ready: I always use a candy thermometer when making toffee because color alone can be misleading. Cook it to 150°C (300°F), then remove it from the heat promptly. Toffee can go from perfectly golden to burnt surprisingly quickly, and there’s no rescuing those scorched butter solids!
- Toffee and moisture are not friends: A little steam or condensation is enough to turn beautifully crisp toffee sticky. I let mine cool in a dry spot, use completely dry utensils, and store it in an airtight container. That extra care helps preserve the satisfying crunch we’re after.
- Give each cake pan an equal share: I weigh the batter when dividing it between the three pans. It only takes a moment, but it helps the layers bake evenly. Otherwise, you could end up with one layer that’s still underbaked while another is already drying out. Nobody wants that in a celebration cake!
- Let the chocolate cool before making buttercream: Melted chocolate that’s still warm can soften the butter too much and leave the frosting loose. I wait until the chocolate has cooled but remains fluid before mixing it in. The result should be smooth, creamy buttercream that’s much easier to spread and decorate with.
- A warm knife makes prettier slices: Cutting through a cake with crunchy toffee pieces takes a little finesse. I dip a sharp knife in hot water, wipe it completely dry, and cut with steady pressure rather than forcing the blade through. Clean and rewarm it between slices to keep the cake layers neat instead of squashing all that hard work.
My Best Tips for Stacking and Decorating a Chocolate Toffee Crunch Layer Cake
A tall chocolate cake needs thoughtful support, especially when crisp candy is involved. I keep the buttercream smooth, the filling controlled, and the cake cold enough to decorate without turning it into a construction project.
- Build a frosting border: Pipe a sturdy ring of buttercream around each layer before adding the softer center filling and toffee, preventing crumbs from escaping through the sides.
- Keep the crunch away from the edge: Leave a 1.5 cm border between the crushed toffee and frosting dam so hard pieces do not interfere with smooth exterior icing.
- Use moderate pressure when stacking: Lower each cake layer straight down and press only until it makes full contact with the filling; excessive pressure squeezes out buttercream and creates leaning layers.
- Chill before final smoothing: A cold crumb coat traps loose cocoa crumbs and firms the structure, allowing the outer buttercream to glide over the cake instead of dragging the layers sideways.
- Place tall shards close to serving: Toffee gradually attracts moisture from frosting and humid air, so add the decorative pieces after the final chill for the cleanest shine and crunch.
A level cake, restrained filling, and one patient chilling break make the decorating far more civilized. The toffee can provide the drama without making the cake wobble.
Ingredients for Chocolate Toffee Crunch Layer Cake
- 113 g unsalted butter (cut into pieces, for the toffee)
- 150 g granulated sugar (for the toffee)
- 30 g water (for the toffee)
- 20 g light corn syrup (for the toffee)
- 1 g fine sea salt (for the toffee)
- 5 g pure vanilla extract (for the toffee)
- 85 g semisweet chocolate (finely chopped, for coating the toffee)
- 300 g all-purpose flour (spooned and leveled if not weighed)
- 400 g granulated sugar (for the cake)
- 75 g Dutch-process cocoa powder (sifted if lumpy)
- 8 g baking powder (about 2 teaspoons)
- 6 g baking soda (about 1 teaspoon)
- 5 g fine sea salt (for the cake)
- 3 large eggs (150 g without shells, at room temperature)
- 300 g full-fat buttermilk (at room temperature)
- 180 g neutral oil (such as canola or sunflower oil)
- 10 g pure vanilla extract (for the cake)
- 240 g hot brewed coffee (hot but not boiling)
- 454 g unsalted butter (softened to 18 to 21°C, for the frosting)
- 600 g confectioners’ sugar (sifted)
- 75 g Dutch-process cocoa powder (sifted, for the frosting)
- 170 g semisweet chocolate (melted and cooled until fluid but not warm)
- 180 g heavy cream (at room temperature, added as needed)
- 10 g pure vanilla extract (for the frosting)
- 3 g fine sea salt (for the frosting)
How to Make Chocolate Toffee Crunch Layer Cake
- STEP 1). Cook and coat the homemade toffee Line a rimmed baking sheet with a silicone mat. Combine 113 g butter, 150 g sugar, water, corn syrup, and 1 g salt in a heavy saucepan. Cook over medium heat, stirring gently until the butter melts and the mixture becomes uniform. Stop stirring once it boils, attach a candy thermometer, and cook until deep amber and 150°C, about 8 to 12 minutes. Remove from the heat, carefully stir in 5 g vanilla, and immediately spread the bubbling candy into a thin, even layer.
- STEP 2). Cool, cover, and crush the toffee Let the toffee stand for 3 minutes, then scatter 85 g finely chopped semisweet chocolate evenly over the hot surface. Wait 2 minutes for the chocolate to soften, spread it into a thin coating, and leave the slab at room temperature until completely firm, about 45 minutes. Break it into pieces, reserving several attractive shards for decorating. Place the remainder in a sturdy food-safe bag and crush it with a rolling pin, keeping most pieces between coarse crumbs and 6 mm nuggets.
- STEP 3). Prepare the oven and cake pans Position an oven rack in the center and heat the oven to 175°C. Grease three 8-inch round cake pans, line each base with parchment, then lightly grease the parchment. Set the pans on a digital scale and have a flexible spatula ready for dividing the batter. Properly lined pans release this tender cake without tearing, while equal batter weights help the three layers bake at the same rate and produce a straight, stable stack.
- STEP 4). Combine the dry and liquid mixtures In a large bowl, whisk the flour, 400 g sugar, 75 g cocoa, baking powder, baking soda, and 5 g salt for 30 seconds, breaking apart any cocoa pockets. In a second bowl, whisk the eggs until uniform, then add the buttermilk, oil, and 10 g vanilla. Whisk until glossy and fully emulsified, with no separate streaks of egg white or oil. Combining each mixture thoroughly now prevents overmixing after the flour becomes wet.
- STEP 5). Finish and divide the chocolate batter Pour the liquid mixture into the dry ingredients and whisk slowly from the center outward until only a few fine flour streaks remain. Gradually stream in the hot coffee while whisking gently, then scrape the bowl and mix just until the batter is smooth and fluid. Do not continue beating once uniform. Divide approximately 610 g batter among each prepared pan, checking the pan weights for consistency, and tap each pan once on the counter to release large trapped air bubbles.
- STEP 6). Bake and cool the cake layers Bake all three pans on the center rack for 27 to 33 minutes, rotating their positions after 22 minutes if the oven browns unevenly. The layers are done when the centers spring back lightly, the edges begin pulling from the pans, and a tester shows moist crumbs but no wet batter. Cool in the pans for 15 minutes. Run a thin spatula around the edges, invert onto wire racks, remove the parchment, and cool completely for at least 75 minutes before leveling or frosting.
- STEP 7). Whip the chocolate buttercream Beat the softened 454 g butter with a paddle attachment on medium speed for 3 minutes, scraping the bowl once, until smooth and slightly aerated. On low speed, add the sifted confectioners’ sugar and 75 g cocoa in four additions, alternating with about 120 g cream. Add the melted cooled chocolate, 10 g vanilla, and 3 g salt, then beat on medium-low for 2 minutes. Add the remaining cream gradually until the frosting holds soft peaks and spreads without tearing cake crumbs.
- STEP 8). Fill, stack, and crumb-coat the cake Level any domed cake tops with a serrated knife. Place one layer cut-side up on a cake board and spread with 180 g buttercream. Pipe a buttercream border around the edge, then scatter about one-third of the crushed toffee inside it. Repeat with the second layer and position the final layer cut-side down. Check the stack from several angles, adjusting before the filling firms. Apply a thin crumb coat over the top and sides, then refrigerate uncovered for 30 minutes.
- STEP 9). Finish, decorate, and portion the cake Cover the chilled cake with the remaining buttercream, using an offset spatula and turntable to smooth the top and sides. Press the remaining crushed toffee around the lower edge and arrange the reserved shards on top, inserting them only far enough to stand securely. Chill the finished cake for 30 minutes to set the decoration. Before serving, let it stand at room temperature for 30 to 45 minutes, then cut 16 slices with a warm, dry knife, wiping the blade between cuts.
Storage and Freezing
- Storage: Keep the assembled cake covered in the refrigerator for up to 4 days. A cake carrier or tall airtight container protects the frosting and limits moisture reaching the toffee.
- Freezing: Freeze undecorated, well-wrapped cake layers for up to 2 months.
- Freeze the buttercream separately in an airtight container for up to 1 month. Do not freeze the finished toffee decoration because condensation makes it sticky.
- Thawing: Thaw wrapped cake layers overnight in the refrigerator, then unwrap them once chilled and free of surface condensation.
- Thaw buttercream in the refrigerator and bring it to room temperature before rewhipping.
- Serving: For the softest crumb and creamiest frosting, remove the assembled cake from the refrigerator 30 to 45 minutes before slicing. Add reserved toffee shards shortly before serving if maximum crunch is important.
Frequently Asked Questions
How do I keep the toffee crunchy inside a layer cake?
Coating the toffee with semisweet chocolate creates a partial barrier between the cooked sugar and moisture in the buttercream. Keep the filling pieces fairly coarse and place them inside a piped frosting border rather than directly against exposed cake.
The crunch is strongest on the day of assembly and gradually softens during refrigerated storage. Add the decorative shards shortly before serving if you want the top pieces especially crisp.
Why did my homemade toffee separate or turn greasy?
Separation usually occurs when the heat changes sharply or the mixture is stirred aggressively after boiling. Use a heavy saucepan, moderate heat, and gentle stirring only while the butter and sugar are initially combining.
If a thin butter layer begins appearing during cooking, lower the heat slightly and stir slowly until the mixture comes back together. Continue cooking only after it looks cohesive, and rely on the thermometer rather than rushing the candy.
What makes these chocolate cake layers suitable for stacking?
All-purpose flour and eggs provide enough protein to support the three-layer structure, while oil and buttermilk prevent the crumb from becoming dry or rigid. The result should feel tender but should not crumble when lifted after complete cooling.
Leveling the cakes and chilling the crumb-coated stack are equally important. Warm layers and excessive filling encourage sliding, even when the cake formula itself is structurally sound.
Can I prepare the chocolate toffee crunch layer cake in advance?
The cake layers can be baked, cooled, wrapped tightly, and refrigerated one day before assembly. The toffee can also be prepared up to three days ahead and kept in an airtight container at cool room temperature.
For the clearest contrast between creamy frosting and crisp candy, assemble the cake no more than one day before serving. Hold back the tallest decorative shards until the final few hours.
How should I fix chocolate buttercream that is too soft or too stiff?
Soft buttercream generally means the butter or melted chocolate was too warm. Refrigerate the bowl for 10 minutes, then mix briefly on low speed. Repeat only if necessary because overchilling makes the frosting difficult to smooth.
For stiff buttercream, add room-temperature cream 1 teaspoon at a time while mixing on low. Stop when the frosting forms soft peaks and glides over the cake without pulling up crumbs.
More Ridiculously Delicious Cakes
- Moist Chocolate Fudge Layer Cake with Silky Fudge Frosting
- Triple Chocolate Mousse Layer Cake Recipe
- Chocolate Peanut Butter Crunch Cake Recipe
- Chocolate Espresso Celebration Cake Recipe
- Two-Tier Chocolate Vanilla Celebration Cake
Chocolate Toffee Crunch Layer Cake Recipe
Ingredients
Equipment
Method
- Line a rimmed baking sheet with a silicone mat. Combine 113 g butter, 150 g sugar, water, corn syrup, and 1 g salt in a heavy saucepan. Cook over medium heat, stirring gently until the butter melts and the mixture becomes uniform. Stop stirring once it boils, attach a candy thermometer, and cook until deep amber and 150°C, about 8 to 12 minutes. Remove from the heat, carefully stir in 5 g vanilla, and immediately spread the bubbling candy into a thin, even layer.
- Let the toffee stand for 3 minutes, then scatter 85 g finely chopped semisweet chocolate evenly over the hot surface. Wait 2 minutes for the chocolate to soften, spread it into a thin coating, and leave the slab at room temperature until completely firm, about 45 minutes. Break it into pieces, reserving several attractive shards for decorating. Place the remainder in a sturdy food-safe bag and crush it with a rolling pin, keeping most pieces between coarse crumbs and 6 mm nuggets.
- Position an oven rack in the center and heat the oven to 175°C. Grease three 8-inch round cake pans, line each base with parchment, then lightly grease the parchment. Set the pans on a digital scale and have a flexible spatula ready for dividing the batter. Properly lined pans release this tender cake without tearing, while equal batter weights help the three layers bake at the same rate and produce a straight, stable stack.
- In a large bowl, whisk the flour, 400 g sugar, 75 g cocoa, baking powder, baking soda, and 5 g salt for 30 seconds, breaking apart any cocoa pockets. In a second bowl, whisk the eggs until uniform, then add the buttermilk, oil, and 10 g vanilla. Whisk until glossy and fully emulsified, with no separate streaks of egg white or oil. Combining each mixture thoroughly now prevents overmixing after the flour becomes wet.
- Pour the liquid mixture into the dry ingredients and whisk slowly from the center outward until only a few fine flour streaks remain. Gradually stream in the hot coffee while whisking gently, then scrape the bowl and mix just until the batter is smooth and fluid. Do not continue beating once uniform. Divide approximately 610 g batter among each prepared pan, checking the pan weights for consistency, and tap each pan once on the counter to release large trapped air bubbles.
- Bake all three pans on the center rack for 27 to 33 minutes, rotating their positions after 22 minutes if the oven browns unevenly. The layers are done when the centers spring back lightly, the edges begin pulling from the pans, and a tester shows moist crumbs but no wet batter. Cool in the pans for 15 minutes. Run a thin spatula around the edges, invert onto wire racks, remove the parchment, and cool completely for at least 75 minutes before leveling or frosting.
- Beat the softened 454 g butter with a paddle attachment on medium speed for 3 minutes, scraping the bowl once, until smooth and slightly aerated. On low speed, add the sifted confectioners’ sugar and 75 g cocoa in four additions, alternating with about 120 g cream. Add the melted cooled chocolate, 10 g vanilla, and 3 g salt, then beat on medium-low for 2 minutes. Add the remaining cream gradually until the frosting holds soft peaks and spreads without tearing cake crumbs.
- Level any domed cake tops with a serrated knife. Place one layer cut-side up on a cake board and spread with 180 g buttercream. Pipe a buttercream border around the edge, then scatter about one-third of the crushed toffee inside it. Repeat with the second layer and position the final layer cut-side down. Check the stack from several angles, adjusting before the filling firms. Apply a thin crumb coat over the top and sides, then refrigerate uncovered for 30 minutes.
- Cover the chilled cake with the remaining buttercream, using an offset spatula and turntable to smooth the top and sides. Press the remaining crushed toffee around the lower edge and arrange the reserved shards on top, inserting them only far enough to stand securely. Chill the finished cake for 30 minutes to set the decoration. Before serving, let it stand at room temperature for 30 to 45 minutes, then cut 16 slices with a warm, dry knife, wiping the blade between cuts.
Notes
- Trust the thermometer for the toffee: Color can be deceptive in different saucepans, so cook to 150°C and remove the pan promptly before the butter solids scorch.
- Keep water away from finished candy: Steam, wet utensils, and condensation make toffee sticky, so cool the slab in a dry area and store it airtight.
- Weigh the divided batter: Matching the batter in all three pans prevents one underbaked layer and one dry layer from sharing the same oven timer.
- Watch the chocolate temperature: Melted chocolate should feel neutral rather than warm before entering the buttercream, or it can soften the butter and create a loose frosting.
- Use a warm knife, not brute force: Briefly heat and thoroughly dry the blade before each cut so it passes through crisp toffee pieces without compressing the cake.



