Table of Contents
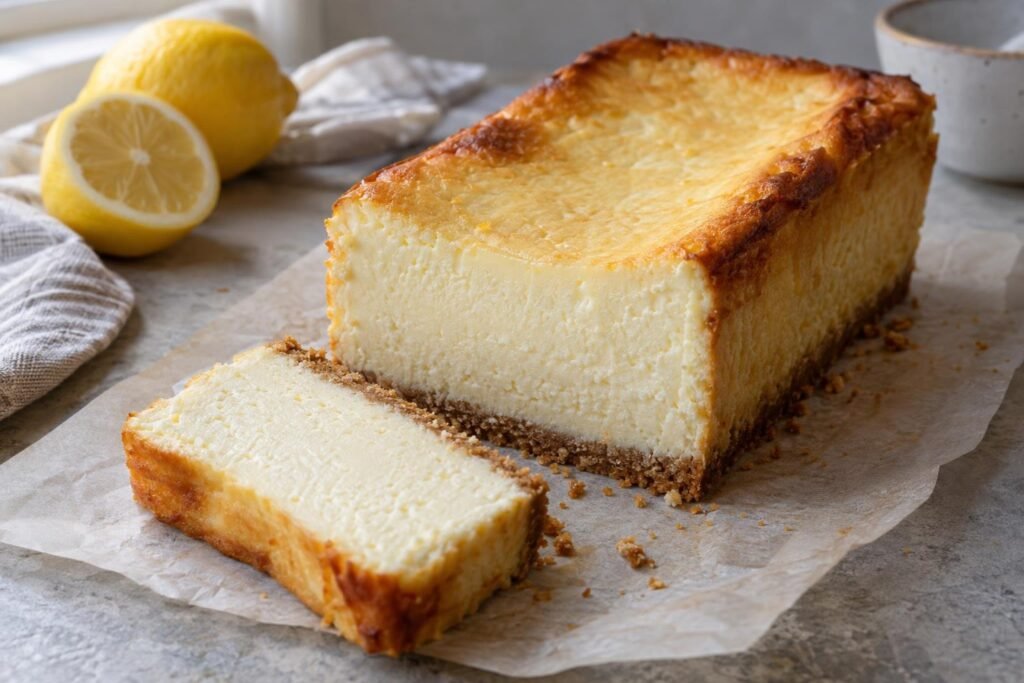
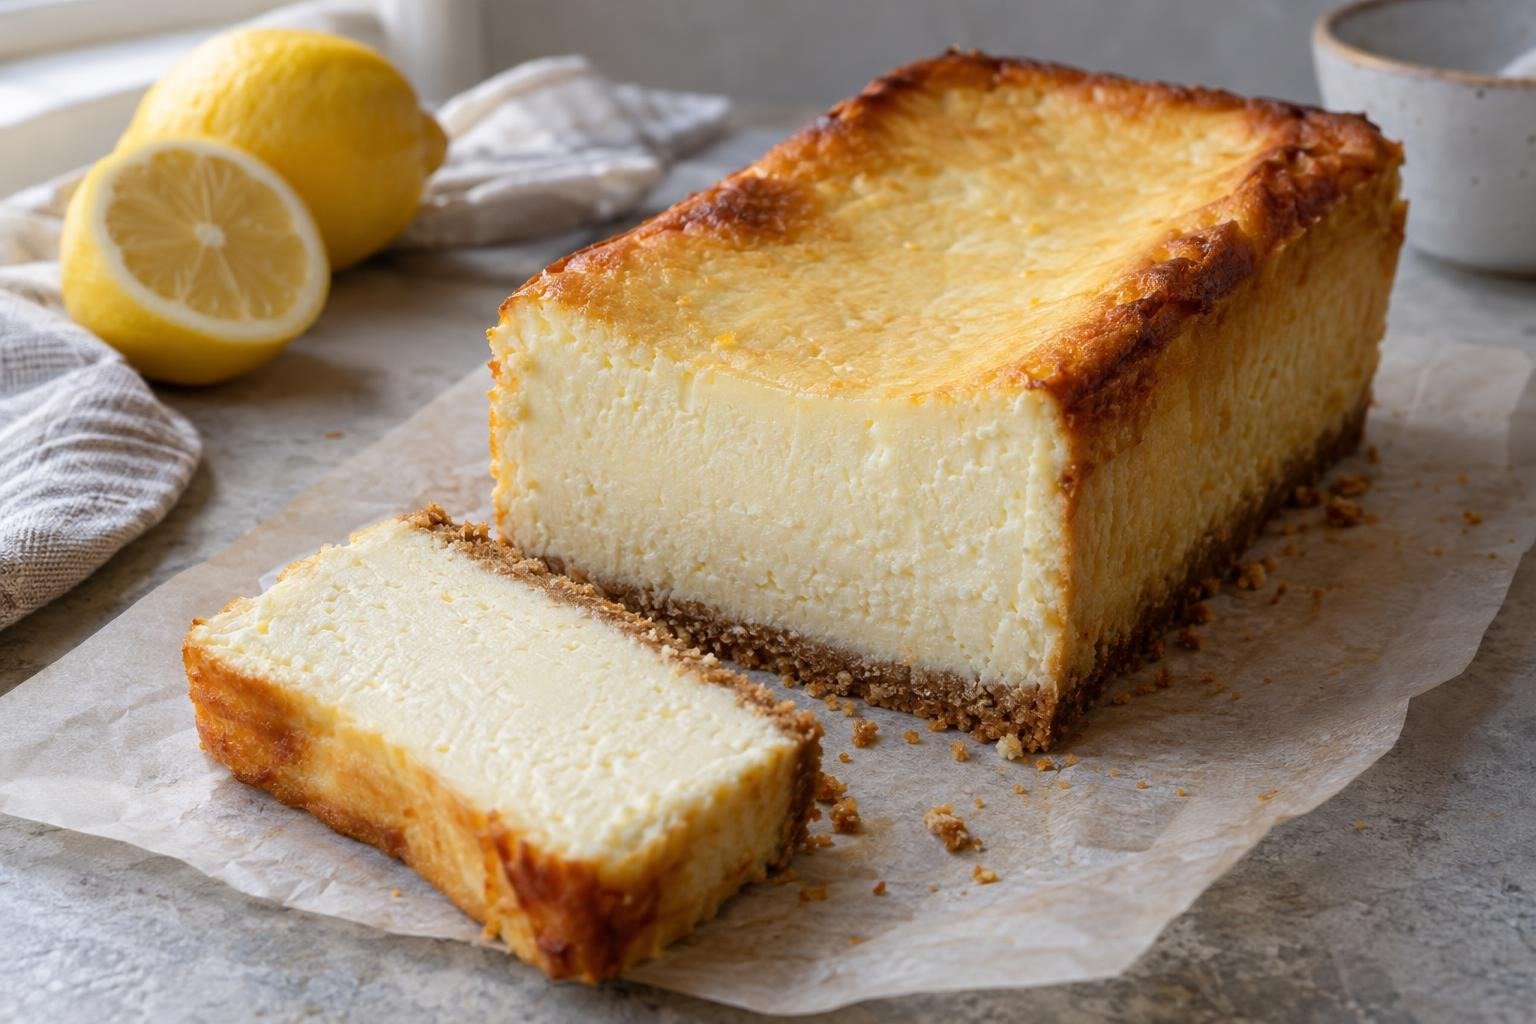
A buttery graham crust gives way to a dense, satin-smooth filling scented with vanilla and fresh lemon in this small-batch cheesecake in a loaf pan. The citrus keeps the rich cream cheese flavor bright rather than sharply lemony, while the narrow loaf shape produces tidy slices with an appealing balance of crust and filling.
I keep the cream cheese, sour cream, and eggs near 70°F so they combine without stubborn lumps, then mix at low speed to limit incorporated air. A gentle water bath and gradual cooling protect the filling from abrupt temperature changes. Look for set edges and a center that wobbles as one piece, not a center that ripples or looks wet. That distinction is the key to creamy cheesecake rather than underbaked filling.
What Makes this Cheesecake So Ridiculously Good
- Two full packages of cream cheese provide enough fat and milk solids for a rich filling that sets into six substantial slices without requiring a round springform pan.
- Cornstarch binds a small amount of free moisture and reinforces the egg structure, helping the narrow cheesecake slice cleanly after a full chill.
- Low-speed mixing limits large air bubbles that can expand in the oven, distort the surface, and contribute to cracking during cooling.
- Fresh lemon zest perfumes the filling through its aromatic oils, while a small amount of juice balances the sugar without making the cheesecake loose or aggressively tart.
- The hot-water bath moderates heat around the metal loaf pan, and the staged cooling period allows the egg and dairy structure to settle gradually.
Ingredient Notes for Small-Batch Cheesecake in a Loaf Pan with a Smooth Filling
- Graham cracker crumbs: Finely ground crumbs pack into a cohesive base and leave fewer loose pockets. Crush whole crackers until the texture resembles coarse sand, not large flakes.
- Unsalted butter: Melted butter coats the crumbs and firms when chilled. Unsalted butter lets the measured salt control the seasoning of the crust and filling.
- Full-fat brick cream cheese: Use firm blocks rather than whipped or tub-style cream cheese, which contains a different balance of moisture and air. Bring it to 68 to 72°F so it smooths without prolonged beating.
- Granulated sugar: Sugar sweetens the filling and softens its protein structure. Scraping the bowl after it dissolves into the cream cheese prevents dense, unsweetened patches near the bottom.
- Cornstarch: This small amount manages moisture and adds stability without turning the filling bouncy. Sifting or whisking it with the sugar helps prevent starch lumps.
- Sour cream: Full-fat sour cream contributes acidity, moisture, and a softer mouthfeel. Let it lose its refrigerator chill before mixing so it blends evenly into the cream cheese.
- Eggs: Eggs set the cheesecake as they heat. Room-temperature eggs disperse more readily, and adding them one at a time reduces the amount of mixing needed.
- Lemon and vanilla: Finely grate only the yellow outer zest because the white pith tastes bitter. Vanilla rounds out the dairy flavor while lemon juice and zest provide a fresh, balanced finish.
Expert Baking Tips
- Check the cream cheese temperature before mixing. Cream cheese much colder than 68°F tends to form small lumps, while overly warm cream cheese can become greasy and produce a softer batter.
- Keep the mixer on low once the sugar is added. A silky batter comes from properly softened ingredients and thorough scraping, not from whipping extra air into the filling.
- Use hot water for the bath, but avoid vigorously boiling water that is difficult to pour safely. Pour near one corner of the roasting pan so water does not splash into the cheesecake.
- Judge doneness by the movement at the center rather than waiting for the entire surface to become rigid. A cohesive wobble will finish setting during gradual cooling, but a loose wave indicates unbaked filling.
- Plan around the full six-hour chill. Cutting while the center is even slightly warm compresses the filling, drags crumbs upward, and makes an accurately baked cheesecake appear underdone.
Ingredients for Small-Batch Cheesecake In A Loaf Pan
- 90 g finely ground graham cracker crumbs (about 3/4 cup)
- 25 g granulated sugar (2 tablespoons, for the crust)
- 1/8 teaspoon fine salt (for the crust)
- 35 g unsalted butter (2 1/2 tablespoons, melted)
- 454 g full-fat brick cream cheese (two 8-ounce packages, softened to 68 to 72°F)
- 100 g granulated sugar (1/2 cup, for the filling)
- 8 g cornstarch (1 tablespoon)
- 1/8 teaspoon fine salt (for the filling)
- 60 g full-fat sour cream (1/4 cup, brought to room temperature)
- 2 large eggs (brought to room temperature)
- 1 teaspoon pure vanilla extract
- 1 teaspoon finely grated lemon zest (zest only the yellow outer peel)
- 1 tablespoon fresh lemon juice (strained to remove seeds and pulp)
How to Make Small-Batch Cheesecake In A Loaf Pan
- STEP 1). Prepare the oven, pan, and water bath Position a rack in the center of the oven and heat it to 325°F. Lightly grease an 8.5 x 4.5-inch metal loaf pan, then line the bottom and long sides with parchment, leaving enough overhang to lift the chilled cheesecake. Wrap the outside in a double layer of foil as splash protection. Set the loaf pan inside a 9 x 13-inch roasting pan, and heat a kettle of water for the bath.
- STEP 2). Mix and prebake the graham crust Combine the graham cracker crumbs, 25 g sugar, and 1/8 teaspoon salt in a medium bowl. Stir in the melted butter until every crumb looks evenly moistened and the mixture holds together when squeezed. Press it firmly and evenly over the loaf pan bottom using a flat-bottomed cup. Bake for 10 minutes, until fragrant and slightly darker at the edges, then cool for 15 minutes while keeping the oven at 325°F.
- STEP 3). Smooth the cream cheese base at low speed Place the softened cream cheese in a mixing bowl and beat with a paddle or hand mixer on low speed for about 60 seconds, just until smooth. Whisk the 100 g sugar, cornstarch, and 1/8 teaspoon salt together, then add them gradually. Continue mixing on low for 1 to 2 minutes, stopping twice to scrape the bowl and beater. The base should look creamy and uniform, without visible cream cheese pebbles or a whipped, airy texture.
- STEP 4). Add the sour cream, eggs, and flavorings Mix the room-temperature sour cream into the cream cheese base on low speed until no white streaks remain. Add the eggs one at a time, mixing only until each yolk disappears before adding the next. Fold in the vanilla, lemon zest, and strained lemon juice with a silicone spatula, scraping across the bowl bottom. The finished batter should flow in a thick ribbon and look glossy, with minimal bubbles and no liquid pooling around the edges.
- STEP 5). Fill the pan and bake gently in hot water Pour the filling over the cooled crust and smooth the surface. Tap the loaf pan lightly on the counter two or three times, then pop any large surface bubbles with a toothpick. Place it in the roasting pan and carefully add hot water until it reaches halfway up the loaf pan sides. Bake at 325°F for 42 to 50 minutes. The edges should look set, while a roughly 2-inch center area wobbles cohesively rather than rippling like wet batter.
- STEP 6). Cool the cheesecake in controlled stages Turn off the oven, prop the door open about 2 inches with a wooden spoon, and leave the cheesecake in the water bath for 60 minutes. Carefully remove the roasting pan, lift out the loaf pan, and discard the foil if wet. Set the cheesecake on a wire rack for another 60 minutes, until it is near room temperature. Do not leave it out longer than 2 hours total after baking, since the dairy and egg filling must be refrigerated promptly.
- STEP 7). Chill, lift, and cut clean slices Cover the loaf pan without touching the surface and refrigerate the cheesecake for at least 6 hours, preferably overnight, until completely cold and firm. Run a thin knife along the unlined ends, then use the parchment overhang to lift the cheesecake onto a cutting board. If it resists, warm the outside of the pan briefly with a towel dipped in warm water. Cut six slices with a thin knife, wiping the blade clean between every cut for smooth edges.
Storage and Freezing
- Refrigerating: Keep the cheesecake covered in the loaf pan or in an airtight container for up to 4 days. Place parchment between cut surfaces and the container if needed to prevent sticking.
- Freezing: Freeze fully chilled individual slices on a parchment-lined tray until firm, then wrap each slice tightly and place in an airtight freezer container for up to 1 month.
- Thawing: Unwrap frozen slices and thaw them in a covered container in the refrigerator overnight. Refrigerated thawing limits condensation and preserves the creamy texture.
- Serving: Let refrigerated slices stand at room temperature for 10 to 15 minutes for a softer mouthfeel. Do not leave cheesecake at room temperature for more than 2 hours.
Frequently Asked Questions
How do you tell when small-batch cheesecake in a loaf pan is done?
The outer 1 to 1 1/2 inches should appear set and slightly puffed, while the center moves as one soft section when the roasting pan is nudged. It should not slosh, ripple like liquid, or show a visibly wet center.
Avoid waiting for the middle to become completely rigid in the oven. Residual heat continues setting the filling during the one-hour oven cool, and the cheesecake firms fully after refrigeration.
How long should small-batch cheesecake in a loaf pan chill before slicing?
A minimum six-hour refrigerator chill is necessary after the two-stage cooling period. Overnight chilling is even more convenient because the cream cheese fat becomes fully firm and the egg-starch structure settles before the cheesecake is lifted from the pan.
Slicing early causes the center to compress and cling to the knife, even when the cheesecake was baked correctly. A properly chilled slice should hold a clean edge without feeling rubbery.
Why did my loaf-pan cheesecake crack while cooling?
Cracks often result from excess air in the batter, overbaking, or a sudden temperature change. Mixing on high speed creates bubbles that expand, while baking until the center is completely firm removes too much moisture and tightens the egg proteins.
Use softened ingredients, mix on low, and stop the oven when the center still has a cohesive wobble. Cooling first in the switched-off oven reduces the sharp contraction that can split the surface.
What loaf pan size works for this small-batch cheesecake recipe?
An 8.5 x 4.5-inch metal loaf pan provides the intended filling depth and baking schedule. A light-colored pan also transfers heat less aggressively than a very dark pan, helping the edges set without becoming dry before the center is ready.
A 9 x 5-inch pan spreads the batter into a shallower layer and can finish sooner, so the stated 42 to 50-minute range would be less reliable. Check the wobble early if the exact pan is unavailable.
Can I bake this cheesecake without a water bath?
Direct baking exposes the loaf pan edges to stronger heat and increases the chance of a dry perimeter, puffed surface, or crack during cooling. The water bath provides a gentler, more even environment for this compact but relatively deep filling.
For the texture and timing specified here, use the water bath and protect the pan from splashes with foil. A standard solid loaf pan cannot leak through a removable base, so careful pouring is the main precaution.
More Ridiculously Delicious Cheesecakes
- Classic New York Cheesecake with a Dense, Creamy Filling
- Strawberry Cheesecake with a Creamy Filling
- Japanese Cotton Cheesecake with a Light, Airy Texture
- Salted Caramel Cheesecake with Creamy Filling
- Basque Burnt Cheesecake with a Creamy Center
Small-Batch Cheesecake in a Loaf Pan with a Smooth Filling
Ingredients
Equipment
Method
- Position a rack in the center of the oven and heat it to 325°F. Lightly grease an 8.5 x 4.5-inch metal loaf pan, then line the bottom and long sides with parchment, leaving enough overhang to lift the chilled cheesecake. Wrap the outside in a double layer of foil as splash protection. Set the loaf pan inside a 9 x 13-inch roasting pan, and heat a kettle of water for the bath.
- Combine the graham cracker crumbs, 25 g sugar, and 1/8 teaspoon salt in a medium bowl. Stir in the melted butter until every crumb looks evenly moistened and the mixture holds together when squeezed. Press it firmly and evenly over the loaf pan bottom using a flat-bottomed cup. Bake for 10 minutes, until fragrant and slightly darker at the edges, then cool for 15 minutes while keeping the oven at 325°F.
- Place the softened cream cheese in a mixing bowl and beat with a paddle or hand mixer on low speed for about 60 seconds, just until smooth. Whisk the 100 g sugar, cornstarch, and 1/8 teaspoon salt together, then add them gradually. Continue mixing on low for 1 to 2 minutes, stopping twice to scrape the bowl and beater. The base should look creamy and uniform, without visible cream cheese pebbles or a whipped, airy texture.
- Mix the room-temperature sour cream into the cream cheese base on low speed until no white streaks remain. Add the eggs one at a time, mixing only until each yolk disappears before adding the next. Fold in the vanilla, lemon zest, and strained lemon juice with a silicone spatula, scraping across the bowl bottom. The finished batter should flow in a thick ribbon and look glossy, with minimal bubbles and no liquid pooling around the edges.
- Pour the filling over the cooled crust and smooth the surface. Tap the loaf pan lightly on the counter two or three times, then pop any large surface bubbles with a toothpick. Place it in the roasting pan and carefully add hot water until it reaches halfway up the loaf pan sides. Bake at 325°F for 42 to 50 minutes. The edges should look set, while a roughly 2-inch center area wobbles cohesively rather than rippling like wet batter.
- Turn off the oven, prop the door open about 2 inches with a wooden spoon, and leave the cheesecake in the water bath for 60 minutes. Carefully remove the roasting pan, lift out the loaf pan, and discard the foil if wet. Set the cheesecake on a wire rack for another 60 minutes, until it is near room temperature. Do not leave it out longer than 2 hours total after baking, since the dairy and egg filling must be refrigerated promptly.
- Cover the loaf pan without touching the surface and refrigerate the cheesecake for at least 6 hours, preferably overnight, until completely cold and firm. Run a thin knife along the unlined ends, then use the parchment overhang to lift the cheesecake onto a cutting board. If it resists, warm the outside of the pan briefly with a towel dipped in warm water. Cut six slices with a thin knife, wiping the blade clean between every cut for smooth edges.
Notes
- Check the cream cheese temperature before mixing. Cream cheese much colder than 68°F tends to form small lumps, while overly warm cream cheese can become greasy and produce a softer batter.
- Keep the mixer on low once the sugar is added. A silky batter comes from properly softened ingredients and thorough scraping, not from whipping extra air into the filling.
- Use hot water for the bath, but avoid vigorously boiling water that is difficult to pour safely. Pour near one corner of the roasting pan so water does not splash into the cheesecake.
- Judge doneness by the movement at the center rather than waiting for the entire surface to become rigid. A cohesive wobble will finish setting during gradual cooling, but a loose wave indicates unbaked filling.
- Plan around the full six-hour chill. Cutting while the center is even slightly warm compresses the filling, drags crumbs upward, and makes an accurately baked cheesecake appear underdone.