
Table of Contents
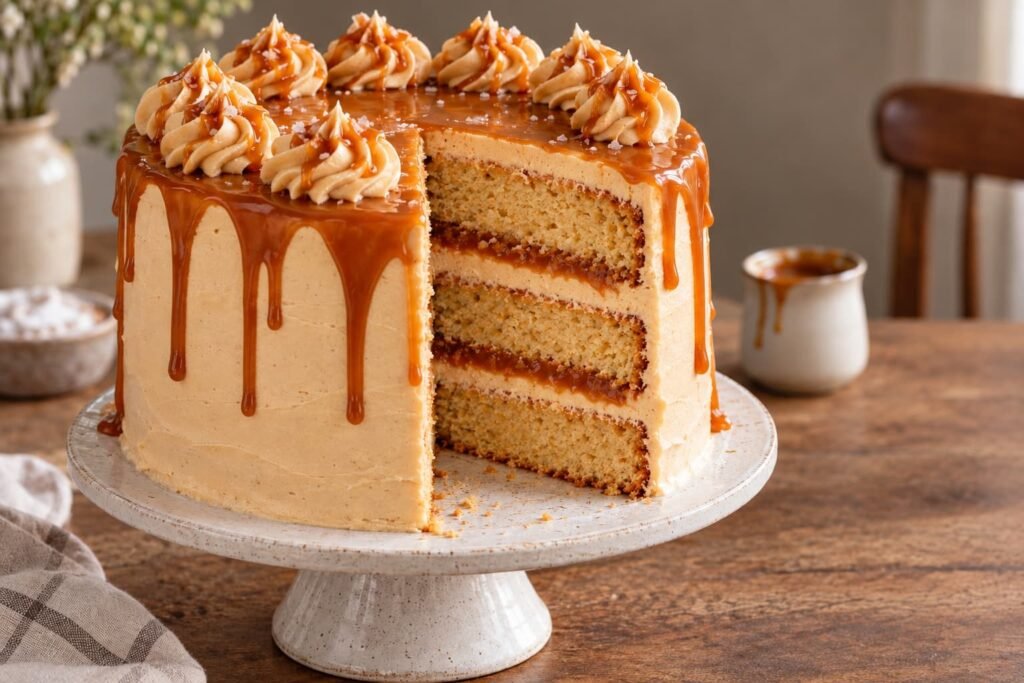
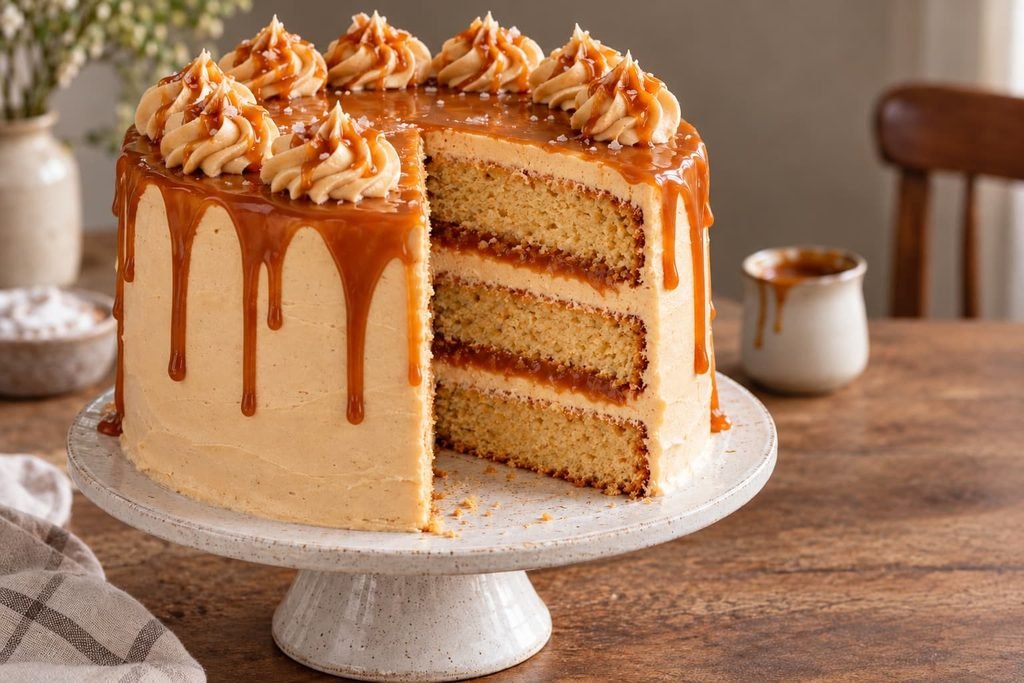
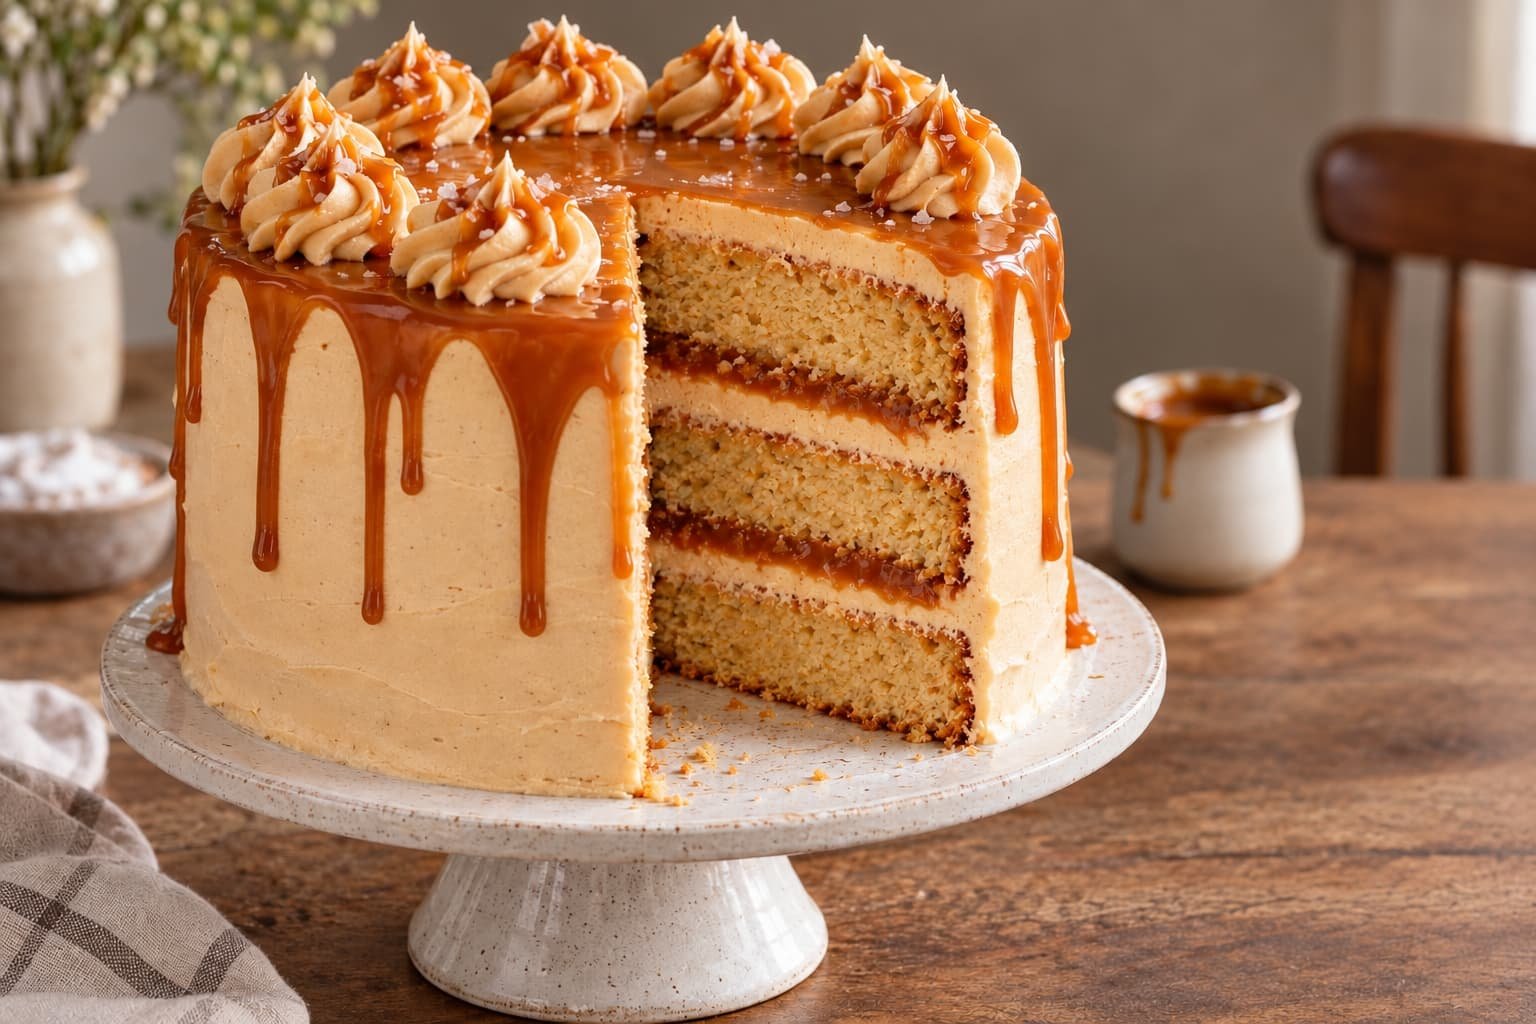
Buttery caramel, a soft brown sugar crumb, and a clean pop of sea salt give every slice of this salted caramel birthday cake recipe a proper bakery-style balance. Three golden vanilla cake layers hold glossy caramel filling inside neat buttercream dams, while caramel-enriched frosting adds flavor without making the entire cake sticky or excessively sweet.
I use cake flour for a fine, tender crumb, but enough egg and sour cream remain in the formula to support the filling. The caramel must cool until thick and spoonable before it touches the cake, and the buttercream should hold a curved peak without looking greasy. A chilled crumb coat, level layers, and a controlled drip are the practical details that keep this tall birthday cake stable and sharp.
Why This Salted Caramel Birthday Cake Recipe Frickin’ Works
- Brown sugar supplies molasses flavor and moisture, giving the vanilla cake a caramel-friendly profile instead of relying on the filling for all the flavor.
- Cake flour limits gluten development, while eggs and sour cream provide enough structure and protein to support three filled layers.
- Cooking one caramel batch creates consistent flavor across the filling, frosting, and decorative drip without requiring multiple sauces.
- A buttercream dam contains the softer caramel filling so it does not squeeze out when the upper layers are added.
- Chilling the crumb-coated cake firms the butter and caramel, creating a stable surface for smooth frosting, controlled drips, and clean slices.
Ingredient Notes for Bakery-Style Salted Caramel Birthday Cake
- Cake flour: Its lower protein content produces a finer, more tender crumb than all-purpose flour. Weigh it rather than packing it into a measuring cup, and sift only if it has visible lumps.
- Butter: Room-temperature butter should be pliable but still cool, ideally around 18 to 21°C. Overly warm butter cannot retain the air needed for an even, bakery-style crumb or stable frosting.
- Brown and granulated sugars: Brown sugar contributes moisture and molasses depth, while granulated sugar helps the creamed butter hold fine air bubbles. Using both keeps the cake tender without making it heavy.
- Sour cream and whole milk: Sour cream supplies fat, acidity, and body; milk loosens the batter so it spreads evenly. Bring both to room temperature to reduce the risk of a split butter emulsion.
- Heavy cream: Warm cream blends into cooked sugar more smoothly and limits the violent temperature change that makes caramel seize. It will still bubble aggressively, so use a deep saucepan and pour carefully.
- Sea salt: Fine sea salt disperses evenly through the caramel and frosting. Flaky salt is less predictable by volume and is better reserved for a very light garnish, if desired.
- Confectioners’ sugar: Sifting removes compacted lumps that would otherwise show in the finished buttercream. Add it gradually so the frosting remains smooth and does not coat the kitchen in a sugar cloud.
My Best Baking Tips
- Stop the caramel at deep amber rather than pale gold. Pale caramel tastes mostly sweet, while very dark caramel can become bitter before the cream is added.
- If the butter and sugar mixture looks shiny instead of aerated, the butter is probably too warm. Chill the mixing bowl for 5 to 10 minutes, then continue beating until the mixture looks fluffy.
- Weigh the finished batter into the pans. Equal layers bake at the same rate and make a tall cake substantially easier to level and decorate.
- Use fully cooled, thick caramel between the layers. Warm caramel softens the buttercream dam and can cause the cake layers to slide.
- For clean birthday slices, chill the assembled cake until stable, then let it soften briefly before serving. Wipe and rewarm the knife between cuts so caramel does not drag through the crumb.
Ingredients for Salted Caramel Birthday Cake
- 300 g granulated sugar, for the salted caramel (Keep separate from the sugar used in the cake.)
- 60 g water (For dissolving the caramel sugar.)
- 170 g heavy cream, for the salted caramel (Warm until steaming but not boiling.)
- 85 g unsalted butter, for the salted caramel (Cut into small pieces and keep at room temperature.)
- 5 g fine sea salt, for the salted caramel (About 3/4 teaspoon.)
- 360 g cake flour (Weighed accurately, about 3 cups when spooned and leveled.)
- 12 g baking powder (About 1 tablespoon.)
- 4 g fine sea salt, for the cake (About 3/4 teaspoon.)
- 226 g unsalted butter, for the cake (Softened to a cool room temperature, about 1 cup.)
- 250 g granulated sugar, for the cake (About 1 1/4 cups.)
- 180 g light brown sugar (Break up any firm lumps before mixing, about 3/4 cup packed.)
- 200 g large eggs (About 4 large eggs, at room temperature.)
- 15 g pure vanilla extract, for the cake (About 1 tablespoon.)
- 300 g whole milk (At room temperature, about 1 1/4 cups.)
- 120 g full-fat sour cream (At room temperature, about 1/2 cup.)
- 454 g unsalted butter, for the buttercream (Softened but still cool, about 2 cups.)
- 650 g confectioners’ sugar (Sifted, about 5 1/2 cups.)
- 180 g prepared salted caramel, for the buttercream (Measured from the cooled caramel made above.)
- 30 g heavy cream, for the buttercream (At room temperature, about 2 tablespoons.)
- 5 g pure vanilla extract, for the buttercream (About 1 teaspoon.)
- 1 g fine sea salt, for the buttercream (About 1/4 teaspoon; adjust only after tasting the finished frosting.)
How to Make Salted Caramel Birthday Cake
- STEP 1). Cook and cool the salted caramel Place the 300 g granulated sugar and water in a clean, heavy 3-quart saucepan. Cook over medium heat without stirring, swirling the pan only after the syrup begins coloring, until it reaches a deep amber color, about 8 to 12 minutes or 170 to 175°C. Remove from the heat. Slowly whisk in the warm cream, protecting your hands from the vigorous steam, then whisk in the 85 g butter and 5 g salt. Transfer to a heatproof bowl and cool until thick, glossy, and completely room temperature.
- STEP 2). Prepare the pans and oven Set an oven rack in the center and heat the oven to 175°C. Grease three 8-inch round cake pans, line the bottoms with parchment rounds, then lightly grease the parchment. Leave the pan sides mostly free of excess grease so the batter can climb evenly. Confirm that the milk, sour cream, eggs, and cake butter are at room temperature. Set the prepared pans on the counter and have a digital scale ready so the finished batter can be divided evenly.
- STEP 3). Combine the dry and liquid mixtures Whisk the cake flour, baking powder, and 4 g salt in a medium bowl for at least 30 seconds, breaking up any pockets of leavener. In a separate jug, whisk the whole milk and sour cream until smooth and pourable. Keeping the dry and liquid mixtures separate at this stage makes the final additions controlled and limits unnecessary gluten development. Scrape the bottom of the sour cream mixture because dense streaks tend to settle there.
- STEP 4). Cream the butter, sugars, eggs, and vanilla Using a stand mixer fitted with the paddle, beat the 226 g cake butter, 250 g granulated sugar, and brown sugar on medium speed for 3 to 4 minutes. Stop and scrape the bowl and paddle halfway through. The mixture should look paler, slightly increased in volume, and fluffy rather than greasy. Add the eggs one at a time on medium-low speed, mixing until each disappears before adding the next. Mix in the 15 g vanilla, then scrape the bowl thoroughly.
- STEP 5). Finish the cake batter Run the mixer on low and add one-third of the flour mixture, followed by half of the milk mixture. Repeat, then finish with the remaining flour. Mix only until most flour streaks disappear, about 15 seconds after the final addition. Remove the bowl and fold from the bottom with a flexible spatula until the batter is uniform. It should be thick, smooth, and scoopable, with no dry flour pockets or curdled-looking liquid around the edges.
- STEP 6). Divide and bake the cake layers Divide the batter evenly among the prepared pans, using the scale for layers of equal height, and smooth each surface with a small offset spatula. Bake all three pans on the center rack for 24 to 29 minutes, rotating their positions after 18 minutes only if the oven browns unevenly. The cakes are done when the centers spring back lightly, the edges begin pulling from the pans, and a tester shows moist crumbs but no wet batter.
- STEP 7). Cool and level the layers Place the pans on wire racks and cool for 15 minutes. Run a thin offset spatula around each edge, invert the cakes onto the racks, remove the parchment, and turn them upright. Cool completely for about 90 minutes before trimming or wrapping; residual warmth will melt the filling. If the tops are domed, use a long serrated knife to remove only the raised portion. For easier assembly, chill the cooled layers for 20 to 30 minutes until firm but not frozen.
- STEP 8). Whip the salted caramel buttercream Beat the 454 g butter with the paddle on medium speed for 3 minutes, scraping once, until creamy and slightly lighter. Reduce the mixer to low and add the sifted confectioners’ sugar in four additions. Add 180 g completely cooled caramel, the 30 g cream, 5 g vanilla, and 1 g salt, then beat on medium for 2 minutes. Finish on low for 1 minute to reduce large air pockets. The frosting should hold a curved peak and spread without slumping.
- STEP 9). Fill and crumb-coat the cake Place one cake layer on an 8-inch board or serving plate. Pipe a buttercream ring about 2 cm high around the edge, then spread 120 g cooled caramel inside the dam without covering it. Add the second layer and repeat with another 120 g caramel. Position the final layer cut-side down and check that the sides are vertical. Spread a thin buttercream coat over the top and sides, trapping loose crumbs, then refrigerate the cake for 30 minutes until the coating feels firm.
- STEP 10). Frost, decorate, and set before slicing Cover the chilled cake with the remaining buttercream, smoothing the sides with a bench scraper and the top with an offset spatula. Chill for 20 minutes. Gently warm the remaining caramel just until it flows slowly from a spoon, keeping it below body temperature so it will not melt the frosting. Test one drip on the back, then add drips and a thin layer on top. Pipe buttercream swirls around the rim and let the cake stand for 30 minutes before cutting with a warm, dry knife.
Storage and Freezing
- Storage: Keep the assembled cake covered in the refrigerator for up to 4 days. Protect cut surfaces with parchment or plastic wrap so the exposed crumb does not dry out.
- Freezing: Freeze unfrosted cake layers, wrapped twice and placed in an airtight container, for up to 2 months. The fully decorated cake is not ideal for freezing because condensation can mark the caramel finish.
- Thawing: Thaw wrapped cake layers overnight in the refrigerator, then bring them to cool room temperature before unwrapping and assembling. This keeps condensation on the wrapping rather than the cake.
- Serving: Remove the finished cake from the refrigerator 45 to 60 minutes before serving. The buttercream and caramel should be soft enough to cut cleanly but not warm enough for the layers to shift.
Frequently Asked Questions
Why does salted caramel cake filling sometimes leak between the layers?
Leaking usually means the caramel was warm, the buttercream dam was too low, or too much filling was added. For this cake, cool the caramel until it is thick and spoonable, then keep each filling portion inside a sturdy ring of buttercream.
Chill the filled cake before applying the final frosting. If a layer begins sliding, insert a skewer through the center temporarily and refrigerate the cake until the butter and caramel firm up.
How do you keep a three-layer caramel cake from becoming dense?
Use room-temperature ingredients, cream the butter and sugars until visibly aerated, and stop mixing once the final flour streaks disappear. Cold ingredients can break the butter emulsion, while prolonged mixing after flour is added develops excess gluten.
Accurate flour measurement also matters. A scale prevents extra flour from being packed into the batter, and dividing the batter equally helps every layer finish baking before its edges become dry.
What consistency should homemade salted caramel have before cake assembly?
The cooled caramel should fall from a spoon in a thick ribbon and slowly settle back into itself. It needs to spread with gentle pressure but should not run across a flat plate or feel warm against your fingertip.
If it is too firm, warm it briefly over a bowl of hot water. If it is still fluid, allow more cooling time rather than thickening it with an ingredient that would alter its texture and flavor.
Can I make this salted caramel birthday cake in advance?
The caramel and cake layers may be prepared one day before assembly. Refrigerate the caramel in an airtight container, and wrap the completely cooled layers individually so they retain moisture and do not absorb refrigerator odors.
Assemble and decorate the cake up to one day before serving. Refrigerate it in a covered cake carrier, then bring it out 45 to 60 minutes before cutting so the buttercream softens and the caramel regains its creamy texture.
When should the caramel drip be added to a frosted birthday cake?
Add the drip only after the final buttercream coat has chilled for about 20 minutes. The cold surface slows the caramel, helping it stop partway down the cake instead of pooling around the base.
The caramel itself should flow slowly and feel no warmer than body temperature. Test one drip on the back of the cake first. If it races downward, cool the caramel longer before decorating the visible sides.
More Sweet Treats to Fall in Love With
- Cranberry Orange Upside-Down Cake with Bright Citrus and Caramel
- Salted Caramel Filling for Layer Cakes
- Pineapple Upside-Down Cake with Golden Caramelized Pineapple
- Brown Butter Plum Upside-Down Cake with Caramelized Plums
- Bakery-Style Peanut Butter Cup Birthday Cake Recipe
Bakery-Style Salted Caramel Birthday Cake Recipe
Ingredients
Equipment
Method
- Place the 300 g granulated sugar and water in a clean, heavy 3-quart saucepan. Cook over medium heat without stirring, swirling the pan only after the syrup begins coloring, until it reaches a deep amber color, about 8 to 12 minutes or 170 to 175°C. Remove from the heat. Slowly whisk in the warm cream, protecting your hands from the vigorous steam, then whisk in the 85 g butter and 5 g salt. Transfer to a heatproof bowl and cool until thick, glossy, and completely room temperature.
- Set an oven rack in the center and heat the oven to 175°C. Grease three 8-inch round cake pans, line the bottoms with parchment rounds, then lightly grease the parchment. Leave the pan sides mostly free of excess grease so the batter can climb evenly. Confirm that the milk, sour cream, eggs, and cake butter are at room temperature. Set the prepared pans on the counter and have a digital scale ready so the finished batter can be divided evenly.
- Whisk the cake flour, baking powder, and 4 g salt in a medium bowl for at least 30 seconds, breaking up any pockets of leavener. In a separate jug, whisk the whole milk and sour cream until smooth and pourable. Keeping the dry and liquid mixtures separate at this stage makes the final additions controlled and limits unnecessary gluten development. Scrape the bottom of the sour cream mixture because dense streaks tend to settle there.
- Using a stand mixer fitted with the paddle, beat the 226 g cake butter, 250 g granulated sugar, and brown sugar on medium speed for 3 to 4 minutes. Stop and scrape the bowl and paddle halfway through. The mixture should look paler, slightly increased in volume, and fluffy rather than greasy. Add the eggs one at a time on medium-low speed, mixing until each disappears before adding the next. Mix in the 15 g vanilla, then scrape the bowl thoroughly.
- Run the mixer on low and add one-third of the flour mixture, followed by half of the milk mixture. Repeat, then finish with the remaining flour. Mix only until most flour streaks disappear, about 15 seconds after the final addition. Remove the bowl and fold from the bottom with a flexible spatula until the batter is uniform. It should be thick, smooth, and scoopable, with no dry flour pockets or curdled-looking liquid around the edges.
- Divide the batter evenly among the prepared pans, using the scale for layers of equal height, and smooth each surface with a small offset spatula. Bake all three pans on the center rack for 24 to 29 minutes, rotating their positions after 18 minutes only if the oven browns unevenly. The cakes are done when the centers spring back lightly, the edges begin pulling from the pans, and a tester shows moist crumbs but no wet batter.
- Place the pans on wire racks and cool for 15 minutes. Run a thin offset spatula around each edge, invert the cakes onto the racks, remove the parchment, and turn them upright. Cool completely for about 90 minutes before trimming or wrapping; residual warmth will melt the filling. If the tops are domed, use a long serrated knife to remove only the raised portion. For easier assembly, chill the cooled layers for 20 to 30 minutes until firm but not frozen.
- Beat the 454 g butter with the paddle on medium speed for 3 minutes, scraping once, until creamy and slightly lighter. Reduce the mixer to low and add the sifted confectioners’ sugar in four additions. Add 180 g completely cooled caramel, the 30 g cream, 5 g vanilla, and 1 g salt, then beat on medium for 2 minutes. Finish on low for 1 minute to reduce large air pockets. The frosting should hold a curved peak and spread without slumping.
- Place one cake layer on an 8-inch board or serving plate. Pipe a buttercream ring about 2 cm high around the edge, then spread 120 g cooled caramel inside the dam without covering it. Add the second layer and repeat with another 120 g caramel. Position the final layer cut-side down and check that the sides are vertical. Spread a thin buttercream coat over the top and sides, trapping loose crumbs, then refrigerate the cake for 30 minutes until the coating feels firm.
- Cover the chilled cake with the remaining buttercream, smoothing the sides with a bench scraper and the top with an offset spatula. Chill for 20 minutes. Gently warm the remaining caramel just until it flows slowly from a spoon, keeping it below body temperature so it will not melt the frosting. Test one drip on the back, then add drips and a thin layer on top. Pipe buttercream swirls around the rim and let the cake stand for 30 minutes before cutting with a warm, dry knife.
Notes
- Stop the caramel at deep amber rather than pale gold. Pale caramel tastes mostly sweet, while very dark caramel can become bitter before the cream is added.
- If the butter and sugar mixture looks shiny instead of aerated, the butter is probably too warm. Chill the mixing bowl for 5 to 10 minutes, then continue beating until the mixture looks fluffy.
- Weigh the finished batter into the pans. Equal layers bake at the same rate and make a tall cake substantially easier to level and decorate.
- Use fully cooled, thick caramel between the layers. Warm caramel softens the buttercream dam and can cause the cake layers to slide.
- For clean birthday slices, chill the assembled cake until stable, then let it soften briefly before serving. Wipe and rewarm the knife between cuts so caramel does not drag through the crumb.



