Table of Contents
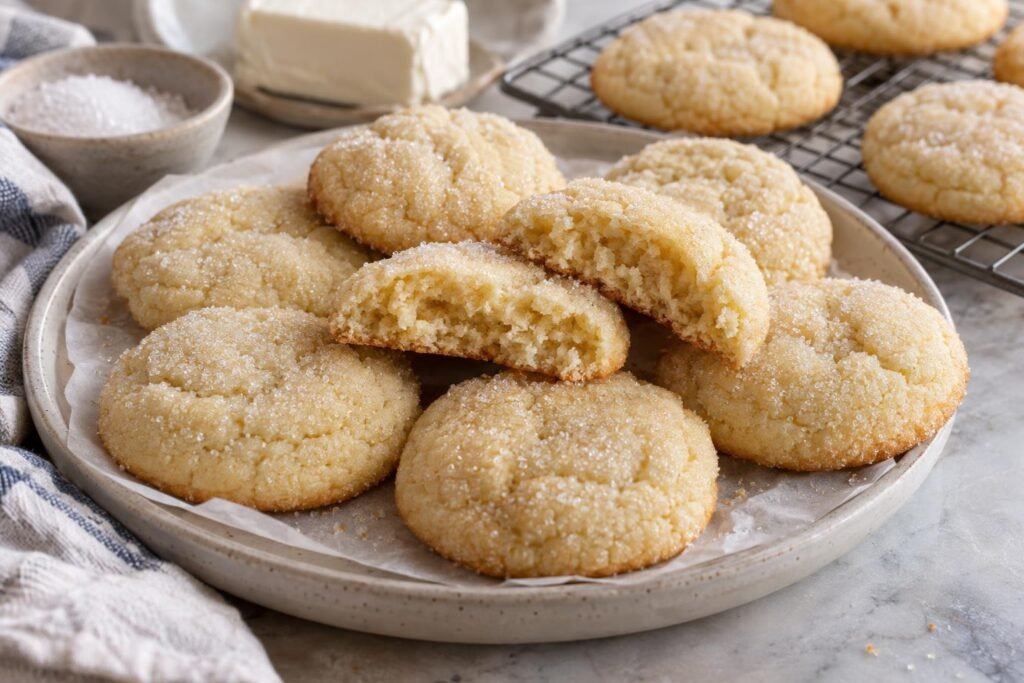
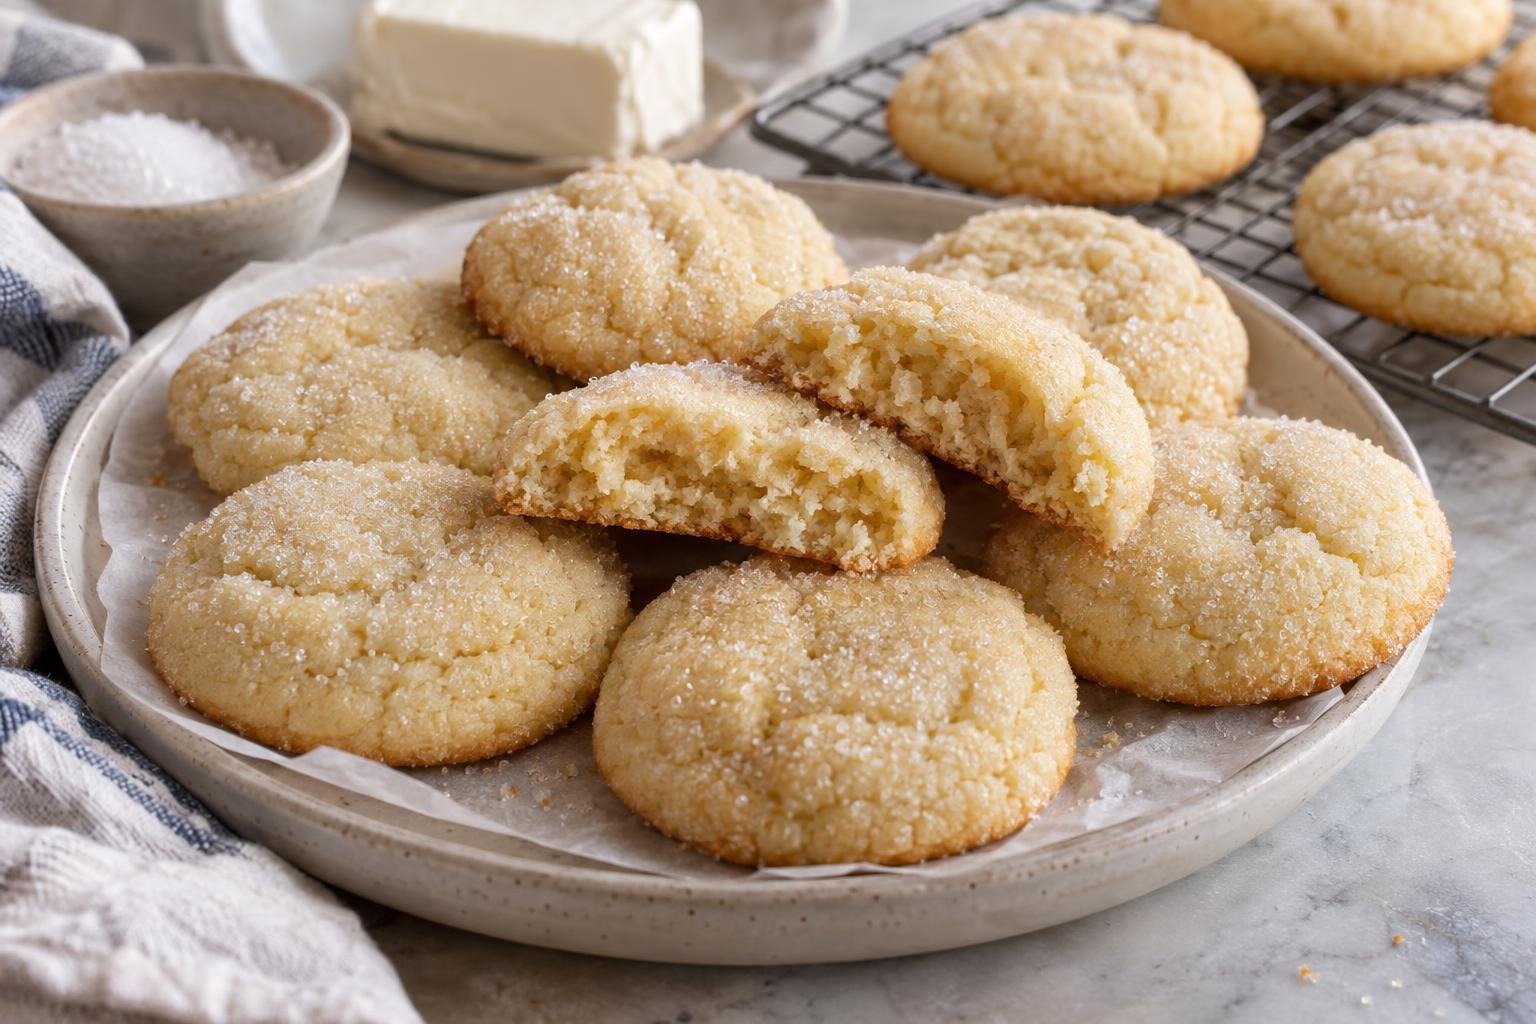
Buttery vanilla aroma, sparkling sugar crusts, and thick centers that stay tender and pleasantly chewy make these bakery-style soft sugar cookies feel properly substantial. Each large cookie has a pale golden base, softly set middle, and delicate edge crispness rather than the dry, crumbly texture sugar cookies sometimes develop. Vanilla leads the flavor, while a small amount of cream cheese adds subtle tang and richness without turning the dough into cheesecake.
I use softened butter for aeration, cool cream cheese for structure, and a combination of flour and cornstarch to limit gluten development. The dough should look thick and slightly tacky, not loose or greasy, before it is portioned and chilled. Rolling the cold portions in granulated sugar gives the exterior a fine crunch, while pulling the cookies from the oven when their centers are puffed and matte preserves the soft texture as they finish setting on the hot pan.
Why These Cookies Are Ridiculously Delicious
- Large 70-gram portions create the bakery-style contrast between softly chewy centers and lightly crisp edges.
- Cream cheese contributes moisture, milk solids, and gentle acidity, producing a tender cookie without making the dough cakey.
- Cornstarch dilutes the flour proteins, limiting gluten formation so the thick cookies stay soft rather than bready.
- A full two-hour chill firms the butter and hydrates the flour, which reduces excessive spread and improves the dough’s handling.
- Granulated sugar on the exterior forms a delicate sparkling crust while the moderate oven temperature allows the centers to bake through gently.
Ingredient Notes for Bakery-Style Soft Sugar Cookies with Soft, Chewy Centers
- All-purpose flour: Provides enough protein to support large cookie portions. Weigh it when possible because compacted flour can make the cookies dry and prevent normal spreading.
- Cornstarch: Reduces the effective protein concentration of the dry mixture, helping the centers remain tender. Whisk it thoroughly into the flour so no chalky pockets remain.
- Baking powder and baking soda: Baking powder adds controlled lift, while the smaller amount of baking soda encourages modest spreading and browning. Both should be fresh and evenly dispersed.
- Unsalted butter: Supplies flavor, tenderness, and aeration. It should be pliable but still cool, ideally 18 to 20°C, so it can hold air instead of becoming greasy during mixing.
- Full-fat brick cream cheese: Adds moisture, richness, and mild tang while helping the dough retain thickness. Use firm brick-style cream cheese rather than whipped or tub-style spread, which contains more water.
- Granulated and confectioners’ sugars: Granulated sugar supports spread and crisp edges. Confectioners’ sugar contains fine starch and dissolves readily, contributing to a softer, finer-textured center.
- Egg and egg yolk: The whole egg binds the dough and supplies water for hydration. The additional yolk increases fat and emulsifiers, supporting chewiness without adding as much water as another whole egg.
- Vanilla extract: Two teaspoons give these simple cookies a clearly defined vanilla flavor. Stir it into the eggs before adding the dry ingredients so it distributes evenly.
My Best Baking Tips
- Judge the butter by texture rather than elapsed counter time. It should accept a fingertip impression while still feeling cool; glossy or partially melted butter encourages greasy spreading.
- Shape each portion slightly taller than it is wide. This gives the chilled dough more time to set vertically before the butter fully melts in the oven.
- Bake one pan at a time on the center rack. Two-pan baking changes airflow and heat exposure, which can leave one tray pale while the other develops dark bottoms.
- Do not wait for deep golden tops. These cookies remain fairly pale, and pronounced browning usually means the centers have baked past their softest stage.
- If the first cookie spreads much faster than expected, refrigerate the remaining portions for another 20 minutes and confirm the oven has reached 350°F with a separate oven thermometer.
Ingredients for Bakery-Style Soft Sugar Cookies
- 300 g all-purpose flour (2 1/2 cups, spooned and leveled if not weighed)
- 16 g cornstarch (2 tablespoons)
- 4 g baking powder (1 teaspoon)
- 1 g baking soda (1/4 teaspoon)
- 3 g fine sea salt (1/2 teaspoon)
- 170 g unsalted butter (3/4 cup, softened to 18 to 20°C)
- 57 g full-fat brick cream cheese (2 ounces, cool but pliable)
- 200 g granulated sugar (1 cup)
- 30 g confectioners’ sugar (1/4 cup, sifted if lumpy)
- 1 large egg (about 50 g out of the shell, at room temperature)
- 1 large egg yolk (about 18 g, at room temperature)
- 10 ml pure vanilla extract (2 teaspoons)
- 50 g granulated sugar for coating (1/4 cup)
How to Make Bakery-Style Soft Sugar Cookies
- STEP 1). Prepare the pans and dry ingredients Line two 13 by 18-inch baking sheets with parchment paper. In a medium bowl, whisk the flour, cornstarch, baking powder, baking soda, and fine sea salt for about 30 seconds. Break apart any visible cornstarch lumps against the side of the bowl. Thorough distribution matters because these cookies are large, and a concentrated pocket of leavener can create uneven rising, coarse holes, or an unpleasant alkaline flavor.
- STEP 2). Cream the fats and sugars Fit a stand mixer with the paddle attachment. Beat the softened butter and cool, pliable cream cheese on medium speed for 30 seconds, scraping the bowl and paddle once. Add the granulated sugar and confectioners’ sugar, then mix on medium speed for 2 to 3 minutes. Stop when the mixture is smooth, slightly lighter in color, and creamy but not warm or shiny. Excessive aeration can make the cookies rise dramatically and then collapse.
- STEP 3). Incorporate the egg and vanilla Add the whole egg, egg yolk, and vanilla extract to the creamed mixture. Mix on medium-low speed for 30 to 45 seconds, stopping once to scrape the bottom and sides of the bowl. Continue only until the mixture looks uniform and emulsified, with no slippery streaks of egg remaining. If it appears slightly curdled, keep mixing briefly at low speed rather than increasing the speed, which could warm the butter.
- STEP 4). Mix, portion, and chill the dough Add the dry ingredients and mix on the lowest speed until most of the flour disappears, about 20 seconds. Finish folding with a silicone spatula, scraping the bowl’s base until no dry flour remains. The dough should be thick, soft, and slightly tacky. Divide it into 12 portions of about 70 grams each, shape them into tall balls, and arrange them on one lined pan. Cover and refrigerate for at least 2 hours or up to 48 hours.
- STEP 5). Heat the oven and coat the portions Set an oven rack in the center position and heat the oven to 350°F, allowing at least 20 minutes for stable heat. Place the coating sugar in a shallow bowl. Roll each chilled portion briefly between your palms to smooth the surface, then coat it completely in sugar. Arrange six portions on each prepared baking sheet with at least 3 inches between them. Keep the second pan refrigerated while the first pan bakes.
- STEP 6). Bake and cool the cookies Bake one sheet at a time for 10 to 12 minutes, rotating it from front to back after 7 minutes. The cookies are done when the edges look set, the tops are puffed and matte, and the centers no longer appear wet; the bottoms should be pale golden. An optional center temperature is about 190 to 195°F. Cool on the pan for 10 minutes, then transfer carefully to a wire rack and cool for at least 20 minutes before serving.
Storage and Freezing
- Storage: Keep completely cooled cookies in an airtight container at room temperature for up to 4 days. Place parchment between layers to protect the sugar crust.
- Freezing baked cookies: Freeze in a rigid airtight container for up to 2 months. Separate layers with parchment to prevent sticking and surface damage.
- Freezing dough: Freeze the uncoated, portioned dough on a lined tray until firm, then transfer it to a freezer-safe container for up to 2 months. Coat with sugar immediately before baking.
- Thawing and baking: Thaw frozen portions, covered, in the refrigerator overnight. Bake them cold according to the recipe, adding 1 to 2 minutes only if the centers still look wet at the end of the stated time.
- Serving: Let refrigerated or thawed cookies stand at room temperature for 20 to 30 minutes so the butter softens and the centers regain their tender texture.
Frequently Asked Questions
Why do bakery-style soft sugar cookies spread too much?
Overly warm butter, under-measured flour, insufficient chilling, or a cool oven can make the dough spread before its structure sets. The butter should be pliable but not glossy, and each portion needs the full two-hour chill.
If the first cookie becomes thin or develops greasy edges, chill the remaining dough longer and verify the oven temperature. Avoid adding extra flour unless the original flour was clearly under-measured, since too much will produce dry, compact cookies.
How do I know when thick sugar cookies are fully baked?
Look for set edges, puffed matte tops, and centers that no longer appear shiny or wet. The cookies should remain pale on top, with only light golden color underneath. Their centers will feel delicate when they first leave the oven.
Allowing them to stand on the hot baking sheet for 10 minutes finishes the setting process without aggressively drying them. For an additional cue, the center can register approximately 190 to 195°F on an instant-read thermometer.
What makes these sugar cookies soft and chewy instead of cakey?
The extra egg yolk contributes fat and emulsifiers without the additional water found in another whole egg. Cornstarch limits gluten development, while cream cheese supplies moisture and milk solids that support a tender bite.
Large portions also protect the centers from drying before the edges set. Mixing only until the flour disappears prevents excess gluten formation, and removing the cookies while they remain pale preserves their chewy middle.
Can I freeze dough for bakery-style soft sugar cookies?
Portioned dough freezes well before the exterior sugar coating is applied. Freeze the shaped portions on a parchment-lined tray until firm, then seal them in a freezer-safe container for up to two months.
Thaw the portions overnight in the refrigerator, roll them in granulated sugar, and bake while they are still cold. This method gives the flour time to rehydrate and produces more predictable spreading than baking the portions completely frozen.
Which ingredient substitutions work in this bakery-style soft sugar cookies recipe?
Full-fat brick cream cheese and real butter are structural ingredients here, so whipped cream cheese, tub-style spread, or liquid oil will change the moisture and spread. A cup-for-cup gluten-free blend may also absorb water differently and is not a direct structural match for the flour and cornstarch combination.
Pure vanilla extract can be replaced with an equal amount of imitation vanilla if needed, although the flavor will differ. Keep the egg, yolk, sugars, flour, and leaveners unchanged for the intended texture.
More Ridiculously Delicious Cookies
- Chewy Ginger Molasses Cookies with Warm Spices
- Chewy Cranberry White Chocolate Cookies with Soft, Chewy Centers
- Red Velvet Sandwich Cookies with Soft, Chewy Centers
- Lemon Sandwich Cookies with Buttercream Filling
- Soft and Chewy Peanut Butter Cookies with Crisp Edges
- Small-Batch Soft Sugar Cookies with Soft, Chewy Centers
Bakery-Style Soft Sugar Cookies with Soft, Chewy Centers
Ingredients
Equipment
Method
- Line two 13 by 18-inch baking sheets with parchment paper. In a medium bowl, whisk the flour, cornstarch, baking powder, baking soda, and fine sea salt for about 30 seconds. Break apart any visible cornstarch lumps against the side of the bowl. Thorough distribution matters because these cookies are large, and a concentrated pocket of leavener can create uneven rising, coarse holes, or an unpleasant alkaline flavor.
- Fit a stand mixer with the paddle attachment. Beat the softened butter and cool, pliable cream cheese on medium speed for 30 seconds, scraping the bowl and paddle once. Add the granulated sugar and confectioners’ sugar, then mix on medium speed for 2 to 3 minutes. Stop when the mixture is smooth, slightly lighter in color, and creamy but not warm or shiny. Excessive aeration can make the cookies rise dramatically and then collapse.
- Add the whole egg, egg yolk, and vanilla extract to the creamed mixture. Mix on medium-low speed for 30 to 45 seconds, stopping once to scrape the bottom and sides of the bowl. Continue only until the mixture looks uniform and emulsified, with no slippery streaks of egg remaining. If it appears slightly curdled, keep mixing briefly at low speed rather than increasing the speed, which could warm the butter.
- Add the dry ingredients and mix on the lowest speed until most of the flour disappears, about 20 seconds. Finish folding with a silicone spatula, scraping the bowl’s base until no dry flour remains. The dough should be thick, soft, and slightly tacky. Divide it into 12 portions of about 70 grams each, shape them into tall balls, and arrange them on one lined pan. Cover and refrigerate for at least 2 hours or up to 48 hours.
- Set an oven rack in the center position and heat the oven to 350°F, allowing at least 20 minutes for stable heat. Place the coating sugar in a shallow bowl. Roll each chilled portion briefly between your palms to smooth the surface, then coat it completely in sugar. Arrange six portions on each prepared baking sheet with at least 3 inches between them. Keep the second pan refrigerated while the first pan bakes.
- Bake one sheet at a time for 10 to 12 minutes, rotating it from front to back after 7 minutes. The cookies are done when the edges look set, the tops are puffed and matte, and the centers no longer appear wet; the bottoms should be pale golden. An optional center temperature is about 190 to 195°F. Cool on the pan for 10 minutes, then transfer carefully to a wire rack and cool for at least 20 minutes before serving.
Notes
- Judge the butter by texture rather than elapsed counter time. It should accept a fingertip impression while still feeling cool; glossy or partially melted butter encourages greasy spreading.
- Shape each portion slightly taller than it is wide. This gives the chilled dough more time to set vertically before the butter fully melts in the oven.
- Bake one pan at a time on the center rack. Two-pan baking changes airflow and heat exposure, which can leave one tray pale while the other develops dark bottoms.
- Do not wait for deep golden tops. These cookies remain fairly pale, and pronounced browning usually means the centers have baked past their softest stage.
- If the first cookie spreads much faster than expected, refrigerate the remaining portions for another 20 minutes and confirm the oven has reached 350°F with a separate oven thermometer.