

Table of Contents
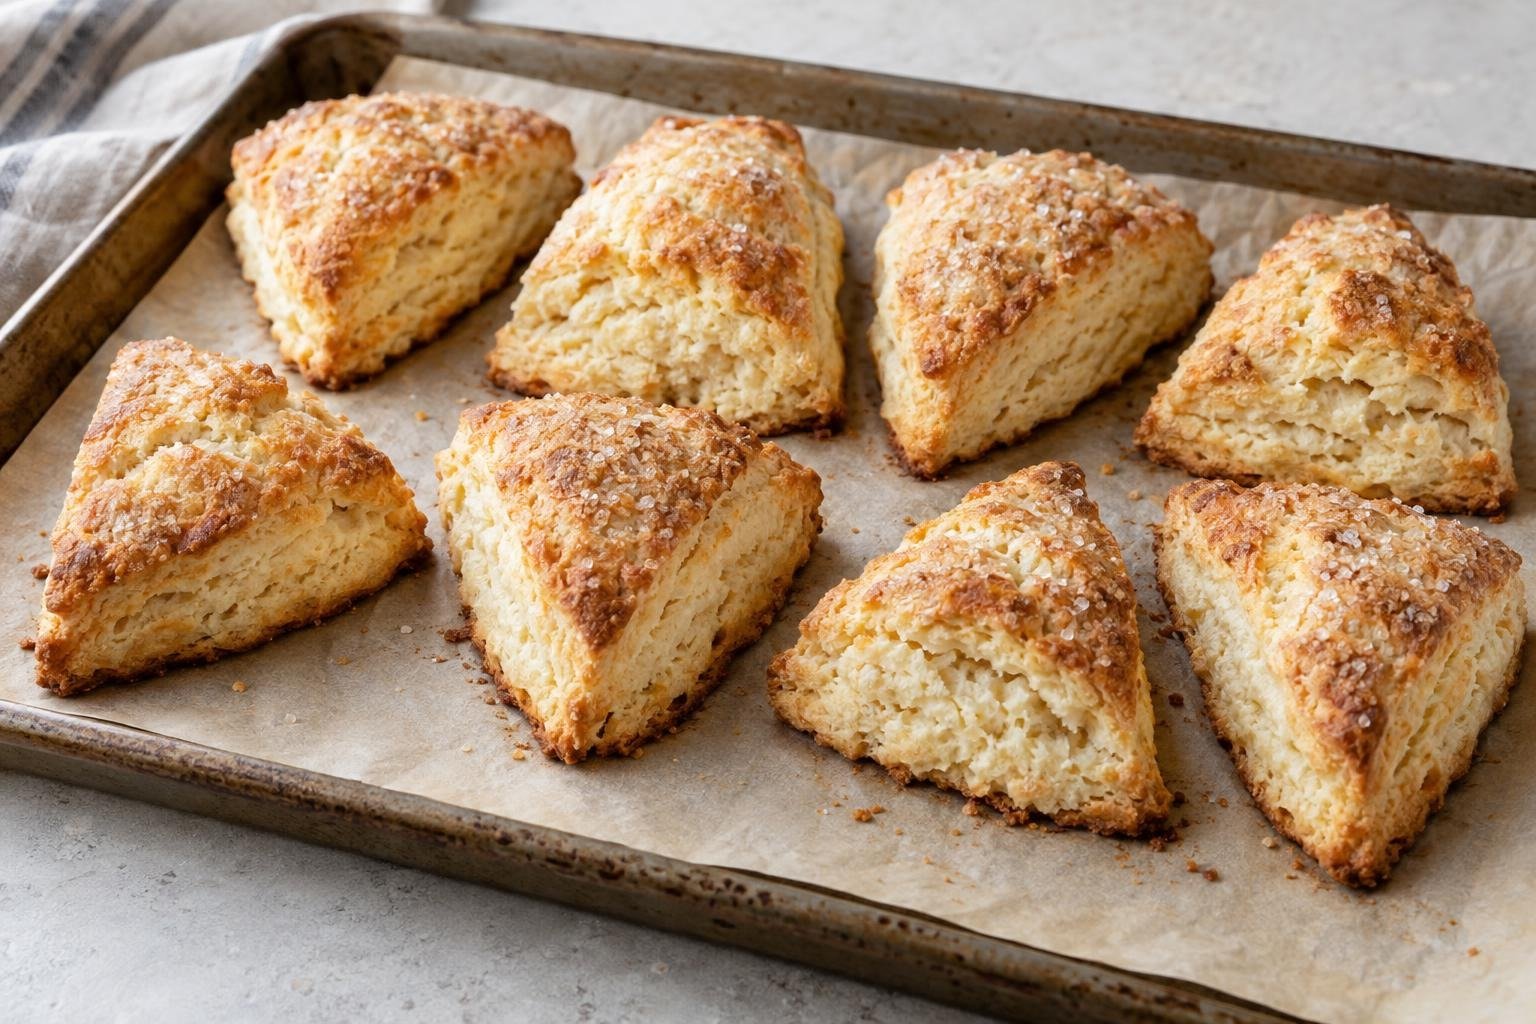
Crisp golden edges break into buttery layers, while the center stays soft, creamy, and just sweet enough. These flaky cream scones have a lightly caramelized sugar crust and a rich vanilla aroma, but they are not cakey or overly dense. The wedge shape gives each scone a tidy point, a craggy outer edge, and enough height to split open for butter or jam.
I keep the butter cold, mix the cream in only until the flour is hydrated, and fold the dough three times to build defined layers without developing too much gluten. The dough should feel cool and slightly tacky, not wet or elastic. A short chill helps the wedges retain their shape, while a thoroughly heated oven sets the edges before the butter and cream can cause spreading.
What Makes these Scones Deliciously Ridiculous
- Cold butter remains in distinct pieces throughout mixing, creating pockets of steam that separate the dough into flaky layers in the oven.
- Heavy cream supplies both fat and moisture, producing a tender interior without requiring eggs or additional liquid.
- Three simple letter folds align the butter pieces and dough into layers while limiting the handling that can make scones tough.
- Chilling the shaped wedges firms the butter and relaxes the dough, helping the scones rise upward instead of spreading outward.
- A 400°F oven quickly sets the exterior, browns the cream-brushed tops, and cooks the centers before the scones dry out.
Ingredient Notes for Flaky Cream Scones with a Tender Center
- All-purpose flour: Its moderate protein level gives the scones enough structure to rise while preserving a tender crumb. Weigh it when possible, since excess flour produces dry, crumbly dough.
- Granulated sugar: A restrained amount sweetens the dough and supports browning without turning the scones into cake. It is whisked into the flour for even distribution.
- Baking powder: This provides the primary lift. Use fresh double-acting baking powder and distribute it thoroughly so individual wedges rise evenly without bitter pockets.
- Unsalted butter: Cold butter creates the flaky structure. Cut it into small cubes and keep it refrigerated until needed; softened or melted butter will absorb into the flour and encourage spreading.
- Heavy cream: Cream hydrates the flour while adding enough fat for a tender center. Keep it cold and use cream containing about 35 percent milk fat rather than lower-fat milk, which would change both moisture and richness.
- Vanilla extract: Vanilla rounds out the dairy flavor without masking the butter. Stir it into the cream so it disperses without additional mixing.
- Coarse sugar: A small amount on top gives the cream-brushed crust a delicate crunch. Turbinado or another coarse baking sugar works because the larger crystals remain distinct during baking.
Baking Tips Worth Knowing
- Measure the flour by weight when possible. A small excess absorbs the limited cream quickly and can turn a tender center into a dry, crumbly one.
- If the butter softens while you cut it into the flour, refrigerate the entire bowl for 10 minutes before adding the cream. The butter should remain firm enough to see after mixing.
- Use a bowl scraper to gather dry patches rather than adding extra cream immediately. Gentle pressing usually hydrates the final flour without making the dough sticky and prone to spreading.
- Make each cut in one decisive downward motion and wipe the blade between cuts. Dragging through the dough seals and distorts the layered edges.
- Give the oven enough time to reach 400°F before loading the chilled wedges. A lukewarm oven melts the fat before the structure sets, which reduces height and causes wide, greasy scones.
Ingredients for Flaky Cream Scones
- 300 g all-purpose flour (about 2 1/2 cups, spooned and leveled if measured by volume)
- 67 g granulated sugar (about 1/3 cup)
- 14 g baking powder (1 tablespoon plus 1/2 teaspoon)
- 3 g fine sea salt (1/2 teaspoon)
- 113 g unsalted butter (1/2 cup, cold and cut into 1/2-inch cubes)
- 210 g cold heavy cream (about 7/8 cup, for the dough)
- 5 ml pure vanilla extract (1 teaspoon)
- 15 g heavy cream (1 tablespoon, for brushing)
- 12 g coarse sugar (about 1 tablespoon, for topping)
How to Make Flaky Cream Scones
- STEP 1). Combine the dry ingredients Line a large rimmed baking sheet with parchment paper. In a large mixing bowl, whisk the flour, granulated sugar, baking powder, and salt for about 30 seconds. Break up every visible lump of baking powder and scrape around the bottom of the bowl. Thorough distribution matters because the dough receives very little mixing after the cream is added, and concentrated pockets of leavener can create uneven rise or a bitter taste.
- STEP 2). Cut in the cold butter Add the cold butter cubes to the flour mixture. Use a pastry blender or two table knives to cut the butter into irregular pieces ranging from coarse crumbs to flattened pea-size bits, about 2 to 3 minutes. Stop while distinct butter pieces remain visible and the mixture still feels cool. Do not rub the butter completely into the flour, since those intact pieces release steam and create the flaky structure during baking.
- STEP 3). Add the cream and fold the dough Stir the 210 g cold heavy cream and vanilla together, then pour them evenly over the flour mixture. Use a flexible scraper to fold until shaggy clumps form and only a little loose flour remains, about 20 strokes. Turn the mixture onto a lightly floured surface, press it into a rough rectangle, and perform three letter folds, rotating the dough 90 degrees after each fold. Stop when it holds together; it should look layered and feel slightly tacky, not smooth or elastic.
- STEP 4). Shape, cut, and chill the wedges Pat the dough into a 7-inch round about 1 inch thick, using a bench scraper to neaten the edge without compressing it. Cut straight down through the round with a sharp knife or bench scraper to make 8 equal wedges; do not saw through the dough or twist the cutter. Arrange the wedges 2 inches apart on the prepared sheet and refrigerate for 20 minutes. Meanwhile, position a rack in the center of the oven and preheat it to 400°F so the oven is fully heated before baking.
- STEP 5). Finish, bake, and cool the scones Brush only the tops of the chilled wedges with the remaining 15 g heavy cream, keeping it off the cut sides so the layers can expand freely. Sprinkle evenly with coarse sugar. Bake on the center rack for 18 to 22 minutes, rotating the pan after 12 minutes, until the tops and bottom edges are golden and the centers look set rather than glossy or doughy. Transfer the pan to a rack for 5 minutes, then move the scones directly onto the rack and cool for at least 10 minutes before serving.
Storage and Freezing
- Room temperature: Store completely cooled scones in an airtight container for up to 2 days. Place a sheet of parchment between layers and keep them away from direct heat.
- Freezing baked scones: Freeze cooled scones in a single layer until firm, then transfer them to an airtight freezer container for up to 2 months.
- Freezing unbaked dough: Freeze the chilled wedges on the lined baking sheet until solid, then pack airtight for up to 1 month. Brush with cream and add sugar immediately before baking from frozen, allowing approximately 3 to 5 additional minutes.
- Thawing and serving: Thaw baked scones at room temperature in their wrapping. For a crisper exterior, warm them uncovered in a 325°F oven for 6 to 8 minutes and serve while warm, not piping hot.
Frequently Asked Questions
Why did my flaky cream scones spread instead of rising?
Warm butter, overly wet dough, or an oven that has not fully preheated can make the wedges spread before their structure sets. The shaped dough should feel cool and hold a clean edge when it goes into the oven.
Chill the wedges for the full 20 minutes and leave 2 inches between them. Also keep the cream measurement precise, since extra liquid softens the dough and weakens its shape.
How do I know when cream scones are fully baked?
Look for golden tops, noticeably browned bottom edges, and dry, set surfaces along the center cuts. The wedges should feel light but stable when lifted, with no glossy or compressed strip of raw dough near the base.
A moist crumb is appropriate, but a wet, paste-like center needs more time. Return the pan to the oven for 2 to 3 minutes, then check the thickest scone again.
What makes these scones flaky rather than cakey?
Visible pieces of cold butter release steam in the oven, while the three folds organize the dough into thin layers. Heavy cream tenderizes those layers with milk fat, so they separate without becoming brittle.
Minimal mixing is equally important. Once the dough holds together, additional kneading develops gluten and smears the butter into the flour, creating a tighter, more bread-like interior.
Can you freeze dough for flaky cream scones?
Freezing the cut wedges works well when they are packed after becoming completely firm. Arrange them on a lined tray without touching, freeze until solid, and transfer them to an airtight container for up to 1 month.
Bake the wedges directly from frozen rather than thawing them. Brush with cream, add the coarse sugar, and expect the baking time to increase by approximately 3 to 5 minutes.
Should scone dough be sticky before shaping?
The dough should be slightly tacky and shaggy, but it should not cling heavily to your fingers or slump on the work surface. A few dry-looking seams are preferable to a smooth, wet dough because the cream continues hydrating the flour during chilling.
Use a light dusting of flour on the surface and scraper, not handfuls worked into the dough. If the mixture is genuinely wet, chilling it before shaping is safer than kneading in substantial extra flour.
More Ridiculously Delicious Desserts to Try
Flaky Cream Scones with a Tender Center
Ingredients
Equipment
Method
- Line a large rimmed baking sheet with parchment paper. In a large mixing bowl, whisk the flour, granulated sugar, baking powder, and salt for about 30 seconds. Break up every visible lump of baking powder and scrape around the bottom of the bowl. Thorough distribution matters because the dough receives very little mixing after the cream is added, and concentrated pockets of leavener can create uneven rise or a bitter taste.
- Add the cold butter cubes to the flour mixture. Use a pastry blender or two table knives to cut the butter into irregular pieces ranging from coarse crumbs to flattened pea-size bits, about 2 to 3 minutes. Stop while distinct butter pieces remain visible and the mixture still feels cool. Do not rub the butter completely into the flour, since those intact pieces release steam and create the flaky structure during baking.
- Stir the 210 g cold heavy cream and vanilla together, then pour them evenly over the flour mixture. Use a flexible scraper to fold until shaggy clumps form and only a little loose flour remains, about 20 strokes. Turn the mixture onto a lightly floured surface, press it into a rough rectangle, and perform three letter folds, rotating the dough 90 degrees after each fold. Stop when it holds together; it should look layered and feel slightly tacky, not smooth or elastic.
- Pat the dough into a 7-inch round about 1 inch thick, using a bench scraper to neaten the edge without compressing it. Cut straight down through the round with a sharp knife or bench scraper to make 8 equal wedges; do not saw through the dough or twist the cutter. Arrange the wedges 2 inches apart on the prepared sheet and refrigerate for 20 minutes. Meanwhile, position a rack in the center of the oven and preheat it to 400°F so the oven is fully heated before baking.
- Brush only the tops of the chilled wedges with the remaining 15 g heavy cream, keeping it off the cut sides so the layers can expand freely. Sprinkle evenly with coarse sugar. Bake on the center rack for 18 to 22 minutes, rotating the pan after 12 minutes, until the tops and bottom edges are golden and the centers look set rather than glossy or doughy. Transfer the pan to a rack for 5 minutes, then move the scones directly onto the rack and cool for at least 10 minutes before serving.
Notes
- Measure the flour by weight when possible. A small excess absorbs the limited cream quickly and can turn a tender center into a dry, crumbly one.
- If the butter softens while you cut it into the flour, refrigerate the entire bowl for 10 minutes before adding the cream. The butter should remain firm enough to see after mixing.
- Use a bowl scraper to gather dry patches rather than adding extra cream immediately. Gentle pressing usually hydrates the final flour without making the dough sticky and prone to spreading.
- Make each cut in one decisive downward motion and wipe the blade between cuts. Dragging through the dough seals and distorts the layered edges.
- Give the oven enough time to reach 400°F before loading the chilled wedges. A lukewarm oven melts the fat before the structure sets, which reduces height and causes wide, greasy scones.



