Table of Contents
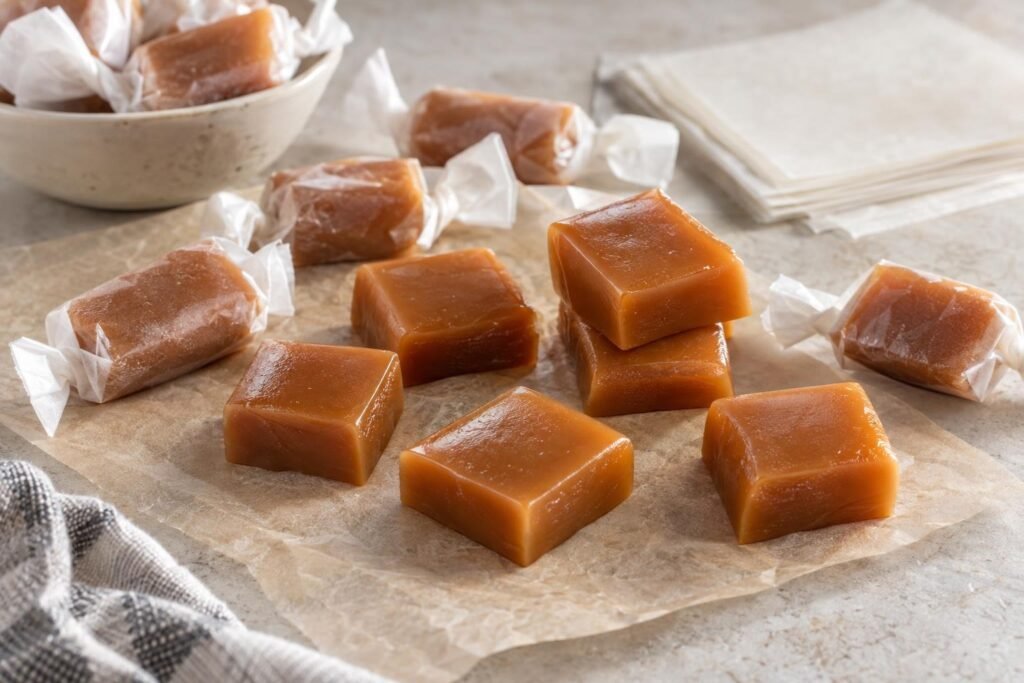
Glossy, amber soft caramels yield gently beneath your teeth, then melt into a buttery chew with warm vanilla and a balanced touch of salt. These homemade candy squares get their deep flavor from caramelizing the sugar before adding the dairy, rather than relying on brown sugar for color. The finished slab is firm enough to cut cleanly but remains pleasantly soft at room temperature.
I use both a thermometer and visual cues because temperature determines the texture while color builds the flavor. The sugar syrup should reach a clear medium amber before the warm cream goes in, then the finished caramel cooks to 245°F. A slow, undisturbed room-temperature cooling period allows the candy to set evenly without becoming hard or greasy, and a lightly buttered knife keeps those squares tidy.

Why I Love this Homemade Recipe
- Caramelizing granulated sugar to a medium amber creates a deeper toasted flavor than simply boiling all the ingredients together.
- Light corn syrup interferes with sucrose crystallization, helping the finished candy remain smooth instead of turning sandy or grainy.
- Warming the cream and butter limits the temperature shock when they meet the hot caramel, although the mixture will still bubble vigorously.
- Cooking the finished mixture to 245°F removes enough moisture for a defined square while preserving a soft, flexible chew.
- Cooling the caramel uncovered at room temperature prevents refrigerator condensation and gives the fat and concentrated sugar syrup time to set evenly.
Ingredient Notes for Soft Caramels for Homemade Candy Squares
- Granulated sugar: This provides the confection's structure and develops toasted flavor as it caramelizes. Keep sugar crystals off the saucepan walls once the syrup boils because stray crystals can encourage graininess.
- Light corn syrup: The glucose-rich syrup helps control crystallization and keeps the soft caramels pliable. Clear glucose syrup may replace it in the same weight, although a very thick glucose syrup can take longer to scrape from the measuring container.
- Heavy cream: Cream supplies water, milk proteins, and fat, creating a rich caramel rather than a brittle sugar candy. Use cream with 35 to 36 percent milk fat and warm it gently without boiling.
- Unsalted butter: Butter softens the concentrated sugar syrup and contributes dairy flavor. Cut it into pieces so it melts evenly into the cream, and avoid replacing it with spreadable tub butter, which contains an inconsistent amount of water.
- Fine sea salt: Salt sharpens the caramelized notes and keeps the sweetness from tasting flat. Fine crystals dissolve more reliably than coarse salt in the warm dairy mixture.
- Vanilla extract: Vanilla rounds out the cooked sugar and dairy flavors. Add it after the pan leaves the heat so its volatile aroma is not boiled away, taking care because the caramel may briefly foam.
My Baking Tips
- Calibrate the thermometer in boiling water before starting. At sea level it should read close to 212°F; account for any consistent difference when judging the caramel's final temperature.
- Choose a light-colored stainless steel saucepan rather than a dark nonstick pan. The pale interior makes the shift from straw-colored syrup to medium amber much easier to see before the sugar burns.
- Do not scrape crystallized sugar from the saucepan walls into the boiling syrup. If crystals appear early, brush the sides with a clean pastry brush dipped in water before the syrup begins to color.
- As the caramel approaches 245°F, lower the heat and stir continuously along the bottom. The milk solids can scorch before the center of the mixture reaches the target temperature.
- Cut only after the slab has cooled completely. If the knife drags or compresses the candy, let the slab stand for another 30 to 60 minutes and clean the blade between cuts.
Ingredients for Soft Caramels
- 300 g granulated sugar (About 1 1/2 cups; keep the saucepan walls free of loose crystals.)
- 240 g light corn syrup (About 3/4 cup; clear glucose syrup may be used at the same weight.)
- 60 g water (About 1/4 cup; this helps the sugar dissolve and cooks off during caramelization.)
- 240 g heavy cream (About 1 cup, with 35 to 36 percent milk fat.)
- 170 g unsalted butter (About 3/4 cup, cut into small pieces, plus a little softened butter for the pan and knife.)
- 3 g fine sea salt (About 1/2 teaspoon.)
- 10 mL pure vanilla extract (2 teaspoons, added away from the heat.)
How to Make Soft Caramels
- STEP 1). Prepare the pan and working area Lightly butter an 8-inch square metal pan, line it with two crossing strips of parchment to form a sling, and butter the parchment very thinly. Set the pan on a heatproof surface near the stove because the cooked caramel must be poured immediately. Measure every ingredient before heating, place a heatproof spatula and thermometer beside the saucepan, and keep children, pets, and loose sleeves away from the cooking area. Hot sugar adheres to skin and should never be touched to judge doneness.
- STEP 2). Warm the cream, butter, and salt Combine the heavy cream, butter pieces, and fine sea salt in a small saucepan. Heat over medium-low, stirring occasionally, for 4 to 6 minutes, until the butter has melted and the mixture is steaming but not simmering, about 140 to 150°F. Remove it from the heat and cover to keep warm. Warm dairy blends into caramel more gradually than cold dairy, reducing severe bubbling and hard clumps, but the mixture will still expand, so use the specified deep saucepan for the sugar.
- STEP 3). Dissolve and caramelize the sugar Combine the granulated sugar, corn syrup, and water in a heavy 3 to 4-quart stainless steel saucepan. Stir over medium heat until the sugar dissolves and the syrup looks clear, about 3 minutes. Once it boils, stop stirring and cook for 7 to 10 minutes, gently swirling the pan only if the color develops unevenly. Watch for the syrup to change from pale straw to a clear medium amber and register approximately 320 to 325°F. Remove the pan from the heat before it becomes dark brown or smells bitter.
- STEP 4). Add the dairy and cook to the setting temperature Wearing heat-resistant mitts, add the warm cream mixture to the caramel in four small additions, stirring carefully with a long heatproof spatula after each addition. The caramel will release hot steam and rise sharply. Return the pan to medium-low heat and cook, stirring slowly across the bottom and into the corners, until completely smooth and 245°F, about 10 to 15 minutes. The bubbles will become thicker, slower, and glossier. Confirm the temperature in the center without letting the thermometer touch the pan's base.
- STEP 5). Flavor, cool, cut, and wrap the caramels Remove the saucepan from the heat, stir in the vanilla carefully, and immediately pour the caramel into the prepared pan without scraping any dark residue from the bottom. Let it cool uncovered and undisturbed at room temperature for at least 4 hours, until fully set and no longer warm. Lift out the slab by the parchment, peel it away, and cut eight 1-inch strips in each direction with a long, lightly buttered knife. Wipe and re-butter the blade as needed, then wrap each of the 64 squares individually.
Storage and Freezing
- Room temperature: Keep the individually wrapped soft caramels in an airtight container in a cool, dry place for up to 2 weeks. Separate stacked layers with parchment and keep them away from direct sunlight or a warm stove.
- Refrigeration: Refrigerate wrapped caramels for up to 1 month if the room is warmer than 72°F. Let the closed container stand at room temperature before opening so condensation forms on the container rather than on the candy.
- Freezing: Place individually wrapped caramels in a freezer-safe airtight container and freeze for up to 3 months.
- Thawing: Thaw the unopened container overnight in the refrigerator, then bring it to room temperature before opening and serving.
- Serving: For the softest chew and fullest caramel flavor, serve the candies at a room temperature of approximately 68 to 72°F.
Frequently Asked Questions
Why will my soft caramels not set firmly enough to cut?
Caramels that remain syrupy or slump after cooling usually did not reach 245°F, often because the thermometer touched the pan or was removed before the entire mixture reached the target. A few degrees make a noticeable difference in concentrated sugar candy.
Allow the slab the full four-hour cooling period before assessing it. If it is completely cool but still cannot hold an edge, it was undercooked and will be better used as caramel sauce rather than repeatedly reheated.
What makes homemade caramels turn grainy?
Graininess develops when dissolved sucrose forms large crystals. Undissolved sugar on the saucepan walls, excessive stirring after the syrup boils, or scraping crystallized residue into the finished caramel can start that process.
Corn syrup reduces this risk by interfering with sucrose alignment. Stir only until the initial sugar dissolves, keep the pan walls clean, and pour the cooked caramel without scraping hardened or unusually dark material from the saucepan.
Can you make soft caramels ahead for gifts?
Individually wrapped soft caramels can be prepared up to two weeks before gifting when stored in an airtight container in a cool, dry room. Wrapping is important because exposed caramel absorbs moisture and sticks to neighboring pieces.
If the kitchen is warm, refrigerate the sealed container for up to one month. Bring it to room temperature before opening so surface condensation does not make the wrappers damp or the candies tacky.
Which ingredient substitutions work in this soft caramels recipe?
Clear glucose syrup can replace light corn syrup at the same 240-gram weight because both help control crystallization and preserve a pliable texture. Weighing is more reliable than measuring by volume because glucose syrup may be substantially thicker.
Heavy cream and full-fat butter should remain unchanged. Lower-fat dairy or spreadable butter introduces different proportions of water, fat, and emulsifiers, which can alter the cooking time and prevent the candy from setting at the expected temperature.
How do you cut soft caramels without sticking to the knife?
Let the slab cool completely at room temperature, then use a long, sharp chef's knife brushed with a very thin film of softened butter. Press straight down instead of sawing, which stretches the caramel and produces ragged edges.
Wipe the blade clean after every few cuts and apply more butter sparingly. If the slab compresses instead of cutting, give it another 30 to 60 minutes to set rather than chilling it abruptly and creating condensation.
Soft Caramels for Homemade Candy Squares
Ingredients
Equipment
Method
- Lightly butter an 8-inch square metal pan, line it with two crossing strips of parchment to form a sling, and butter the parchment very thinly. Set the pan on a heatproof surface near the stove because the cooked caramel must be poured immediately. Measure every ingredient before heating, place a heatproof spatula and thermometer beside the saucepan, and keep children, pets, and loose sleeves away from the cooking area. Hot sugar adheres to skin and should never be touched to judge doneness.
- Combine the heavy cream, butter pieces, and fine sea salt in a small saucepan. Heat over medium-low, stirring occasionally, for 4 to 6 minutes, until the butter has melted and the mixture is steaming but not simmering, about 140 to 150°F. Remove it from the heat and cover to keep warm. Warm dairy blends into caramel more gradually than cold dairy, reducing severe bubbling and hard clumps, but the mixture will still expand, so use the specified deep saucepan for the sugar.
- Combine the granulated sugar, corn syrup, and water in a heavy 3 to 4-quart stainless steel saucepan. Stir over medium heat until the sugar dissolves and the syrup looks clear, about 3 minutes. Once it boils, stop stirring and cook for 7 to 10 minutes, gently swirling the pan only if the color develops unevenly. Watch for the syrup to change from pale straw to a clear medium amber and register approximately 320 to 325°F. Remove the pan from the heat before it becomes dark brown or smells bitter.
- Wearing heat-resistant mitts, add the warm cream mixture to the caramel in four small additions, stirring carefully with a long heatproof spatula after each addition. The caramel will release hot steam and rise sharply. Return the pan to medium-low heat and cook, stirring slowly across the bottom and into the corners, until completely smooth and 245°F, about 10 to 15 minutes. The bubbles will become thicker, slower, and glossier. Confirm the temperature in the center without letting the thermometer touch the pan's base.
- Remove the saucepan from the heat, stir in the vanilla carefully, and immediately pour the caramel into the prepared pan without scraping any dark residue from the bottom. Let it cool uncovered and undisturbed at room temperature for at least 4 hours, until fully set and no longer warm. Lift out the slab by the parchment, peel it away, and cut eight 1-inch strips in each direction with a long, lightly buttered knife. Wipe and re-butter the blade as needed, then wrap each of the 64 squares individually.
Notes
- Calibrate the thermometer in boiling water before starting. At sea level it should read close to 212°F; account for any consistent difference when judging the caramel's final temperature.
- Choose a light-colored stainless steel saucepan rather than a dark nonstick pan. The pale interior makes the shift from straw-colored syrup to medium amber much easier to see before the sugar burns.
- Do not scrape crystallized sugar from the saucepan walls into the boiling syrup. If crystals appear early, brush the sides with a clean pastry brush dipped in water before the syrup begins to color.
- As the caramel approaches 245°F, lower the heat and stir continuously along the bottom. The milk solids can scorch before the center of the mixture reaches the target temperature.
- Cut only after the slab has cooled completely. If the knife drags or compresses the candy, let the slab stand for another 30 to 60 minutes and clean the blade between cuts.