Table of Contents
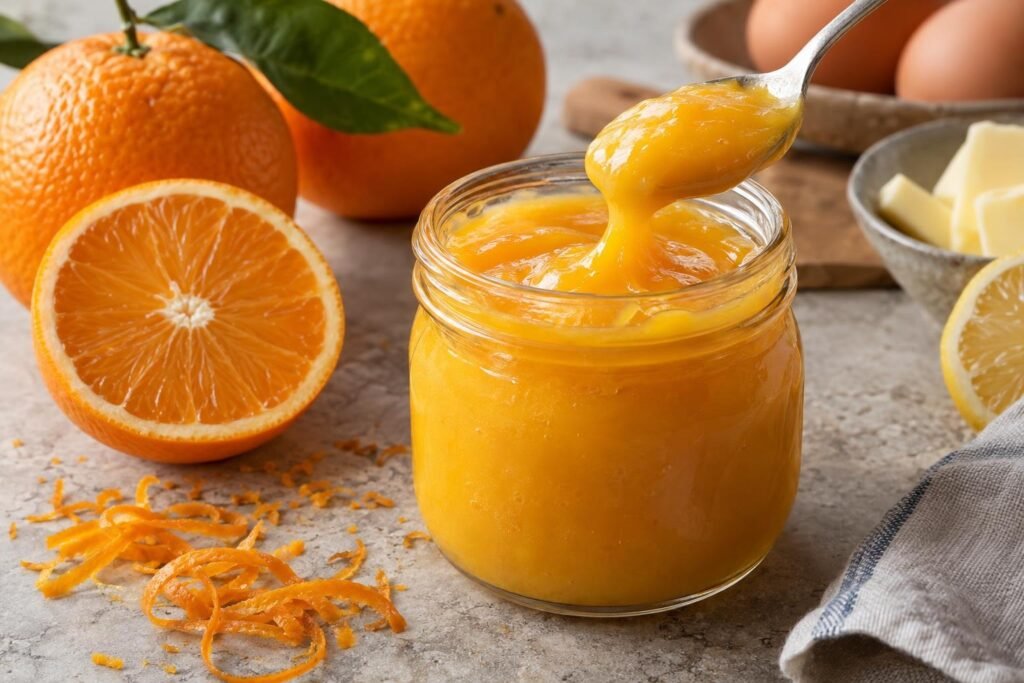
Silky, glossy, and fragrant with fresh zest, this orange curd balances juicy citrus flavor with a rich, buttery finish. It is soft enough to sweep across toast or scones, yet thick enough after chilling to spoon between cake layers or pipe into cupcakes without immediately running for the hills.
I use whole eggs for structure, extra yolks for richness, and no starch, so careful cooking provides the thickening. The useful cues are specific: stir constantly, cook the mixture to 170 to 175°F, strain it, and let it cool slightly before blending in the butter. The curd looks looser while warm, but a four-hour chill transforms it into a smooth, spreadable filling.

Why This Recipe Is Deliciously Ridiculous
- Whole eggs provide enough coagulated protein to set the curd, while additional yolks create a richer color, rounder flavor, and smoother mouthfeel.
- Rubbing orange zest into the sugar releases aromatic citrus oils before cooking, producing fuller orange flavor without adding excess juice.
- Fresh lemon juice sharpens the naturally sweet orange flavor and supplies enough acidity to keep the finished curd lively rather than flat.
- Cooking to 170 to 175°F safely thickens the egg mixture while constant stirring limits hot spots that could create scrambled pieces.
- Blending butter into the slightly cooled base creates a stable, glossy emulsion, while a full refrigerator rest develops the final spreadable consistency.
Ingredient Notes for Orange Curd with a Smooth, Spreadable Finish
- Fresh oranges: Use finely grated outer zest without the bitter white pith. Freshly squeezed juice gives the curd a cleaner aroma than bottled juice, while the zest supplies most of the recognizable orange fragrance.
- Lemon juice: A small amount reinforces acidity and keeps the orange flavor bright. It should support the orange rather than become a separate lemon note.
- Granulated sugar: Sugar sweetens the citrus, disperses the zest oils, and slows egg protein coagulation. Rubbing the zest into the sugar before adding liquid improves aromatic extraction.
- Whole eggs and egg yolks: Whole eggs build the gel that thickens the curd, while yolks contribute fat, emulsifiers, color, and richness. Whisk them until completely uniform before applying heat.
- Unsalted butter: Cool, pliable butter gives the curd body and a smooth finish while allowing control over the salt. Cut it into small cubes so it emulsifies before the base becomes too cool.
- Fine sea salt: A small amount reduces the perception of excessive sweetness and gives the citrus flavor better definition without making the curd taste salty.
Expert Baking Tips
- Use an instant-read thermometer in addition to visual cues. Orange curd can coat a spatula before its egg proteins have fully established the structure needed for a thick chilled finish.
- Keep the heat controlled and stir into every corner of the saucepan. If steam rises aggressively or the mixture begins bubbling, remove the pan from the burner briefly while continuing to stir.
- Judge consistency only after the curd has chilled for at least four hours. Warm butter and fluid egg proteins make freshly cooked curd appear substantially thinner than the finished spread.
- Keep the immersion blender head below the surface. Pulling it repeatedly into the air incorporates bubbles, which dull the glossy appearance and leave a foamy layer on top.
- For cupcakes or cake filling, use the curd directly from the refrigerator and pipe it into a contained cavity. Allowing it to warm extensively before filling makes it softer and more likely to migrate.
Ingredients for Orange Curd
- 12 g finely grated orange zest (about 2 packed tablespoons, from 2 to 3 oranges)
- 120 g fresh orange juice (1/2 cup, strained to remove seeds and coarse pulp)
- 15 g fresh lemon juice (1 tablespoon, strained)
- 150 g granulated sugar (3/4 cup)
- 2 large eggs (about 100 g without shells, at room temperature)
- 3 large egg yolks (about 54 g, at room temperature)
- 1 g fine sea salt (about 1/8 teaspoon)
- 113 g unsalted butter (1/2 cup, cool and cut into 1/2-inch cubes)
How to Make Orange Curd
- STEP 1). Release the orange oils and prepare the ingredients Place the sugar and finely grated orange zest in a 2-quart nonreactive saucepan. Rub them together thoroughly with clean fingertips for about 30 seconds, until the sugar feels damp and smells intensely citrusy. Strain the orange and lemon juices, weigh the eggs and yolks, and cut the cool butter into 1/2-inch cubes. Preparing everything first matters because the curd requires continuous attention once it reaches the stove.
- STEP 2). Whisk the uncooked curd base until completely uniform Add the whole eggs, yolks, and salt to the orange sugar. Whisk for about 45 seconds, scraping around the corners of the saucepan, until no streaks of egg white remain and the mixture looks smooth rather than foamy. Slowly whisk in the orange and lemon juices. Check that no sugar is packed against the bottom, since undissolved pockets can interfere with even cooking and create localized scorching.
- STEP 3). Cook the orange curd to a safe thickening temperature Set the saucepan over low to medium-low heat and cook for 8 to 12 minutes, stirring continuously with a silicone spatula and frequently sweeping the bottom, corners, and sides. As the curd approaches 170°F, it will change from thin and frothy to glossy and custard-like. Remove it from the heat at 170 to 175°F, or when it coats the spatula and a finger drawn through the coating leaves a clear track. Do not let it boil.
- STEP 4). Strain and emulsify the butter into the warm curd Immediately pour the hot curd through a fine-mesh sieve into a heatproof bowl, pressing gently with the spatula to remove cooked zest and any small egg particles. Let it cool for 5 to 8 minutes, stirring occasionally, until it reaches about 140°F. Add the butter a few cubes at a time and blend with an immersion blender, keeping the blade submerged to limit bubbles, until every piece is incorporated and the curd is glossy, thick, and completely smooth.
- STEP 5). Cover and chill until thick and spreadable Transfer the orange curd to a clean 2-cup jar or shallow airtight container. Press food-safe wrap directly against the surface before adding the lid so condensation and a rubbery skin cannot form. Cool at room temperature for no longer than 20 minutes, then refrigerate for at least 4 hours. Stir the chilled curd briefly before serving; it should hold soft ridges on a spoon and spread cleanly without behaving like a pourable sauce.
Storage and Freezing
- Refrigeration: Store the covered orange curd at 40°F or colder for up to 5 days. Use a clean spoon each time to avoid introducing crumbs or moisture.
- Freezing: Freeze in a freezer-safe airtight container for up to 2 months, leaving about 1/2 inch of headspace for expansion.
- Thawing: Thaw overnight in the refrigerator, then whisk or stir gently to restore an even texture. Do not thaw at room temperature.
- Serving: Serve chilled for cupcake filling and cake layers, or let the required portion stand for 10 to 15 minutes for a softer toast or scone spread. Return leftovers promptly to the refrigerator.
Frequently Asked Questions
How do you tell when orange curd is done?
Properly cooked orange curd reaches 170 to 175°F and looks glossy rather than foamy. It should coat a silicone spatula, and a finger drawn through that coating should leave a distinct track that does not immediately close.
The curd will still flow while hot, so do not keep cooking in pursuit of its refrigerated texture. Remove it promptly once it reaches the temperature and coating cues, then strain it before adding the butter.
Why is my orange curd runny after chilling?
Runny orange curd usually did not reach the full thickening temperature, was measured with too much juice, or has not chilled long enough. This formula needs at least four refrigerated hours for the butter and cooked egg structure to firm completely.
If the chilled curd pours like a sauce, return it to a clean saucepan and reheat gently while stirring until it reaches 170 to 175°F. Strain it again, cool briefly, and refrigerate it thoroughly.
What consistency should chilled orange curd have?
Chilled orange curd should be smooth, spoonable, and firm enough to hold soft ridges. It should spread without tearing bread and should not release a watery ring around the edges.
For cupcake filling, the cold curd should stay inside a piped cavity rather than soaking rapidly into the crumb. It will soften as it warms, which is expected because the butter in the emulsion becomes more pliable.
Does orange curd need cornstarch to thicken?
This orange curd recipe relies on egg proteins rather than cornstarch. Whole eggs provide the main structure, while extra yolks contribute emulsifiers and fat for a richer, smoother result.
Temperature control is therefore essential. Undercooking leaves the curd loose, while boiling can overcoagulate the eggs and create a grainy texture. The 170 to 175°F endpoint provides thickening without requiring starch.
Can I use this orange curd for cupcakes and layer cakes?
The fully chilled curd works well in cupcakes when piped into a small, contained cavity. It is thick and spreadable rather than stiff, so avoid overfilling or piping it directly to an uncontained edge.
For layer cakes, spread a modest amount inside a buttercream dam and keep the assembled cake refrigerated. The dam supports the softer curd and prevents pressure from pushing it out between the layers.
More Ridiculously Delicious Desserts to Try
- Passion Fruit Curd with a Smooth Tangy Finish
- Lemon Curd with Whole Eggs with Smooth, Spreadable Texture
- Raspberry Cake Filling with a Thick, Spreadable Texture
Orange Curd with a Smooth, Spreadable Finish
Ingredients
Equipment
Method
- Place the sugar and finely grated orange zest in a 2-quart nonreactive saucepan. Rub them together thoroughly with clean fingertips for about 30 seconds, until the sugar feels damp and smells intensely citrusy. Strain the orange and lemon juices, weigh the eggs and yolks, and cut the cool butter into 1/2-inch cubes. Preparing everything first matters because the curd requires continuous attention once it reaches the stove.
- Add the whole eggs, yolks, and salt to the orange sugar. Whisk for about 45 seconds, scraping around the corners of the saucepan, until no streaks of egg white remain and the mixture looks smooth rather than foamy. Slowly whisk in the orange and lemon juices. Check that no sugar is packed against the bottom, since undissolved pockets can interfere with even cooking and create localized scorching.
- Set the saucepan over low to medium-low heat and cook for 8 to 12 minutes, stirring continuously with a silicone spatula and frequently sweeping the bottom, corners, and sides. As the curd approaches 170°F, it will change from thin and frothy to glossy and custard-like. Remove it from the heat at 170 to 175°F, or when it coats the spatula and a finger drawn through the coating leaves a clear track. Do not let it boil.
- Immediately pour the hot curd through a fine-mesh sieve into a heatproof bowl, pressing gently with the spatula to remove cooked zest and any small egg particles. Let it cool for 5 to 8 minutes, stirring occasionally, until it reaches about 140°F. Add the butter a few cubes at a time and blend with an immersion blender, keeping the blade submerged to limit bubbles, until every piece is incorporated and the curd is glossy, thick, and completely smooth.
- Transfer the orange curd to a clean 2-cup jar or shallow airtight container. Press food-safe wrap directly against the surface before adding the lid so condensation and a rubbery skin cannot form. Cool at room temperature for no longer than 20 minutes, then refrigerate for at least 4 hours. Stir the chilled curd briefly before serving; it should hold soft ridges on a spoon and spread cleanly without behaving like a pourable sauce.
Notes
- Use an instant-read thermometer in addition to visual cues. Orange curd can coat a spatula before its egg proteins have fully established the structure needed for a thick chilled finish.
- Keep the heat controlled and stir into every corner of the saucepan. If steam rises aggressively or the mixture begins bubbling, remove the pan from the burner briefly while continuing to stir.
- Judge consistency only after the curd has chilled for at least four hours. Warm butter and fluid egg proteins make freshly cooked curd appear substantially thinner than the finished spread.
- Keep the immersion blender head below the surface. Pulling it repeatedly into the air incorporates bubbles, which dull the glossy appearance and leave a foamy layer on top.
- For cupcakes or cake filling, use the curd directly from the refrigerator and pipe it into a contained cavity. Allowing it to warm extensively before filling makes it softer and more likely to migrate.