Set an oven rack in the center and preheat to 175°C. Lightly grease two 8 x 2 inch round aluminum pans, line the bottoms with parchment, and grease the parchment without heavily coating the sides. Weigh the empty mixer bowl if you plan to divide the batter precisely. Confirm that the cake butter is pliable, the eggs and dairy are at room temperature, and both pans sit level so the fine batter bakes into even layers.
Sift the cake flour, baking powder, salt, and granulated sugar into the bowl of a stand mixer fitted with the paddle. Whisk the eggs, vanilla, and 120 g of the milk in a medium bowl until no streaks of egg white remain. In a separate cup, stir the remaining 120 g milk with the sour cream until smooth. Keeping these mixtures uniform allows the liquid to enter the butter-coated flour gradually instead of breaking the emulsion.
Mix the dry ingredients on low speed for 20 seconds. Add the softened cake butter and the milk-sour cream mixture, then mix on low until the flour is evenly moistened, about 30 seconds. Increase to medium speed and beat for 90 seconds, stopping once to scrape the bowl and paddle. The mixture should resemble a thick, smooth paste with no dry pockets. This mixing period builds enough structure after the butter has limited excessive gluten formation.
With the mixer on medium-low, add the egg mixture in three equal additions, mixing for 20 seconds after each one. Scrape the bottom and sides thoroughly between additions because dense batter often hides beneath the paddle. After the final addition, mix on medium for 20 to 30 seconds, just until the batter is smooth, satiny, and falls from the paddle in a thick ribbon. Stop before it becomes highly aerated or develops a curdled, grainy appearance.
Divide the batter evenly between the prepared pans, approximately 650 g per pan, and smooth the surfaces with a small offset spatula. Tap each pan once on the counter to release large air pockets. Bake for 28 to 33 minutes, rotating only if the oven browns unevenly. The cakes are done when the centers spring back, the edges barely pull from the pans, and a tester returns with moist crumbs but no wet batter. An instant-read thermometer should register about 96 to 99°C.
Cool the cakes in their pans on wire racks for 15 minutes. Run a thin offset spatula around each edge, invert onto the racks, remove the parchment, and turn the layers upright. Let them cool completely for at least 90 minutes before leveling or frosting; residual warmth will melt the buttercream. If either top is noticeably domed, trim it level with a long serrated knife using shallow sawing motions. Brush away loose crumbs before transferring one layer to a cardboard cake round.
Beat the frosting butter with the clean paddle on medium speed for 3 minutes, scraping twice, until creamy and lighter in color. Add the sifted confectioners' sugar in four additions on low speed, alternating with the heavy cream to control dust and maintain a smooth emulsion. Add the vanilla and salt, then beat on medium-low for 2 minutes. Mix on low for another minute to reduce air bubbles. Reserve 420 g ivory buttercream, then tint the remainder pale blush with the pink gel.
Secure the first layer to the cake board with a dab of blush buttercream. Pipe a 1.5 cm high ring of ivory buttercream around the outer edge, then spread the raspberry preserves inside the dam, leaving the frosting ring exposed. Center the second layer cut-side down and press lightly until level. Apply a thin blush crumb coat over the top and sides, trapping rather than chasing loose crumbs. Chill the cake uncovered for 30 minutes, until the coating feels firm but not frozen.
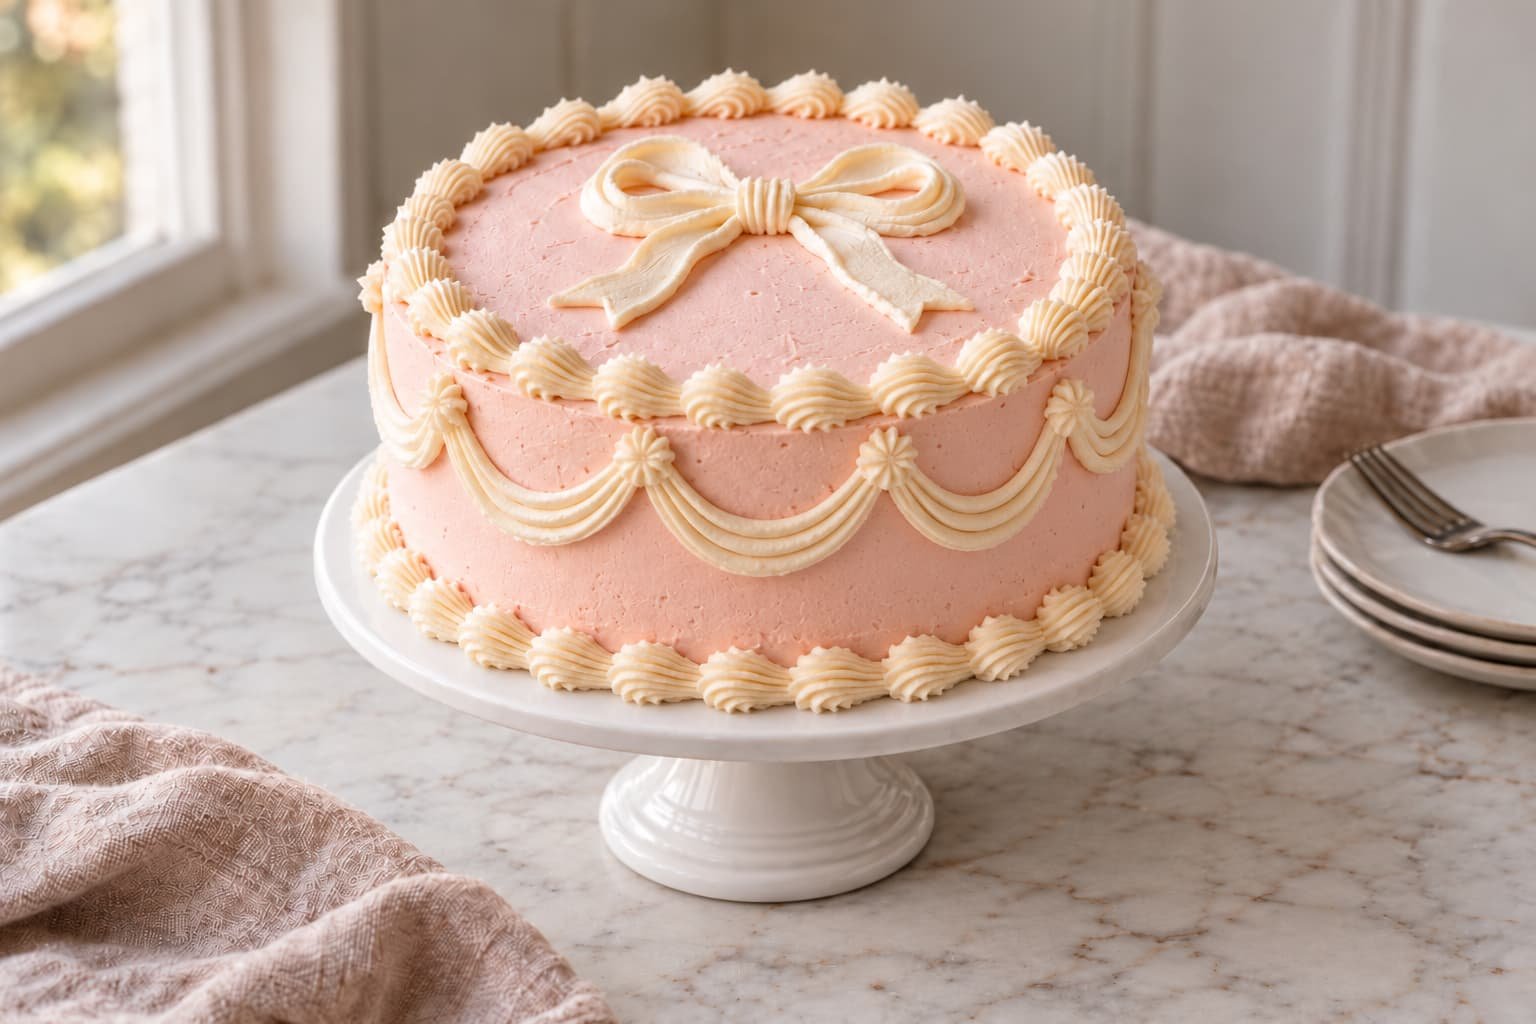
Spread the remaining blush buttercream over the chilled cake, then refine the sides with a bench scraper and the top with an offset spatula. Pipe ivory shell borders with the 4B tip and small swags with the 21 tip. Using the 104 petal tip, pipe two broad loops, a small center knot, and two tapered ribbon tails flat on the top so the bow remains stable. Let the finished cake stand for 20 minutes, then slice with a warm, dry knife, cleaning it between cuts.