Go Back
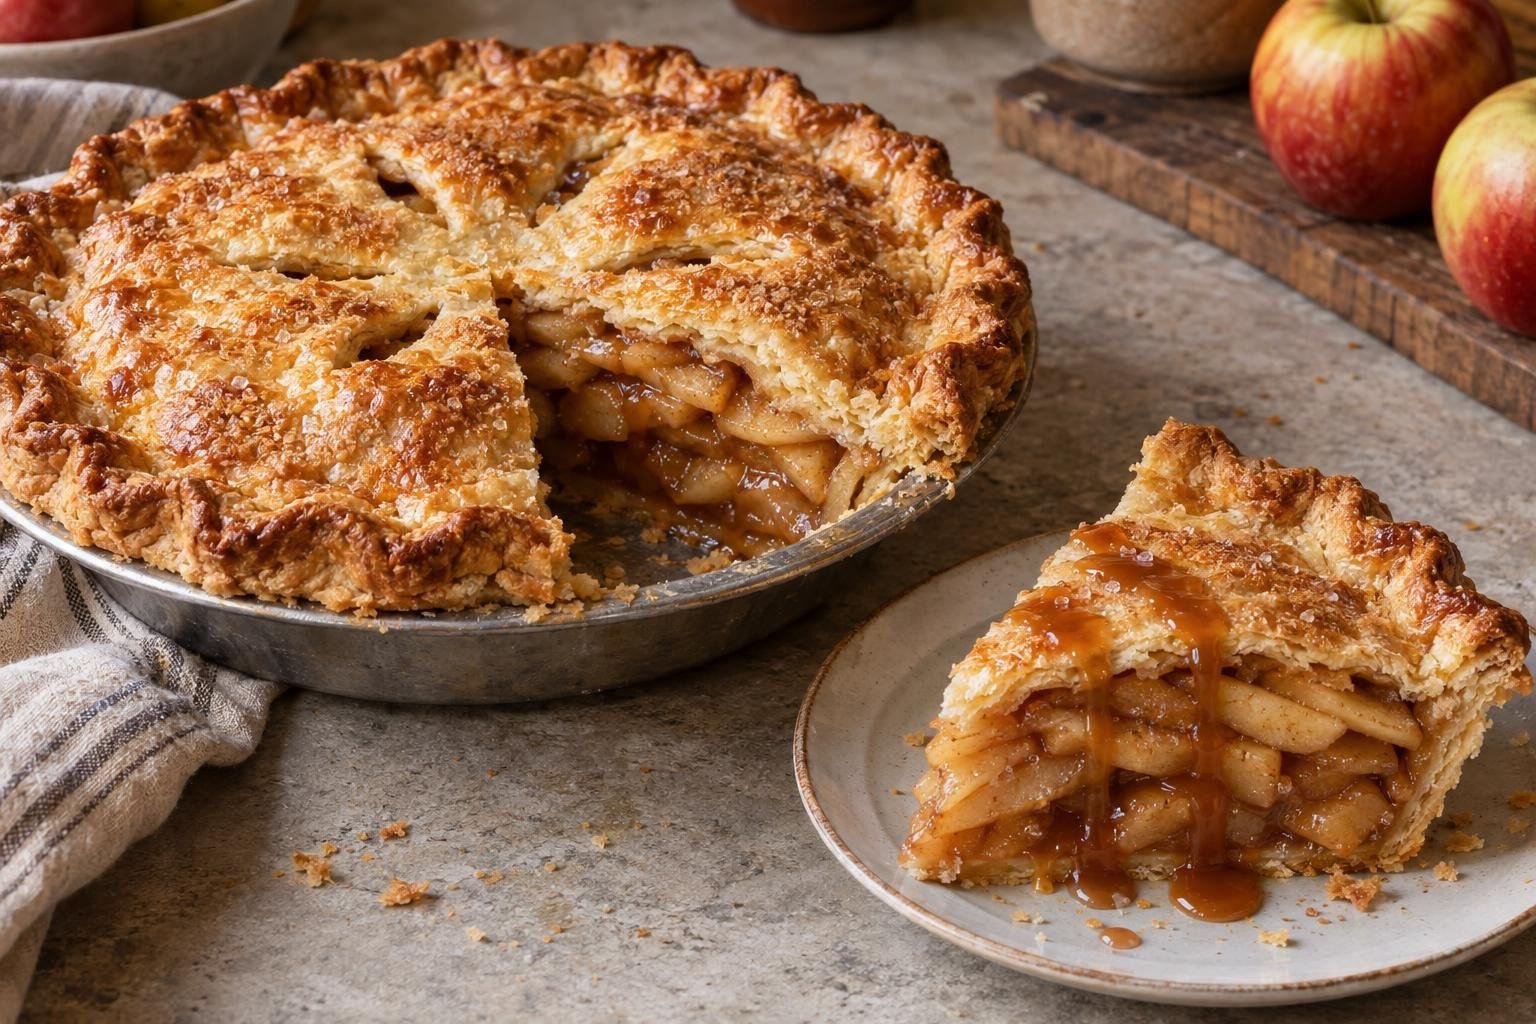
Salted caramel apple pie with golden pastry and a clean slice showing thick spiced apple filling

Salted Caramel Apple Pie with Golden Pastry

A from-scratch salted caramel apple pie with flaky all-butter pastry, tender spiced apples, homemade caramel, and a thick filling that sets into clean slices.
Prep Time 1 hour 15 minutes
Cook Time 1 hour 35 minutes
Cooling 6 hours 45 minutes
Total Time 9 hours 35 minutes
Servings: 8 slices
Course: Dessert
Cuisine: American
Calories: 710

Ingredients
  

  • 2 1/2 (315 g) cups all-purpose flour spooned and leveled if measured by volume
  • 1 tablespoon granulated sugar for the pastry
  • 1 teaspoon fine sea salt for the pastry
  • 1 (226 g) cup unsalted butter cold and cut into 1/2-inch cubes
  • 1/2 (120 ml) cup ice water use only as much as needed
  • 1 (200 g) cup granulated sugar for the salted caramel
  • 1/4 (60 ml) cup water for dissolving the caramel sugar
  • 1/2 (120 ml) cup heavy cream warmed until steaming but not boiling
  • 3 (42 g) tablespoons unsalted butter cut into pieces
  • 3/4 teaspoon fine sea salt for the caramel
  • 1 teaspoon pure vanilla extract stirred into the finished caramel
  • 3 (1.36 kg) pounds peeled and cored baking apples about half Granny Smith and half Honeycrisp, sliced 1/4 inch thick
  • 1/2 (100 g) cup packed light brown sugar for the apple filling
  • 1/4 (32 g) cup cornstarch for thickening the apple juices
  • 1 1/2 teaspoons ground cinnamon for the apple filling
  • 1/4 teaspoon ground nutmeg freshly grated if available
  • 1/4 teaspoon fine sea salt for the apple filling
  • 1 tablespoon fresh lemon juice adds acidity and limits browning
  • 1 large egg beaten with the water for egg wash
  • 1 tablespoon water for the egg wash
  • 1 tablespoon turbinado sugar for the top crust

Equipment

  • Digital kitchen scale and measuring spoons
  • Large mixing bowl
  • Pastry blender or sturdy fork
  • Plastic wrap or reusable dough wraps
  • Rolling pin
  • 9-inch metal pie pan, approximately 1 1/2 inches deep
  • Rimmed metal baking sheet
  • Medium heavy-bottomed saucepan
  • Heatproof whisk and silicone spatula
  • Large Dutch oven or wide heavy skillet
  • Pastry brush
  • Wire cooling rack
  • Instant-read thermometer, optional for checking the caramel

Method
 

  1. Whisk the flour, sugar, and salt in a large bowl. Add the cold butter and cut it in with a pastry blender until most pieces resemble peas, with a few flat almond-sized pieces remaining. Drizzle in three-quarters of the ice water while tossing with a fork, then add the remainder only until the dough holds when squeezed. Divide into two disks, making one slightly larger for the base. Wrap and refrigerate for at least 2 hours.
  2. On a lightly floured surface, roll the larger dough disk into a 13-inch circle about 1/8 inch thick, rotating it frequently to prevent sticking. Transfer it to a 9-inch metal pie pan without stretching, then press it gently into the corners and leave a 1-inch overhang. Roll the second disk into a 12-inch circle, place it on a parchment-lined baking sheet, and refrigerate both crusts while preparing the caramel and filling.
  3. Combine the granulated sugar and water in a medium heavy-bottomed saucepan. Cook over medium heat, without stirring after it begins to boil, until the syrup turns a deep amber color, about 8 to 12 minutes. Remove the pan from the heat and gradually whisk in the warm cream, protecting your hands from the vigorous steam. Whisk in the butter, salt, and vanilla until smooth. Measure 3/4 cup for the filling and reserve the remaining caramel for serving.
  4. Combine the sliced apples, brown sugar, cornstarch, cinnamon, nutmeg, salt, and lemon juice in a large Dutch oven. Cook over medium heat for 10 to 14 minutes, folding frequently with a silicone spatula so the slices heat evenly without breaking. Stop when the apples bend slightly, the released liquid bubbles, and the sauce looks thick and translucent. Remove from the heat, fold in 3/4 cup caramel, spread the filling on a rimmed sheet, and cool for 25 minutes.
  5. Spoon the cooled apple filling into the lined pie pan, arranging the slices compactly and mounding them slightly in the center. Lay the second pastry round over the fruit, trim both layers to a 1-inch overhang, and fold the edges underneath. Crimp firmly, then cut five vents in the top. Beat the egg with one tablespoon water, brush a thin layer over the pastry, and sprinkle with turbinado sugar. Refrigerate the assembled pie for 20 minutes.
  6. While the assembled pie chills, position a rack in the lower third of the oven, place a rimmed metal baking sheet on it, and heat the oven to 425°F for at least 20 minutes. Set the pie on the hot sheet and bake for 20 minutes. Reduce the temperature to 375°F and continue baking for 45 to 55 minutes, shielding the edge if it darkens too quickly. The crust should be deep golden and thick filling should bubble through the vents.
  7. Transfer the pie pan to a wire rack and cool for at least 4 hours before cutting. This rest is part of the setting process, not decorative patience, because slicing while warm releases the thickened juices. If the reserved caramel has become firm, warm it gently in short intervals until pourable but not hot. Cut the cooled pie with a sharp knife, wipe the blade between servings, and drizzle each slice with a portion of the reserved caramel.
Notes

  • Keep both pastry disks cold but pliable. If the dough cracks immediately when rolled, let it stand for 5 minutes; if the butter begins to look shiny or soft, refrigerate it before continuing.
  • Slice the apples to an even 1/4-inch thickness so they soften at a similar rate. Very thin pieces turn into applesauce, while thick wedges can remain crunchy after the crust is fully browned.
  • Watch the caramel rather than relying only on a timer. Remove it when it reaches a deep amber shade and smells toasted; a very dark brown syrup can become bitter before the cream is added.
  • Cool the precooked filling in a wide, shallow layer. Putting hot apples into the pastry melts the butter, weakens the layers, and increases the chance of a greasy or soggy bottom.
  • Bake until filling actively bubbles through more than one vent. A browned crust alone does not confirm that the thickener at the center has reached the heat needed to set properly.