

Table of Contents
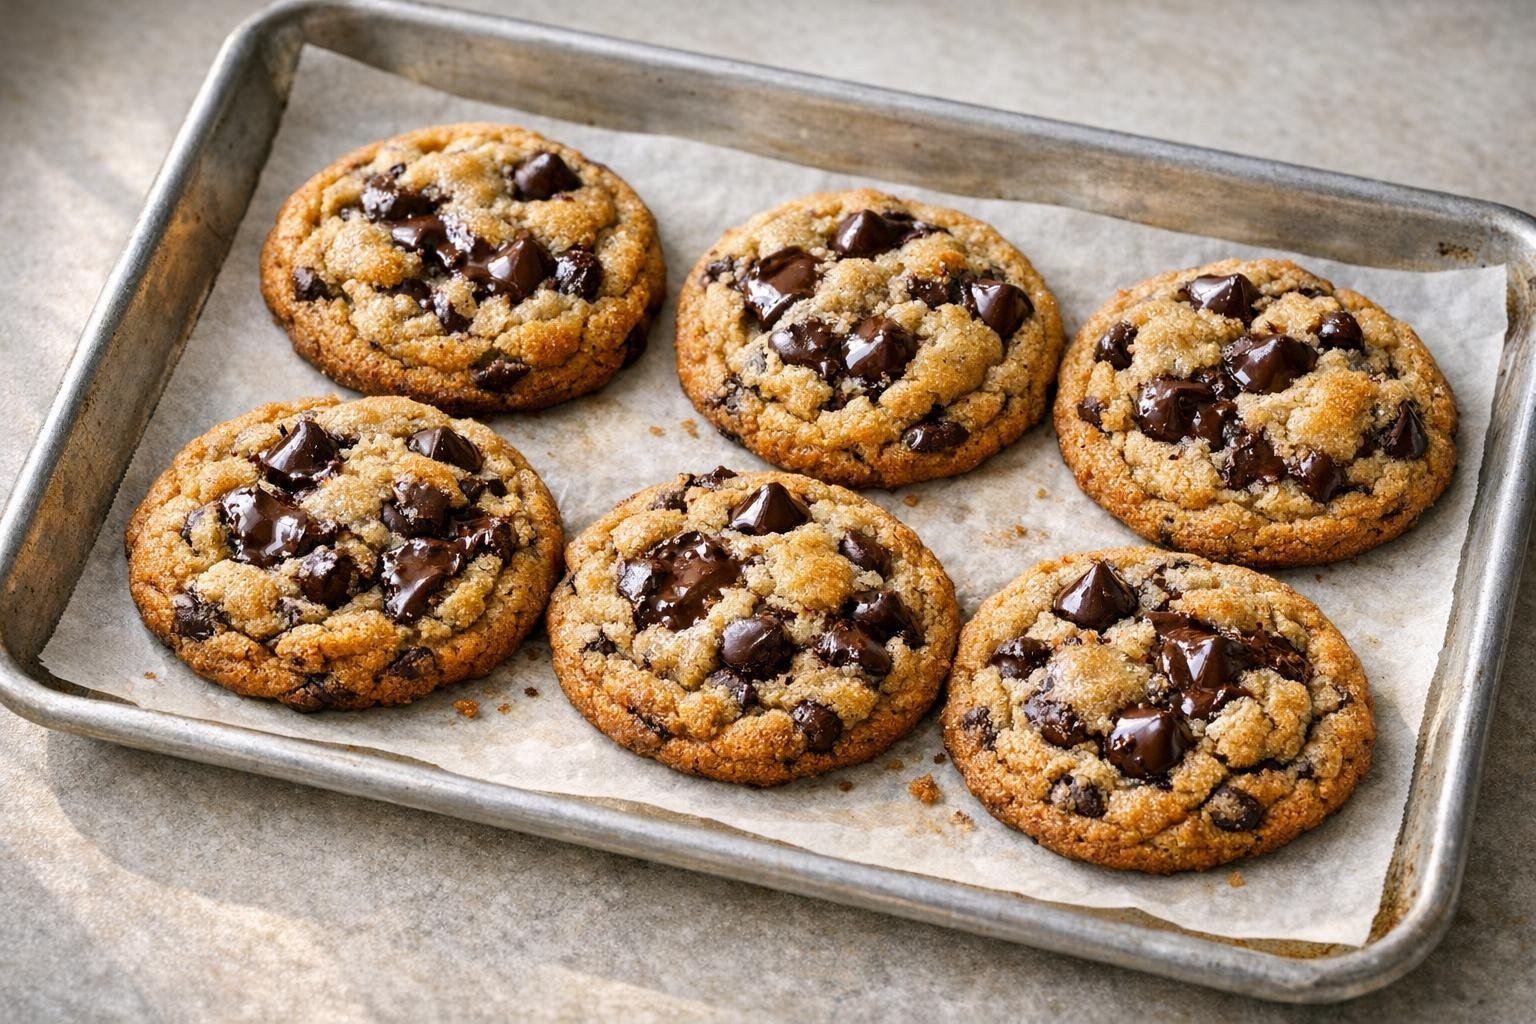
The buttery aroma of freshly baked small batch chocolate chip cookies with chewy centers and crisp edges fills the kitchen almost instantly. As you break one open, melty pools of chocolate glisten in the still-warm dough, the exterior edge crackling and golden, while the center remains gooey and soft. Bite into it, and you get that addictive contrast: a toasty, crisp rim and a thick, chewy interior.
For this easy small batch cookie recipe, I dial in the ratios so you get properly fat, tender morsels that don’t flatten or go cakey. Creaming softened butter with both brown and white sugars ensures depth and chew, while a short rest helps hydrate the dough without any chilling requirement. A precise bake time locks in texture: golden brown at the edges, with firm but not dry middles. My mixing cues simplify things so these cookies are a fuss-free, craveable treat whenever that late-night chocolate chip craving strikes.
Why This Recipe Frickin’ Works
- A 50/50 mix of brown and white sugar adds both chew (from molasses) and crisp edges (from white sugar).
- Softened unsalted butter is creamed for structure, aerating the dough for lift without excessive spread.
- A 1:1 flour-to-butter ratio by weight keeps the cookies thick and prevents them from spreading too thin.
- Chilling isn’t necessary: a 10-minute rest after mixing allows the flour to hydrate and stabilizes the dough.
- An optimal 375°F oven jumpstarts browning, yielding nutty, caramelized edges while maintaining a moist center.
Ingredient Notes for Small Batch Chocolate Chip Cookies with Chewy Centers and Crisp Edges
- Unsalted Butter: Use properly softened butter for even aeration; this controls spread and builds the chewy-meets-crisp texture. Room temperature is best for creaming. Salted butter throws off the salt balance.
- Light Brown Sugar: Provides moisture and chew thanks to the molasses content. Firmly pack it for consistent measurement.
- Granulated Sugar: Balances the brown sugar for a crisp, golden edge and aids in spreading.
- Egg Yolk: Only the yolk hydrates, helps emulsify fats, and adds richness, ensuring cookies stay chewy not cakey.
- All-Purpose Flour: Use unbleached for a sturdy, tender crumb. Spoon and level to avoid packing, which causes dryness.
- Baking Soda: Just the right amount for minimal lift with maximal spread. Double check it’s fresh for even browning and flavor.
- Fine Sea Salt: Balances sweetness and sharpens chocolate flavor; table salt can oversalt or cause uneven mixing.
- Semi-Sweet Chocolate Chips: Classic size for even distribution; chopping some pieces for pools of chocolate isn’t necessary here, but use good quality for the best results.
- Vanilla Extract: Adds depth and warmth to the dough, marrying all the flavors.
Expert Baking Tips
- Always use room temperature butter for creaming; cold butter won’t aerate properly and melted butter will give you flat cookies.
- Spoon and level your flour to avoid compacting. Excess flour yields dry, cakey cookies.
- Don’t skip the 10-minute dough rest. It prevents spread and gives you that chewy center.
- Pull cookies from the oven as soon as edges are deep golden but centers look puffed and just underdone, overbaking eliminates chew.
- If using a toaster oven or small convection oven, check for hot spots and consider rotating the pan earlier (after 4 minutes) for even browning.
Ingredients for Small Batch Chocolate Chip Cookies with Chewy Centers and Crisp Edges
- 56 g unsalted butter (softened to room temperature)
- 35 g light brown sugar (firmly packed)
- 30 g granulated sugar
- 1 egg yolk (from a large egg)
- 1/2 tsp vanilla extract
- 70 g all-purpose flour (spooned and leveled)
- 1/4 tsp baking soda
- 1/4 tsp fine sea salt
- 60 g semi-sweet chocolate chips
How to Make Small Batch Chocolate Chip Cookies with Chewy Centers and Crisp Edges
- STEP 1). STEP 1). Cream Butter and Sugars In a small mixing bowl, cream the softened butter, brown sugar, and granulated sugar using a hand mixer or sturdy whisk for 2-3 minutes. The mixture should look light and fluffy. Proper creaming creates air pockets that result in a chewier texture and even spread.
- STEP 2). STEP 2). Add Egg Yolk and Vanilla Beat in the egg yolk and vanilla extract until fully combined, about 30 seconds. Scrape the bowl. Look for a glossy, cohesive texture. This builds emulsion, ensuring that the fat disperses and locks in moisture.
- STEP 3). STEP 3). Add Dry Ingredients Add the flour, baking soda, and salt. Mix on low or fold with a rubber spatula until just combined and no dry streaks remain. Avoid overmixing, which can toughen the cookies, the dough should be thick and sticky but not wet.
- STEP 4). STEP 4). Fold in Chocolate Chips Gently fold in the chocolate chips until evenly distributed. Use the spatula to turn the dough over itself rather than stirring aggressively. This ensures pockets of chocolate throughout, without causing the dough to seize or overwork.
- STEP 5). STEP 5). Rest Dough Briefly Let the dough rest at room temperature for 10 minutes. This short rest allows the flour to hydrate fully and the dough to firm up, preventing overspreading and leading to thicker cookies with soft centers.
- STEP 6). STEP 6). Portion and Bake Preheat your oven to 375°F (190°C). Line a small baking sheet with parchment. Use a small scoop or tablespoon to portion the dough into 6 equal balls, spacing them 2 inches apart. Bake for 9-11 minutes, until edges are golden and centers look set but slightly underdone. Rotate the pan after 6 minutes for even baking.
- STEP 7). STEP 7). Cool and Enjoy Cool cookies on the baking sheet for 3 minutes, then transfer to a wire rack. This resting period lets the centers finish setting without overbaking the edges. Enjoy warm for gooey chocolate or let fully cool for ultimate chew.
Storage and Freezing
Store completely cooled cookies in an airtight container at room temperature for up to 3 days. To freeze, place baked cookies or portioned dough balls on a sheet pan to freeze solid, then transfer to a resealable bag for up to 2 months. Bake from frozen, adding 2 minutes to the bake time.
Frequently Asked Questions
How many cookies does this small batch recipe make?
This recipe yields 6 generously sized cookies, perfect for two or three people to share. The dough portions easily into six equal balls, giving you bakery-style spread and thickness.
If you want smaller cookies, simply scoop into eight portions and reduce the baking time by a minute or two for a slightly softer finish.
Can I use melted butter instead of softened?
Melted butter will make the cookies spread much more and won’t produce the same chewy center with crisp edges. The texture will be thinner and less structured than intended here.
If you only have melted butter, chill the dough for at least 30 minutes before baking to regain some control over spread, but for best results, stick to softened butter as called for.
Why use just an egg yolk and not a whole egg?
A whole egg would introduce too much moisture and protein for this small batch formula, creating cakey, puffy cookies instead of a chewy center. The yolk alone provides richness, color, and emulsification without excess liquid.
For small batch baking, scaling the egg properly preserves the structure and classic texture you expect from a chocolate chip cookie, all without waste.
How do I know when the cookies are done baking?
The cookies are done when the edges are a deep golden brown and the centers look just set but still soft, they will continue to firm up as they cool. Bake times can vary by a minute or two depending on your oven and baking sheet.
If you prefer ultra-gooey centers, lean toward the lower end of the baking range and let the cookies cool on the sheet to finish setting up.
Can I double this recipe for more cookies?
Doubling works well if you maintain the ingredient ratios and use two sheet pans to avoid crowding; expect a slightly longer mixing and creaming time with a bigger batch. Monitor doneness, as baking times may increase by a minute with fuller pans.
Never bake doubled dough as one giant cookie, since the center won’t finish setting before the edges overbrown. Portioning for even heat circulation keeps every cookie chewy and crisp.
Small Batch Chocolate Chip Cookies with Chewy Centers and Crisp Edges
Ingredients
Equipment
Method
- In a small mixing bowl, cream the softened butter, brown sugar, and granulated sugar using a hand mixer or sturdy whisk for 2-3 minutes. The mixture should look light and fluffy. Proper creaming creates air pockets that result in a chewier texture and even spread.
- Beat in the egg yolk and vanilla extract until fully combined, about 30 seconds. Scrape the bowl. Look for a glossy, cohesive texture. This builds emulsion, ensuring that the fat disperses and locks in moisture.
- Add the flour, baking soda, and salt. Mix on low or fold with a rubber spatula until just combined and no dry streaks remain. Avoid overmixing, which can toughen the cookies, the dough should be thick and sticky but not wet.
- Gently fold in the chocolate chips until evenly distributed. Use the spatula to turn the dough over itself rather than stirring aggressively. This ensures pockets of chocolate throughout, without causing the dough to seize or overwork.
- Let the dough rest at room temperature for 10 minutes. This short rest allows the flour to hydrate fully and the dough to firm up, preventing overspreading and leading to thicker cookies with soft centers.
- Preheat your oven to 375°F (190°C). Line a small baking sheet with parchment. Use a small scoop or tablespoon to portion the dough into 6 equal balls, spacing them 2 inches apart. Bake for 9-11 minutes, until edges are golden and centers look set but slightly underdone. Rotate the pan after 6 minutes for even baking.
- Cool cookies on the baking sheet for 3 minutes, then transfer to a wire rack. This resting period lets the centers finish setting without overbaking the edges. Enjoy warm for gooey chocolate or let fully cool for ultimate chew.
Notes
- Always use room temperature butter for creaming; cold butter won’t aerate properly and melted butter will give you flat cookies.
- Spoon and level your flour to avoid compacting. Excess flour yields dry, cakey cookies.
- Don’t skip the 10-minute dough rest. It prevents spread and gives you that chewy center.
- If using a toaster oven or small convection oven, check for hot spots and consider rotating the pan earlier (after 4 minutes) for even browning.
- Store completely cooled cookies in an airtight container at room temperature for up to 3 days. To freeze, place baked cookies or portioned dough balls on a sheet pan to freeze solid, then transfer to a resealable bag for up to 2 months. Bake from frozen, adding 2 minutes to the bake time.



Leave a Reply