Table of Contents
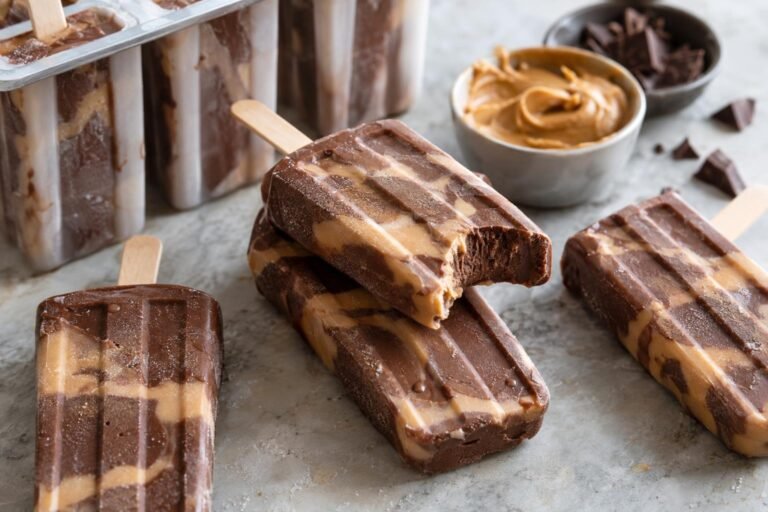
Deep cocoa aroma, a creamy bite, and a clean chocolate finish make these chocolate popsicles taste more like frozen pudding than flavored ice. Cocoa powder provides intensity while melted semisweet chocolate adds cocoa butter, body, and a pleasantly soft melt. The mixture is rich enough to feel indulgent without leaving a heavy, waxy coating on the palate.
I cook the base just until the cornstarch thickens and the first slow bubbles appear, then melt the chopped chocolate with the retained heat. Straining removes stubborn cocoa specks, and chilling the base before filling the molds reduces large ice crystals. The useful cues are a thin coating on the spatula, a completely glossy base, and pops that feel solid through the center before unmolding.

What Makes this Chocolate Recipe So Frickin’ Good
- Dutch-process cocoa supplies concentrated chocolate flavor without adding excess fat, so the frozen pops remain flavorful rather than muted.
- Semisweet chocolate contributes cocoa butter and sugar, giving the popsicles a smoother melt and fuller body than a cocoa-only base.
- Cornstarch binds part of the available water during cooking, which helps prevent the chocolate popsicles from becoming thin, icy, or excessively hard.
- Whole milk and heavy cream provide enough milk fat for creaminess while leaving sufficient water for the mixture to freeze firmly on a stick.
- Chilling the cooked base before filling the molds shortens the final freezing stage and promotes smaller, less noticeable ice crystals.
Ingredient Notes for Chocolate Popsicles for Easy Freezer Molds
- Whole milk: Whole milk supplies water, milk proteins, and moderate fat. Its protein helps emulsify the cocoa butter from the chocolate, while its water content allows the pops to freeze firmly enough to hold their shape.
- Heavy cream: Cream softens the frozen texture and carries chocolate flavor. Use cold cream containing approximately 35 percent milk fat, and avoid replacing it with additional milk because the popsicles will freeze harder and taste less rounded.
- Granulated sugar: Sugar provides sweetness and lowers the freezing point, which keeps the bars biteable. Reducing it significantly can produce hard, icy pops that are difficult to eat directly from the freezer.
- Dutch-process cocoa powder: This alkalized cocoa gives the base a dark color and smooth chocolate profile. Sift visibly lumpy cocoa before measuring; natural cocoa can be used here because the formula contains no chemical leavener, although its flavor will be brighter and more acidic.
- Cornstarch: Cornstarch thickens the dairy and binds free water. Whisking it thoroughly with the sugar and cocoa before adding liquid disperses the starch and reduces the risk of gelatinous lumps.
- Semisweet chocolate: Choose a bar containing roughly 55 to 65 percent cacao and chop it finely so the hot base melts it evenly. Chocolate chips contain stabilizers that can make the finished mixture slightly less fluid and smooth.
- Fine salt and vanilla: Salt sharpens the cocoa flavor, while vanilla rounds out bitterness. Add vanilla after cooking so its aroma is not driven off by prolonged heat.
My Tips for the Best Results
- Measure the capacity of unfamiliar molds with water before starting. This recipe fills approximately ten 3-ounce cavities, but mold shapes and advertised capacities can vary.
- Keep the whisk moving once the saucepan becomes steamy. Cornstarch thickens first along the hot bottom and corners, where unattended mixture can form soft lumps or scorch.
- Do not pour a warm base into the molds. A thoroughly chilled mixture freezes faster and forms smaller ice crystals, which produces a smoother texture.
- Freeze the molds on a rigid, level tray. Tilted molds create uneven portions, off-center sticks, and thin edges that warm too quickly during release.
- Use lukewarm water in short intervals when unmolding. Hot water melts the surface rapidly and can leave the pops slippery, streaked, or detached from their sticks.
Ingredients for Chocolate Popsicles
- 2 cups whole milk (480 grams, divided, cold)
- 3/4 cup heavy cream (180 grams, approximately 35 percent milk fat)
- 1/2 cup granulated sugar (100 grams)
- 1/2 cup Dutch-process cocoa powder (42 grams, sifted if lumpy)
- 1 1/2 tablespoons cornstarch (12 grams)
- 1/4 teaspoon fine salt (Use a level measure)
- 3 ounces semisweet chocolate (85 grams, 55 to 65 percent cacao, finely chopped)
- 2 teaspoons pure vanilla extract (10 milliliters)
How to Make Chocolate Popsicles
- STEP 1). Prepare the molds and cocoa mixture Set ten clean 3-ounce popsicle molds upright on a level tray that fits your freezer. In a 2-quart heavy-bottomed saucepan, whisk the sugar, sifted cocoa powder, cornstarch, and salt until no pale streaks of starch remain. Gradually whisk in 1 cup of the cold milk to form a smooth, lump-free paste, then whisk in the remaining milk and heavy cream. Finely chop the semisweet chocolate and place it in a medium heatproof bowl.
- STEP 2). Cook the chocolate base Place the saucepan over medium heat and cook for 6 to 8 minutes, whisking continuously across the bottom and into the corners. The mixture will become steamy, dark, and slightly thicker. Once slow bubbles break at the surface, reduce the heat to medium-low and cook for 1 minute, still whisking. The base should lightly coat a spatula but remain pourable. This brief bubbling fully activates the cornstarch without reducing the dairy excessively.
- STEP 3). Melt the chocolate and add vanilla Immediately pour the hot cocoa base over the chopped semisweet chocolate. Let it stand undisturbed for 1 minute so the retained heat softens the chocolate, then whisk slowly from the center outward until the mixture is glossy and uniformly dark. Stir in the vanilla extract. Scrape the bowl with a flexible spatula and check for unmelted pieces; if any remain, continue stirring rather than reheating unless the base has noticeably cooled.
- STEP 4). Strain and thoroughly chill the base Pour the base through a fine-mesh sieve into a clean bowl or spouted pitcher, pressing only obvious cocoa lumps through with the spatula. Set the container in a larger bowl of ice water and stir for 5 to 10 minutes, until it feels cool rather than warm. Cover and refrigerate for 2 hours, or until uniformly cold. Stir gently before filling because slight thickening or settling during chilling is normal.
- STEP 5). Fill the molds and freeze until solid Divide the cold chocolate base among the molds, filling each cavity to about 1/4 inch below the rim so the mixture has room to expand. Tap the tray gently on the counter to release hidden air pockets, attach the mold lid, and insert the sticks. For molds without a supporting lid, freeze for 60 to 90 minutes before centering the sticks. Freeze on a level surface for at least 8 hours, preferably overnight, until completely firm.
- STEP 6). Unmold and soften for serving Remove only the number of popsicles you plan to serve. Hold the outside of each mold under lukewarm running water for 5 to 10 seconds, keeping water away from the exposed pop, then pull the stick straight upward with steady pressure. If it resists, warm the mold for another 3 to 5 seconds rather than twisting the stick. Let the unmolded chocolate popsicles stand at room temperature for 2 to 3 minutes for the creamiest bite.
Storage and Freezing
- Storage: Keep the chocolate popsicles in their covered molds for up to 2 weeks to limit freezer odors and surface drying.
- Freezing after unmolding: Wrap each solid pop in parchment or waxed paper, place in an airtight freezer container, and freeze for up to 2 weeks.
- Thawing: Do not fully thaw and refreeze the popsicles because larger ice crystals will form and weaken the texture.
- Serving: Rest each pop at room temperature for 2 to 3 minutes after unmolding so the surface softens and the chocolate flavor becomes more apparent.
Frequently Asked Questions
Why are my chocolate popsicles icy instead of creamy?
Icy chocolate popsicles usually result from excess water, insufficient sugar or fat, or a base that entered the freezer while still warm. Skipping the cornstarch cooking stage also leaves more unbound water available to form noticeable crystals.
Cook until slow bubbles appear, chill the base completely, and preserve the stated dairy and sugar ratios. Keep the frozen pops covered because repeated warming and refreezing also enlarges ice crystals.
How do you unmold chocolate popsicles without breaking them?
Run only the outside of the mold under lukewarm water for 5 to 10 seconds, then pull the stick straight up with firm, even pressure. Brief warming loosens the thin frozen layer touching the mold without melting the entire pop.
If the stick moves but the pop does not, stop pulling and warm the mold for another few seconds. Twisting can split the softened center or pull the stick free.
What keeps homemade chocolate popsicles from freezing too hard?
Sugar, milk fat, cocoa butter, and gelatinized cornstarch all moderate hardness in this chocolate popsicles recipe. Sugar lowers the freezing point, while cream and chocolate interrupt the formation of a rigid network of ice crystals.
Reducing the sugar or replacing the cream with more milk changes that balance. Even correctly formulated pops benefit from a 2 to 3 minute rest at room temperature before serving.
Can I make ingredient substitutions in these chocolate popsicles?
Natural cocoa powder can replace Dutch-process cocoa by weight because there is no chemical leavener in the formula. Expect a lighter color and a brighter, slightly more acidic cocoa flavor. A semisweet bar near 55 to 65 percent cacao gives the intended sweetness and texture.
Higher-cacao bittersweet chocolate will make the pops less sweet and somewhat firmer. Replacing the heavy cream or substantially reducing the sugar is not recommended because both changes encourage a harder, icier result.
How long do chocolate popsicles need to freeze before serving?
Allow at least 8 hours in a consistently cold freezer after filling the molds. Overnight freezing is the most practical schedule, especially for thick molds or freezer doors that are opened frequently.
A ready pop should feel solid through the center and release as one firm piece. If the stick shifts or the middle bends during unmolding, return the mold to the freezer for another 2 hours.
Your Next Baking Obsession Starts Here
- Peanut Butter Chocolate Ice Cream Sandwiches with Frozen Filling
- No-Churn Peanut Butter Chocolate Ice Cream with Chocolate Ribbons
- Chocolate Frozen Yogurt Bark for Break-Apart Frozen Pieces
- Chocolate No-Churn Ice Cream with Creamy Cocoa Flavor
- Chocolate Ice Cream Sandwiches with Frozen Filling
Chocolate Popsicles for Easy Freezer Molds
Ingredients
Equipment
Method
- Set ten clean 3-ounce popsicle molds upright on a level tray that fits your freezer. In a 2-quart heavy-bottomed saucepan, whisk the sugar, sifted cocoa powder, cornstarch, and salt until no pale streaks of starch remain. Gradually whisk in 1 cup of the cold milk to form a smooth, lump-free paste, then whisk in the remaining milk and heavy cream. Finely chop the semisweet chocolate and place it in a medium heatproof bowl.
- Place the saucepan over medium heat and cook for 6 to 8 minutes, whisking continuously across the bottom and into the corners. The mixture will become steamy, dark, and slightly thicker. Once slow bubbles break at the surface, reduce the heat to medium-low and cook for 1 minute, still whisking. The base should lightly coat a spatula but remain pourable. This brief bubbling fully activates the cornstarch without reducing the dairy excessively.
- Immediately pour the hot cocoa base over the chopped semisweet chocolate. Let it stand undisturbed for 1 minute so the retained heat softens the chocolate, then whisk slowly from the center outward until the mixture is glossy and uniformly dark. Stir in the vanilla extract. Scrape the bowl with a flexible spatula and check for unmelted pieces; if any remain, continue stirring rather than reheating unless the base has noticeably cooled.
- Pour the base through a fine-mesh sieve into a clean bowl or spouted pitcher, pressing only obvious cocoa lumps through with the spatula. Set the container in a larger bowl of ice water and stir for 5 to 10 minutes, until it feels cool rather than warm. Cover and refrigerate for 2 hours, or until uniformly cold. Stir gently before filling because slight thickening or settling during chilling is normal.
- Divide the cold chocolate base among the molds, filling each cavity to about 1/4 inch below the rim so the mixture has room to expand. Tap the tray gently on the counter to release hidden air pockets, attach the mold lid, and insert the sticks. For molds without a supporting lid, freeze for 60 to 90 minutes before centering the sticks. Freeze on a level surface for at least 8 hours, preferably overnight, until completely firm.
- Remove only the number of popsicles you plan to serve. Hold the outside of each mold under lukewarm running water for 5 to 10 seconds, keeping water away from the exposed pop, then pull the stick straight upward with steady pressure. If it resists, warm the mold for another 3 to 5 seconds rather than twisting the stick. Let the unmolded chocolate popsicles stand at room temperature for 2 to 3 minutes for the creamiest bite.
Notes
- Measure the capacity of unfamiliar molds with water before starting. This recipe fills approximately ten 3-ounce cavities, but mold shapes and advertised capacities can vary.
- Keep the whisk moving once the saucepan becomes steamy. Cornstarch thickens first along the hot bottom and corners, where unattended mixture can form soft lumps or scorch.
- Do not pour a warm base into the molds. A thoroughly chilled mixture freezes faster and forms smaller ice crystals, which produces a smoother texture.
- Freeze the molds on a rigid, level tray. Tilted molds create uneven portions, off-center sticks, and thin edges that warm too quickly during release.
- Use lukewarm water in short intervals when unmolding. Hot water melts the surface rapidly and can leave the pops slippery, streaked, or detached from their sticks.