Table of Contents
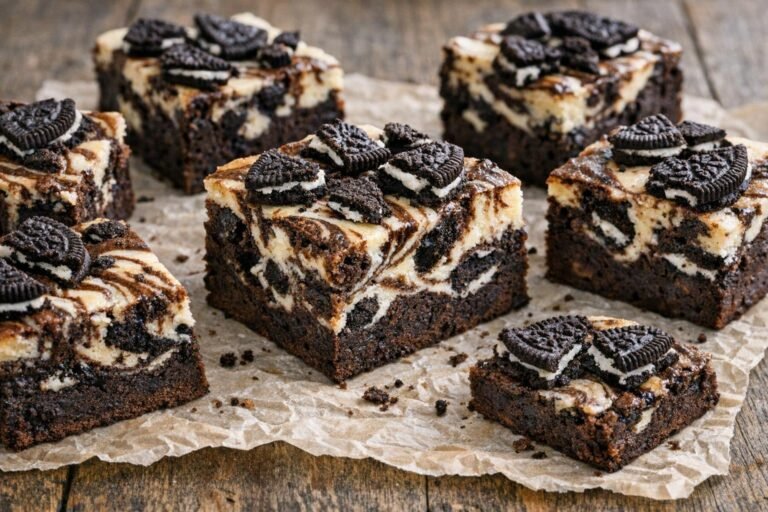
Silky swirls of chocolate cheesecake, cool and creamy with deep cocoa notes, settle on a crisp chocolate-cookie crust. These chocolate no-bake cheesecake bars slice cleanly after a solid chill, thanks to an even blend of cream cheese and melted chocolate. The chocolate flavor hits instantly, followed by a smooth, almost mousse-like texture with a gentle tang from the cream cheese.
To build these bars, I press a buttery chocolate crumb base into an 8-inch square, then whisk together a rich chocolate cheesecake layer using room temperature cream cheese, melted chocolate, and whipped cream for a plush but sliceable consistency. The bars need a dedicated fridge stint, not a freezer shortcut, to set properly; watch for a gently springy top and clean edges when removing from the pan. These hit that craving for something decadent, smooth and chocolatey with zero oven heat, true to the chocolate no-bake cheesecake bars promise.

Why You’ll Love this Ridiculously Delicious Chocolate Cheesecake
- Bittersweet chocolate stabilizes the filling while boosting chocolate depth.
- Whipped cream lightens the structure for a creamy, mousse-like bite.
- A mix of butter and finely crushed cookies gives the base enough integrity to hold clean slices.
- Extended chilling (at least 6 hours) ensures the filling sets without gelatin or baking.
- Balancing tangy cream cheese and sweet chocolate keeps the bars rich but not cloying.
Ingredient Notes for Chocolate No-Bake Cheesecake Bars with a Creamy Filling
- Chocolate sandwich cookies: Ground to crumbs, these form a firm, flavorful base. Use any brand, but classic Oreos give reliable results due to their balanced fat and cocoa content.
- Unsalted butter: Binds the cookie base and adds richness. Melt fully and cool slightly for easy incorporation.
- Cream cheese: Use block style, full-fat cream cheese at room temperature to ensure a smooth, stable cheesecake texture. Avoid whipped or spreadable styles, as they introduce excess water.
- Bittersweet chocolate: At least 60% cacao prevents the filling from being too sweet and adds structure when it sets. Melt carefully and let cool to lukewarm so it blends without seizing the cream cheese.
- Heavy cream: Whipped to soft peaks, this brings airiness to the cheesecake layer without compromising sliceability.
- Powdered sugar: Dissolves easily for a smooth filling and helps sweeten without grittiness.
- Vanilla extract: Rounds out both the chocolate and tangy dairy notes for a fuller flavor.
Tips for a Perfect Set
- Let your cream cheese lose its chill fully at room temperature to mix lump-free and silky.
- Ensure chocolate isn’t hot when adding or it might seize the cream cheese or deflate the whipped cream.
- Use a metal pan for sharper chilled edges; glass pans keep bars soft along the edge.
- Don’t skip the chill, six hours minimum ensures the chocolate and cream cheese set properly for clean slicing.
- Trim the edges before slicing for bakery-style squares with perfectly neat lines and textures.
Ingredients for Chocolate No-Bake Cheesecake Bars
- 24 pieces chocolate sandwich cookies (about 225g, finely crushed)
- 6 tablespoons unsalted butter (melted, slightly cooled)
- 226 grams cream cheese (block style, full-fat, at room temperature)
- 170 grams bittersweet chocolate (60-70% cacao, chopped and melted)
- 1 cup heavy cream (chilled)
- 2/3 cup powdered sugar (sifted)
- 1 teaspoon vanilla extract
- 1/4 teaspoon fine sea salt
How to Make Chocolate No-Bake Cheesecake Bars
- STEP 1). Prepare the pan and crust Line an 8-inch square metal baking pan with two sheets of parchment, leaving some overhang for easy lifting later. Combine the finely crushed chocolate sandwich cookies with the melted butter in a mixing bowl. Stir until all crumbs are evenly moistened and hold shape when pressed. Firmly press this mixture evenly into the base of the pan using a flat-bottomed glass or measuring cup for uniform thickness. Chill in the fridge while you make the filling.
- STEP 2). Melt and cool the chocolate Gently melt the chopped bittersweet chocolate in a heatproof bowl set over simmering water (double boiler method), stirring frequently until fully melted and smooth. Remove from the heat and let cool until just warm but still fluid, about 10-15 minutes. This prevents shocking the cream cheese or whipping cream and keeps the filling silky.
- STEP 3). Whip the cream to soft peaks With an electric mixer and clean bowl, beat the chilled heavy cream on medium-high speed until it forms soft peaks, lift the whisk, and the peak should just fold over. Avoid overwhipping to grainy texture. Refrigerate the whipped cream while preparing the cheesecake base to ensure stability and easy folding.
- STEP 4). Beat cream cheese and sugar base In a clean mixing bowl, beat the room temperature cream cheese with sifted powdered sugar, vanilla extract and fine sea salt on medium speed for 2-3 minutes. Aim for a completely smooth, soft, and lump-free mixture, scraping the bowl often for even blending. This smooth base is your texture and flavor foundation.
- STEP 5). Incorporate chocolate and whipped cream With the mixer on low, blend the melted, slightly cooled chocolate into the cream cheese base, mixing just until streak-free. Fold in the whipped cream with a spatula in two additions, lifting and turning gently to keep the mixture light. Stop folding as soon as you have a uniform color and texture to prevent deflation.
- STEP 6). Spread and chill until set Dollop the cheesecake filling onto the chilled crust and spread evenly using an offset spatula, smoothing the top. Cover tightly with foil or wrap and refrigerate for at least 6 hours, or overnight. The filling is set when it feels gently springy to the touch and pulls cleanly from the parchment. Do not freeze to rush the process as it disrupts the creamy texture.
- STEP 7). Slice and serve Lift the chilled slab out using the parchment overhang. Trim the edges for clean sides, then use a sharp, thin knife to slice into bars, wiping the blade between cuts for neat slices. Bars are best served chilled, if they soften, simply return to the fridge for 15-30 minutes for optimal texture. Enjoy within 3-4 days for maximum creaminess.
Storage and Freezing
Refrigerate bars in a sealed container up to 4 days. Do not freeze, as freezing disrupts the creamy, mousse-like filling.
If bars become soft, return to the fridge for 15-30 minutes before serving. Slice just before serving for best appearance.
Frequently Asked Questions
How do I know when chocolate no-bake cheesecake bars are set?
Check for a gently firm, springy top when pressing the bars lightly, there should be no jiggle beneath the surface. The filling should pull away neatly from the parchment when you lift the slab from the pan, with clean lines and no streaks of cream cheese left behind. Full setting typically takes six hours in a cold fridge.
If your filling looks dull and loses sharpness when sliced, it may need another hour or two in the refrigerator. Avoid rushing the process with the freezer, as it can make the filling grainy and compromise creaminess.
What kind of chocolate is best for the filling?
Bittersweet chocolate between 60-70% cacao works best, as its cocoa butter content helps set the filling without added gelatin. This chocolate brings rich flavor and enough structure so the bars slice cleanly while remaining creamy. It should be smoothly melted and cooled to warm before mixing.
If chocolate is too deeply dark, the filling can set very firmly and taste bitter; lower cacao chocolates make the filling overly sweet and less stable. Stick to a trusted bittersweet bar for reliable results in this chocolate no-bake cheesecake bars recipe.
Why shouldn’t I freeze no-bake cheesecake bars to set them?
Freezing no-bake cheesecake bars might firm them quickly, but it also changes the texture when thawed, making the filling grainy and potentially causing moisture separation. Chilling in the fridge allows the cocoa butter in the chocolate and fat in the cream cheese to work together for a stable, mousse-like structure.
To get true creamy and sliceable bars, give them the full 6-hour (or overnight) fridge treatment. Cutting corners with the freezer undermines the texture you want in a classic chocolate no-bake cheesecake bar.
Is it possible to make these bars ahead for a party?
Chocolate no-bake cheesecake bars are ideal for make-ahead desserts since they hold their shape well after a good chill. Assemble them up to 24 hours before your event, keeping them tightly covered in the fridge until ready to slice and serve. Slicing just before your guests arrive keeps edges sharp and filling luscious.
If you want absolutely perfect presentation, trim edges after unmolding for even bars. If the bars warm up at room temperature, pop them back in the fridge to firm before serving.
What causes runny or soft no-bake cheesecake filling?
Runny or soft filling is usually caused by not chilling long enough, using low-fat or whipped cream cheese, or incorporating chocolate that's too warm and disrupted the emulsion. Make sure all dairy is full-fat and that whipped cream is folded gently, so you don’t knock out the air that gives structure.
For the best result, allow at least 6 hours in a cold fridge. If the filling feels too soft after chilling, refrigerated a bit longer before slicing, a properly set bar should hold its shape easily when lifted.
More Ridiculously Delicious Desserts to Try
- Blueberry Cheesecake with a Creamy Filling
- Lemon Cheesecake with Creamy Citrus Filling
- Classic New York Cheesecake with a Dense, Creamy Filling
- Creamy Vanilla Cheesecake with a Buttery Cookie Crust
- Japanese Cotton Cheesecake with a Light, Airy Texture
- Chocolate Cheesecake with Creamy Filling
- White Chocolate Raspberry Cheesecake with Creamy Filling
- No-Bake Coconut Cheesecake with Creamy Filling
Chocolate No-Bake Cheesecake Bars with a Creamy Filling
Ingredients
Equipment
Method
- Line an 8-inch square metal baking pan with two sheets of parchment, leaving some overhang for easy lifting later. Combine the finely crushed chocolate sandwich cookies with the melted butter in a mixing bowl. Stir until all crumbs are evenly moistened and hold shape when pressed. Firmly press this mixture evenly into the base of the pan using a flat-bottomed glass or measuring cup for uniform thickness. Chill in the fridge while you make the filling.
- Gently melt the chopped bittersweet chocolate in a heatproof bowl set over simmering water (double boiler method), stirring frequently until fully melted and smooth. Remove from the heat and let cool until just warm but still fluid, about 10-15 minutes. This prevents shocking the cream cheese or whipping cream and keeps the filling silky.
- With an electric mixer and clean bowl, beat the chilled heavy cream on medium-high speed until it forms soft peaks, lift the whisk, and the peak should just fold over. Avoid overwhipping to grainy texture. Refrigerate the whipped cream while preparing the cheesecake base to ensure stability and easy folding.
- In a clean mixing bowl, beat the room temperature cream cheese with sifted powdered sugar, vanilla extract and fine sea salt on medium speed for 2-3 minutes. Aim for a completely smooth, soft, and lump-free mixture, scraping the bowl often for even blending. This smooth base is your texture and flavor foundation.
- With the mixer on low, blend the melted, slightly cooled chocolate into the cream cheese base, mixing just until streak-free. Fold in the whipped cream with a spatula in two additions, lifting and turning gently to keep the mixture light. Stop folding as soon as you have a uniform color and texture to prevent deflation.
- Dollop the cheesecake filling onto the chilled crust and spread evenly using an offset spatula, smoothing the top. Cover tightly with foil or wrap and refrigerate for at least 6 hours, or overnight. The filling is set when it feels gently springy to the touch and pulls cleanly from the parchment. Do not freeze to rush the process as it disrupts the creamy texture.
- Lift the chilled slab out using the parchment overhang. Trim the edges for clean sides, then use a sharp, thin knife to slice into bars, wiping the blade between cuts for neat slices. Bars are best served chilled, if they soften, simply return to the fridge for 15-30 minutes for optimal texture. Enjoy within 3-4 days for maximum creaminess.
Notes
- Let your cream cheese lose its chill fully at room temperature to mix lump-free and silky.
- Ensure chocolate isn’t hot when adding or it might seize the cream cheese or deflate the whipped cream.
- Use a metal pan for sharper chilled edges; glass pans keep bars soft along the edge.
- Don’t skip the chill, six hours minimum ensures the chocolate and cream cheese set properly for clean slicing.
- Trim the edges before slicing for bakery-style squares with perfectly neat lines and textures.